User Manual — Forma3D.Connect (Admin Dashboard)
This manual explains how to use the Forma3D.Connect web app (Admin Dashboard) to monitor orders, manage product mappings, track inventory, and review activity logs.
Screenshots in this manual are taken in dark mode (the script signs in, switches to dark theme, signs out, then captures the login page so it too appears in dark mode).
Access & Sign In
- URL:
https://staging-connect.forma3d.be/(staging) - Authentication: you sign in using your email and password (entered on the login page).
Current Staging Credentials
| Password | Role | |
|---|---|---|
admin@forma3d.local |
Admin123! |
Administrator (full access) |
Note: For production environments, the admin credentials should be set via environment variables during database seeding:
SEED_ADMIN_EMAIL- Admin email addressSEED_ADMIN_PASSWORD- Admin passwordThe staging environment is configured with
admin@forma3d.local/Admin123!(as of 2026-01-26).
Login Page
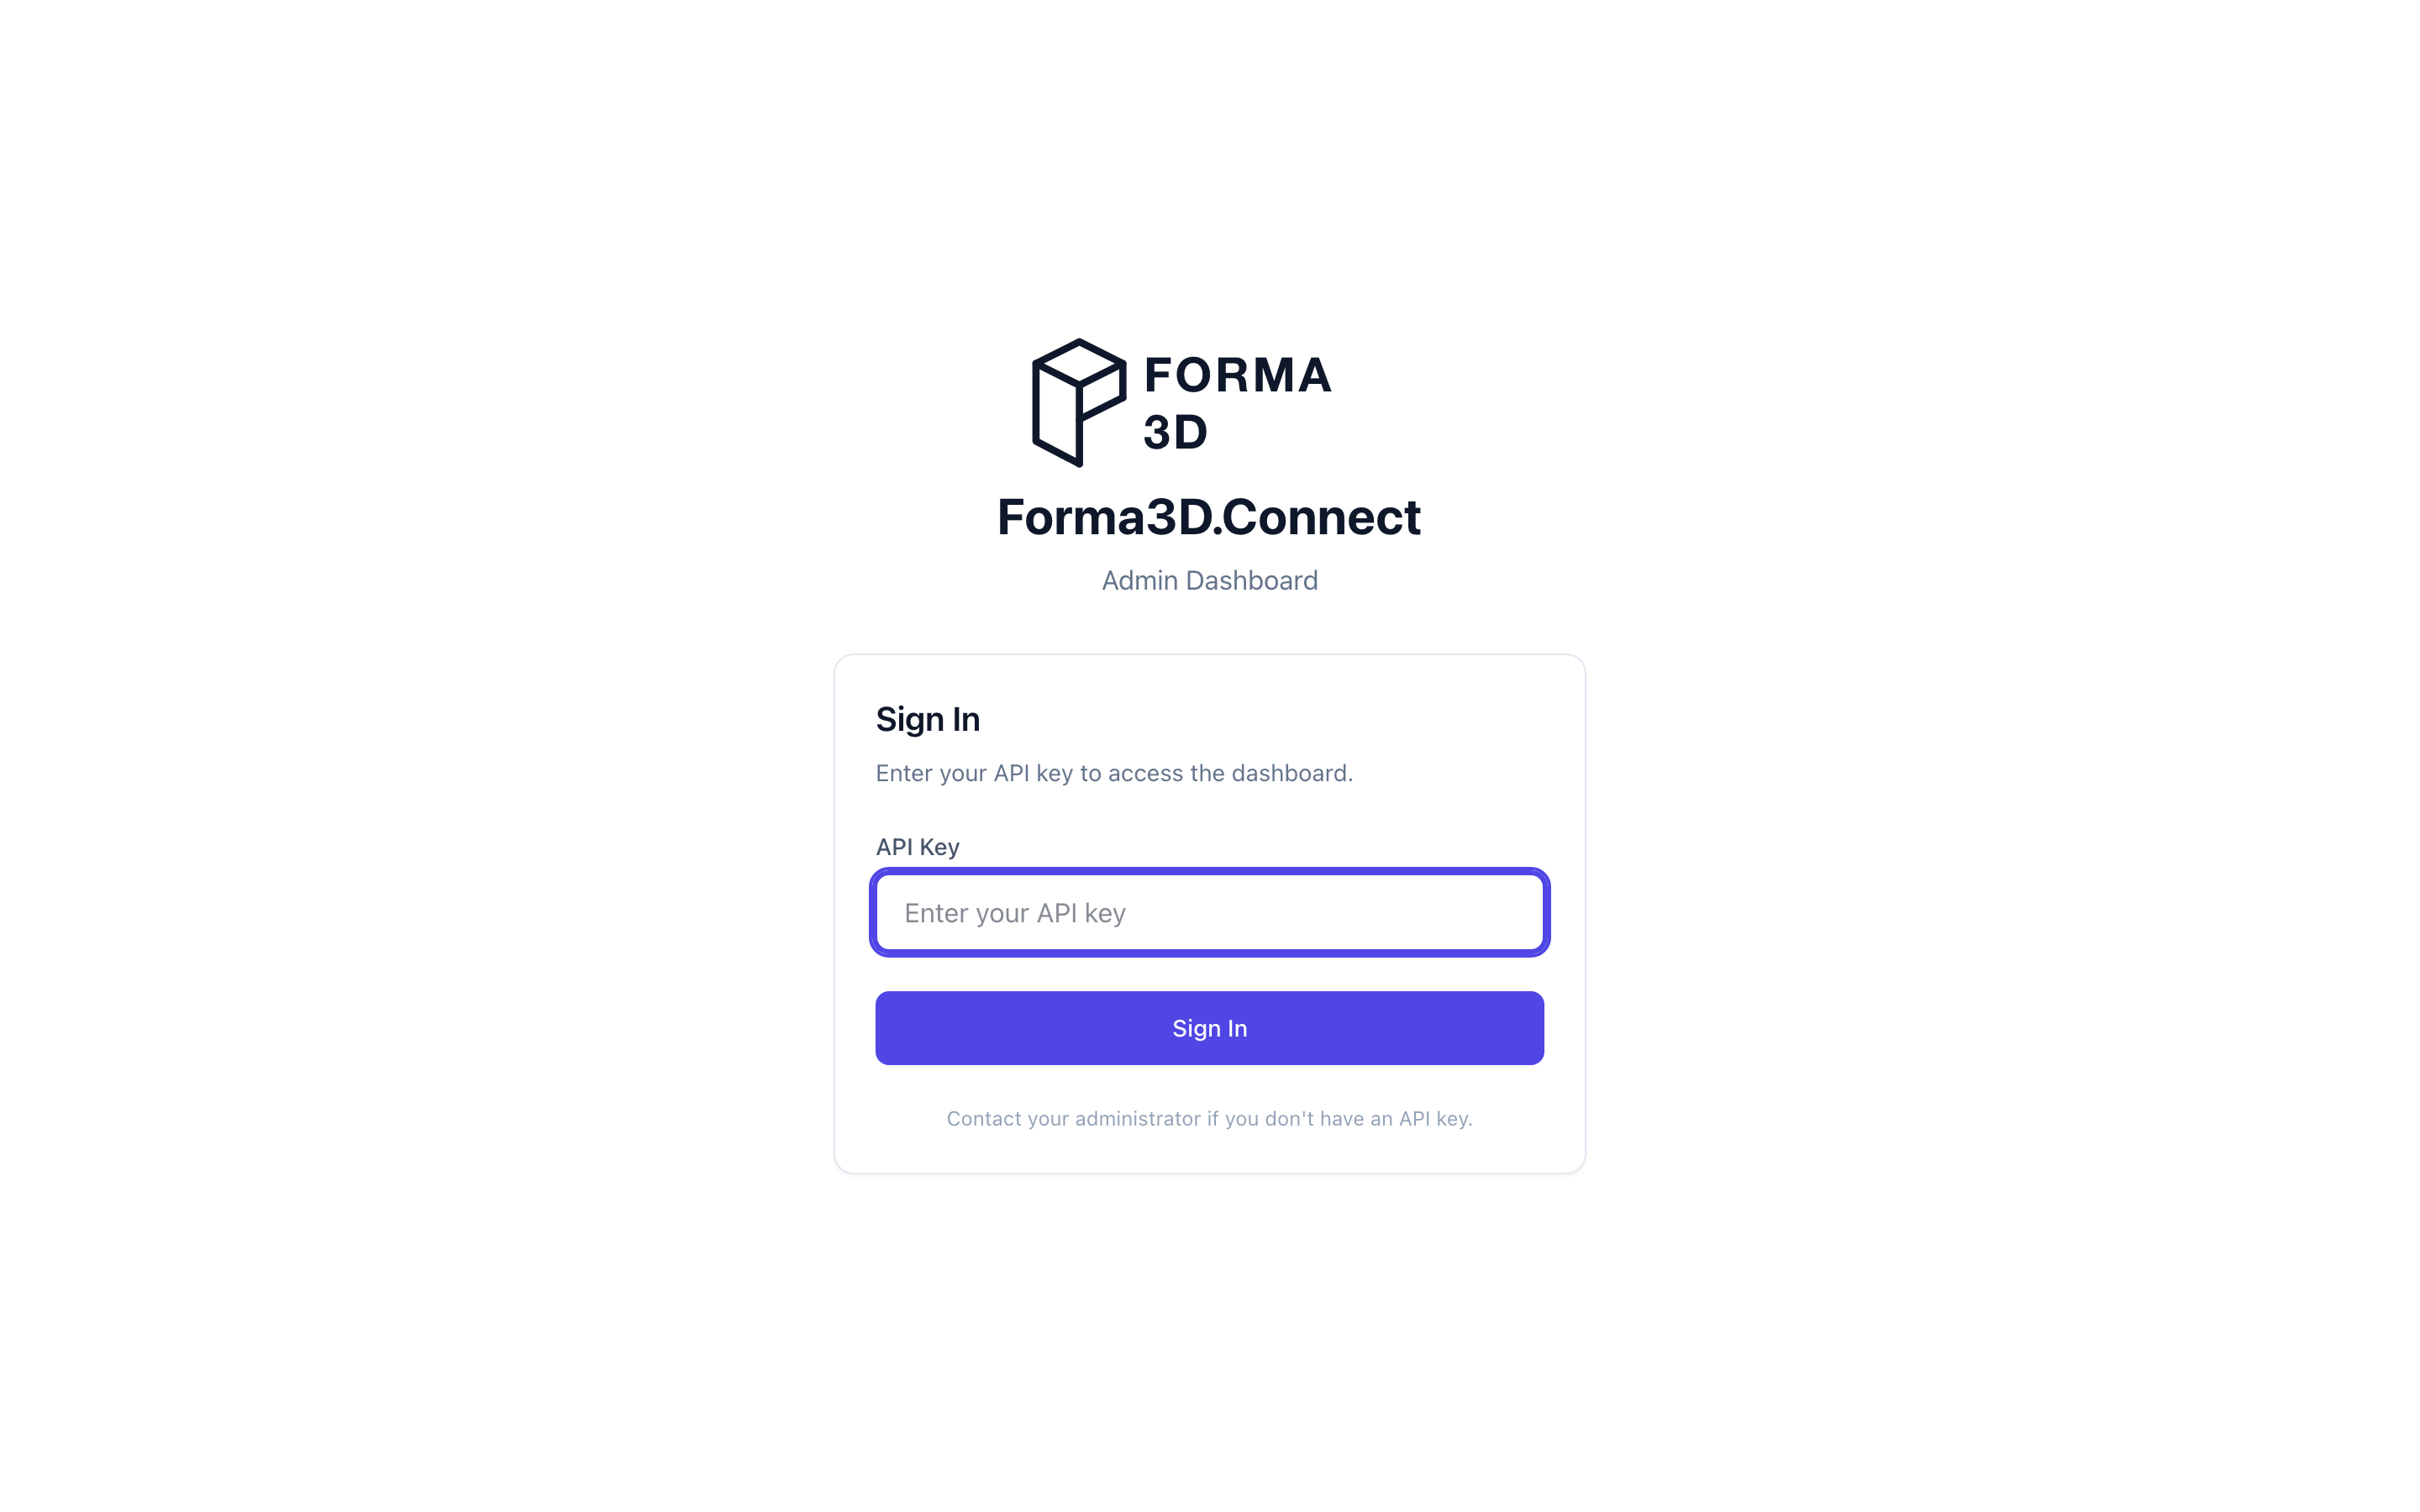
- Open the web app.
- Enter your email address in the "Email" field.
- Enter your password in the "Password" field.
- Click Sign In.
If credentials are incorrect, the app will show "Invalid credentials".
User Roles & Permissions
Forma3D.Connect uses Role-Based Access Control (RBAC). Users are assigned one or more roles, and each role grants specific permissions.
Available Roles
| Role | Description | Permission Count |
|---|---|---|
admin |
Full system access | All permissions |
operator |
Day-to-day operations | Operational subset |
viewer |
Read-only access | Read-only subset |
legacy-admin |
API key compatibility (deprecated) | All permissions |
Permission Reference
The system defines permissions organized by category:
Orders & Fulfillment
| Permission | Description | Roles |
|---|---|---|
orders.read |
View orders and order details | admin, operator, viewer |
orders.write |
Create and update orders | admin, operator |
Print Jobs
| Permission | Description | Roles |
|---|---|---|
printJobs.read |
View print job status and progress | admin, operator, viewer |
printJobs.write |
Create and update print jobs | admin, operator |
Product Mappings
| Permission | Description | Roles |
|---|---|---|
mappings.read |
View product-to-file mappings | admin, operator, viewer |
mappings.write |
Create and update product mappings | admin, operator |
Inventory
| Permission | Description | Roles |
|---|---|---|
inventory.read |
View stock levels, transactions, and replenishment | admin, operator, viewer |
inventory.write |
Adjust stock, configure thresholds, manage batches | admin, operator |
Shipments
| Permission | Description | Roles |
|---|---|---|
shipments.read |
View shipment status and tracking | admin, operator, viewer |
shipments.write |
Create shipping labels and update shipments | admin, operator |
Logs & Observability
| Permission | Description | Roles |
|---|---|---|
logs.read |
View event logs and activity history | admin, operator, viewer |
logs.write |
Clear event logs | admin, operator |
observability.read |
View system metrics and health data | admin, operator, viewer |
Administration
| Permission | Description | Roles |
|---|---|---|
users.read |
View user accounts | admin |
users.write |
Create and manage user accounts | admin |
roles.read |
View role definitions | admin |
roles.write |
Create and manage roles | admin |
settings.read |
View system settings | admin, operator |
settings.write |
Update system settings | admin |
audit.read |
View audit logs (security events) | admin |
audit.write |
Clear audit logs | admin |
admin.operations |
Access developer tools, file management, flags | admin |
Role Permission Matrix
| Permission | admin | operator | viewer |
|---|---|---|---|
orders.read |
✓ | ✓ | ✓ |
orders.write |
✓ | ✓ | |
printJobs.read |
✓ | ✓ | ✓ |
printJobs.write |
✓ | ✓ | |
mappings.read |
✓ | ✓ | ✓ |
mappings.write |
✓ | ✓ | |
inventory.read |
✓ | ✓ | ✓ |
inventory.write |
✓ | ✓ | |
shipments.read |
✓ | ✓ | ✓ |
shipments.write |
✓ | ✓ | |
logs.read |
✓ | ✓ | ✓ |
logs.write |
✓ | ✓ | |
observability.read |
✓ | ✓ | ✓ |
settings.read |
✓ | ✓ | |
settings.write |
✓ | ||
users.read |
✓ | ||
users.write |
✓ | ||
roles.read |
✓ | ||
roles.write |
✓ | ||
audit.read |
✓ | ||
audit.write |
✓ | ||
admin.operations |
✓ |
Security Enforcement
Permissions are enforced server-side (not UI-only security):
- API endpoints are protected by permission guards
- UI elements are hidden or disabled based on permissions
- Unauthorized requests return 403 Forbidden with the required permission
If you lack permission for an action, the UI will hide or disable the corresponding controls, and the API will reject unauthorized requests.
Navigation
After signing in, use the sidebar navigation to switch between pages. The available pages depend on your role and enabled feature flags:
| Page | Admin | Operator | Viewer | Description |
|---|---|---|---|---|
| Dashboard | ✓ | ✓ | ✓ | System overview, analytics, and statistics |
| Orders | ✓ | ✓ | ✓ | Browse and manage orders |
| Product Mappings | ✓ | ✓ | ✓ | Configure product-to-file mappings |
| Inventory | ✓ | ✓ | ✓ | Stock levels, config, and replenishment |
| Activity Logs | ✓ | ✓ | ✓ | View system event history |
| Settings | ✓ | ✓ | ✓ | Theme, notifications, app info |
| Integrations | ✓ | ✓ | ✓ | External service connections |
| SimplyPrint Files | ✓ | Manage files on SimplyPrint | ||
| Feature Flags | ✓ | Enable/disable features per tenant | ||
| Developer Tools | ✓ | Infrastructure containers (pgAdmin) | ||
| User Management | ✓ | Manage user accounts | ||
| Audit Logs | ✓ | Security and authentication events |
Note: The Inventory page is only visible when the
stockManagementfeature flag is enabled for your tenant.
What Each Role Can Do
Admin (Full Access)
- View all data: orders, print jobs, mappings, inventory, logs, users
- Create/Edit/Delete product mappings
- Manage orders: update status, cancel, reactivate, fulfill, force-fulfill
- Manage print jobs: retry failed jobs, cancel, force status
- Manage inventory: adjust stock, configure thresholds, cancel batches
- Manage users: create, edit, deactivate, change passwords
- Configure system settings and feature flags
- Manage SimplyPrint files and developer tools
- Access audit logs for security and authentication events
Operator (Day-to-Day Operations)
- View all operational data: orders, print jobs, mappings, inventory, logs
- Create/Edit/Delete product mappings
- Manage orders and fulfillments
- Manage print jobs: retry, cancel
- Adjust inventory stock levels
- View system settings (cannot modify)
- Cannot access user management, audit logs, feature flags, or developer tools
Viewer (Read-Only)
- View orders and order details
- View print job status
- View product mappings (cannot modify)
- View inventory stock levels
- View activity logs
- Cannot create, edit, or delete anything
- Cannot access user management, settings write, or audit logs
Dashboard
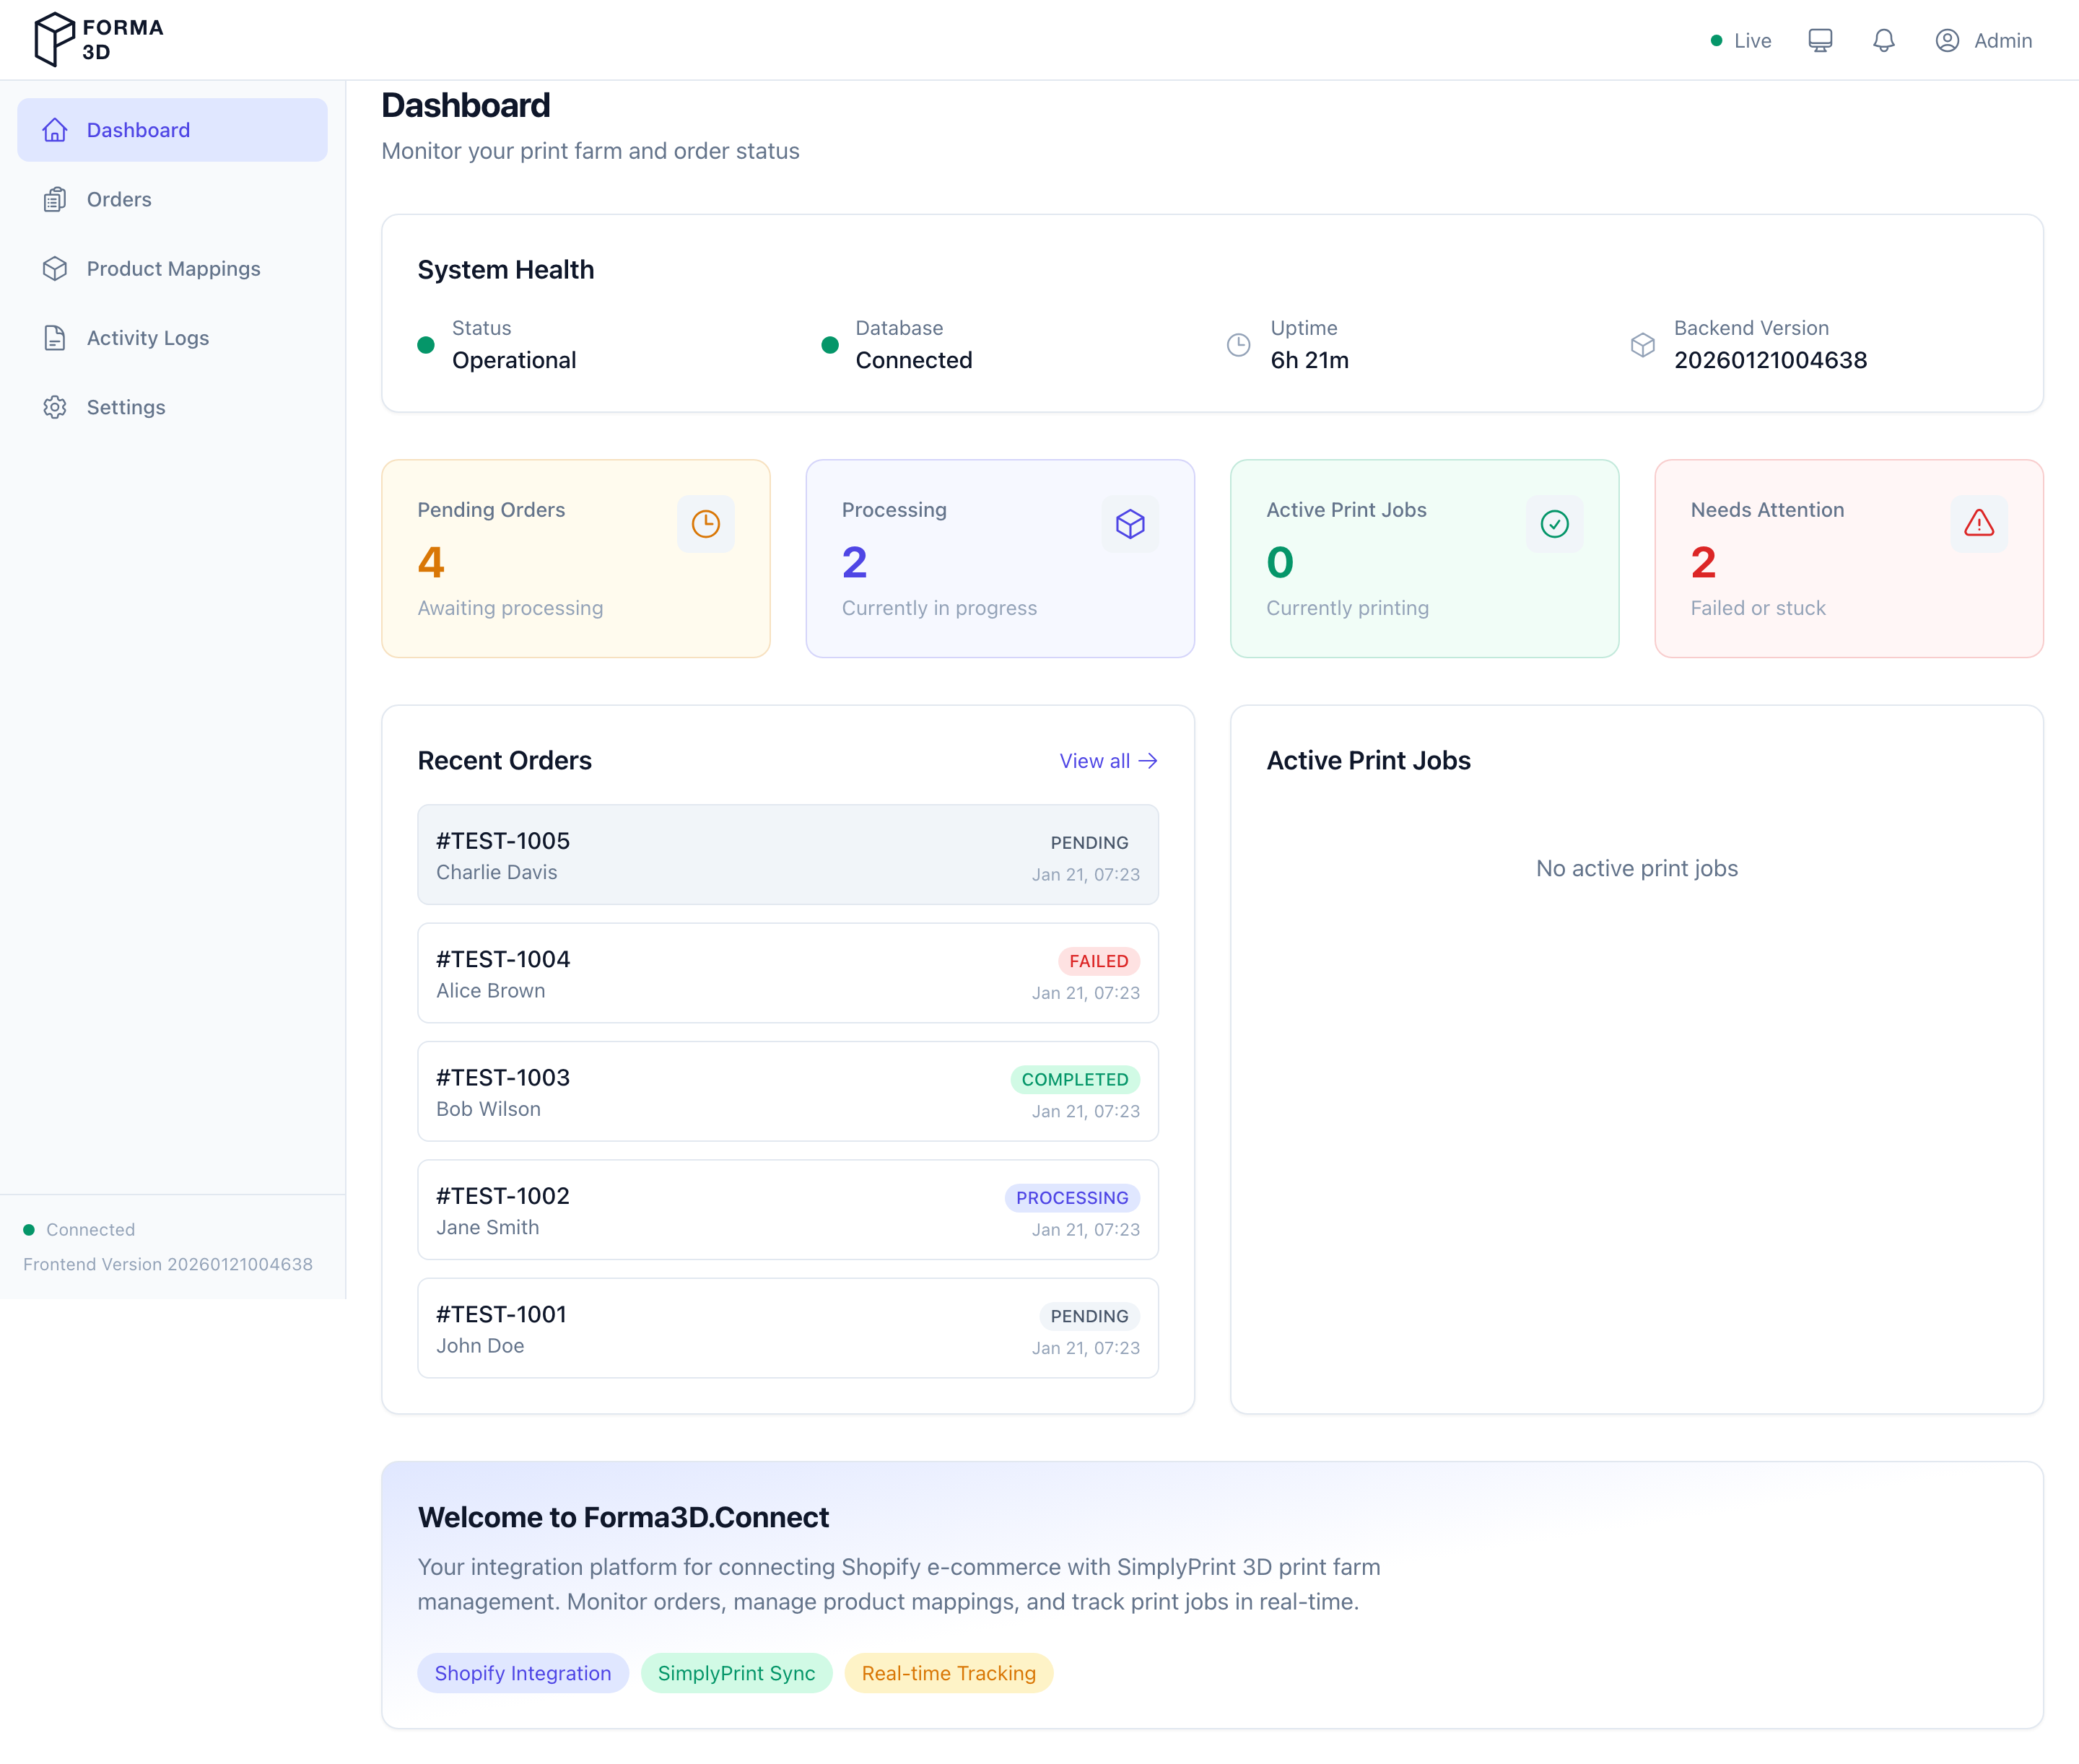
Use the dashboard to get a quick overview of your system. The dashboard includes:
- Stat Cards — key metrics at a glance:
- Pending Orders
- Processing Orders
- Active Print Jobs
-
Needs Attention (failed or stuck items)
-
Analytics Overview — donut charts showing:
- Order Status distribution
- Print Job Status distribution
-
Shipment Status distribution
-
Trend Charts — line/bar charts for:
- Revenue over time
-
Order volume over time
-
Recent Orders — latest orders with quick links to order details
-
Active Print Jobs — currently running print jobs
-
Feature Badges — icons showing which integrations are active (Shopify, SimplyPrint Sync, SendCloud, Real-time Tracking)
Orders
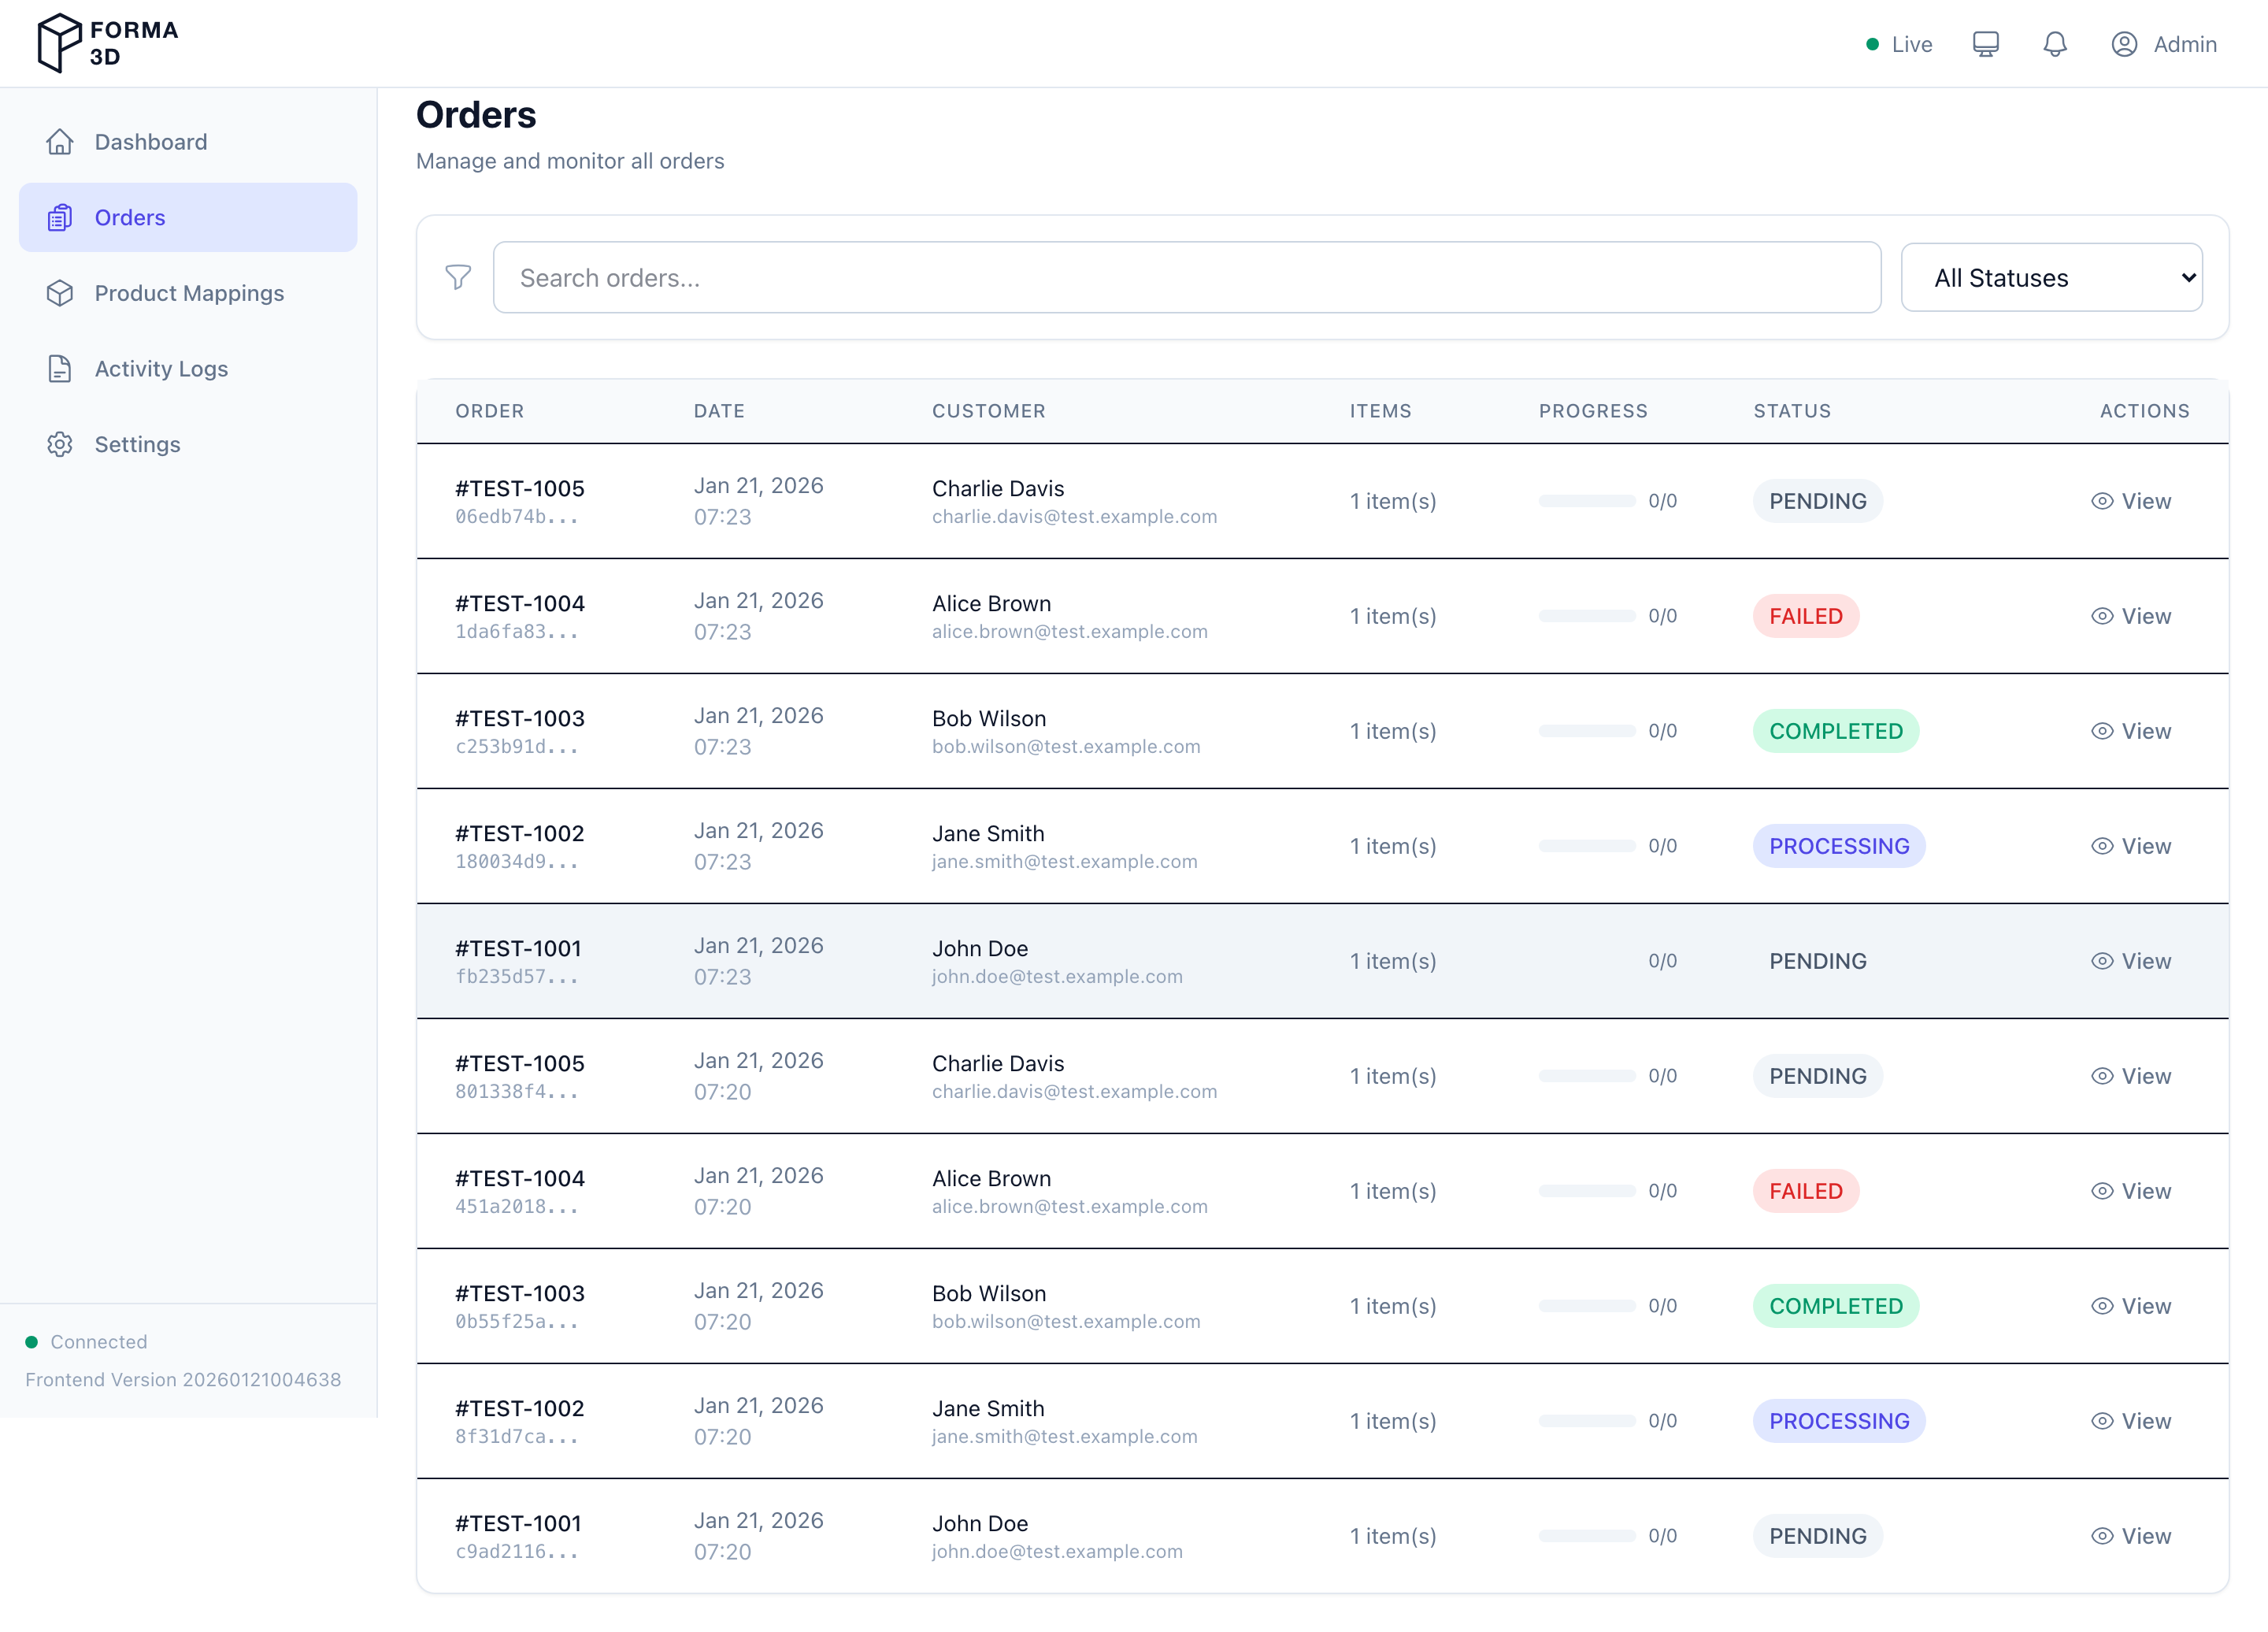
Use Orders to browse and monitor all orders.
Access: All roles (admin, operator, viewer) can view orders. Write operations require admin or operator role.
Features
- Search: use the search input to filter by order number or customer name
- Status filter: filter by order status (Pending, Processing, Completed, Failed, Cancelled)
- Special filters: quickly find orders by:
- Active Print Jobs
- Needs Attention (failed jobs)
- Ready to Ship
- In Transit
- Delivered
- Shipping Issues
- Pagination: move through pages of results
- Open an order: click an order row or View to open the order detail page
Each order row shows the order status, shipment status, and count of failed print jobs (if any).
Actions by Role
| Action | Admin | Operator | Viewer |
|---|---|---|---|
| View orders | ✓ | ✓ | ✓ |
| View order details | ✓ | ✓ | ✓ |
| Update order status | ✓ | ✓ | |
| Cancel order | ✓ | ✓ | |
| Create fulfillment | ✓ | ✓ |
Order Detail
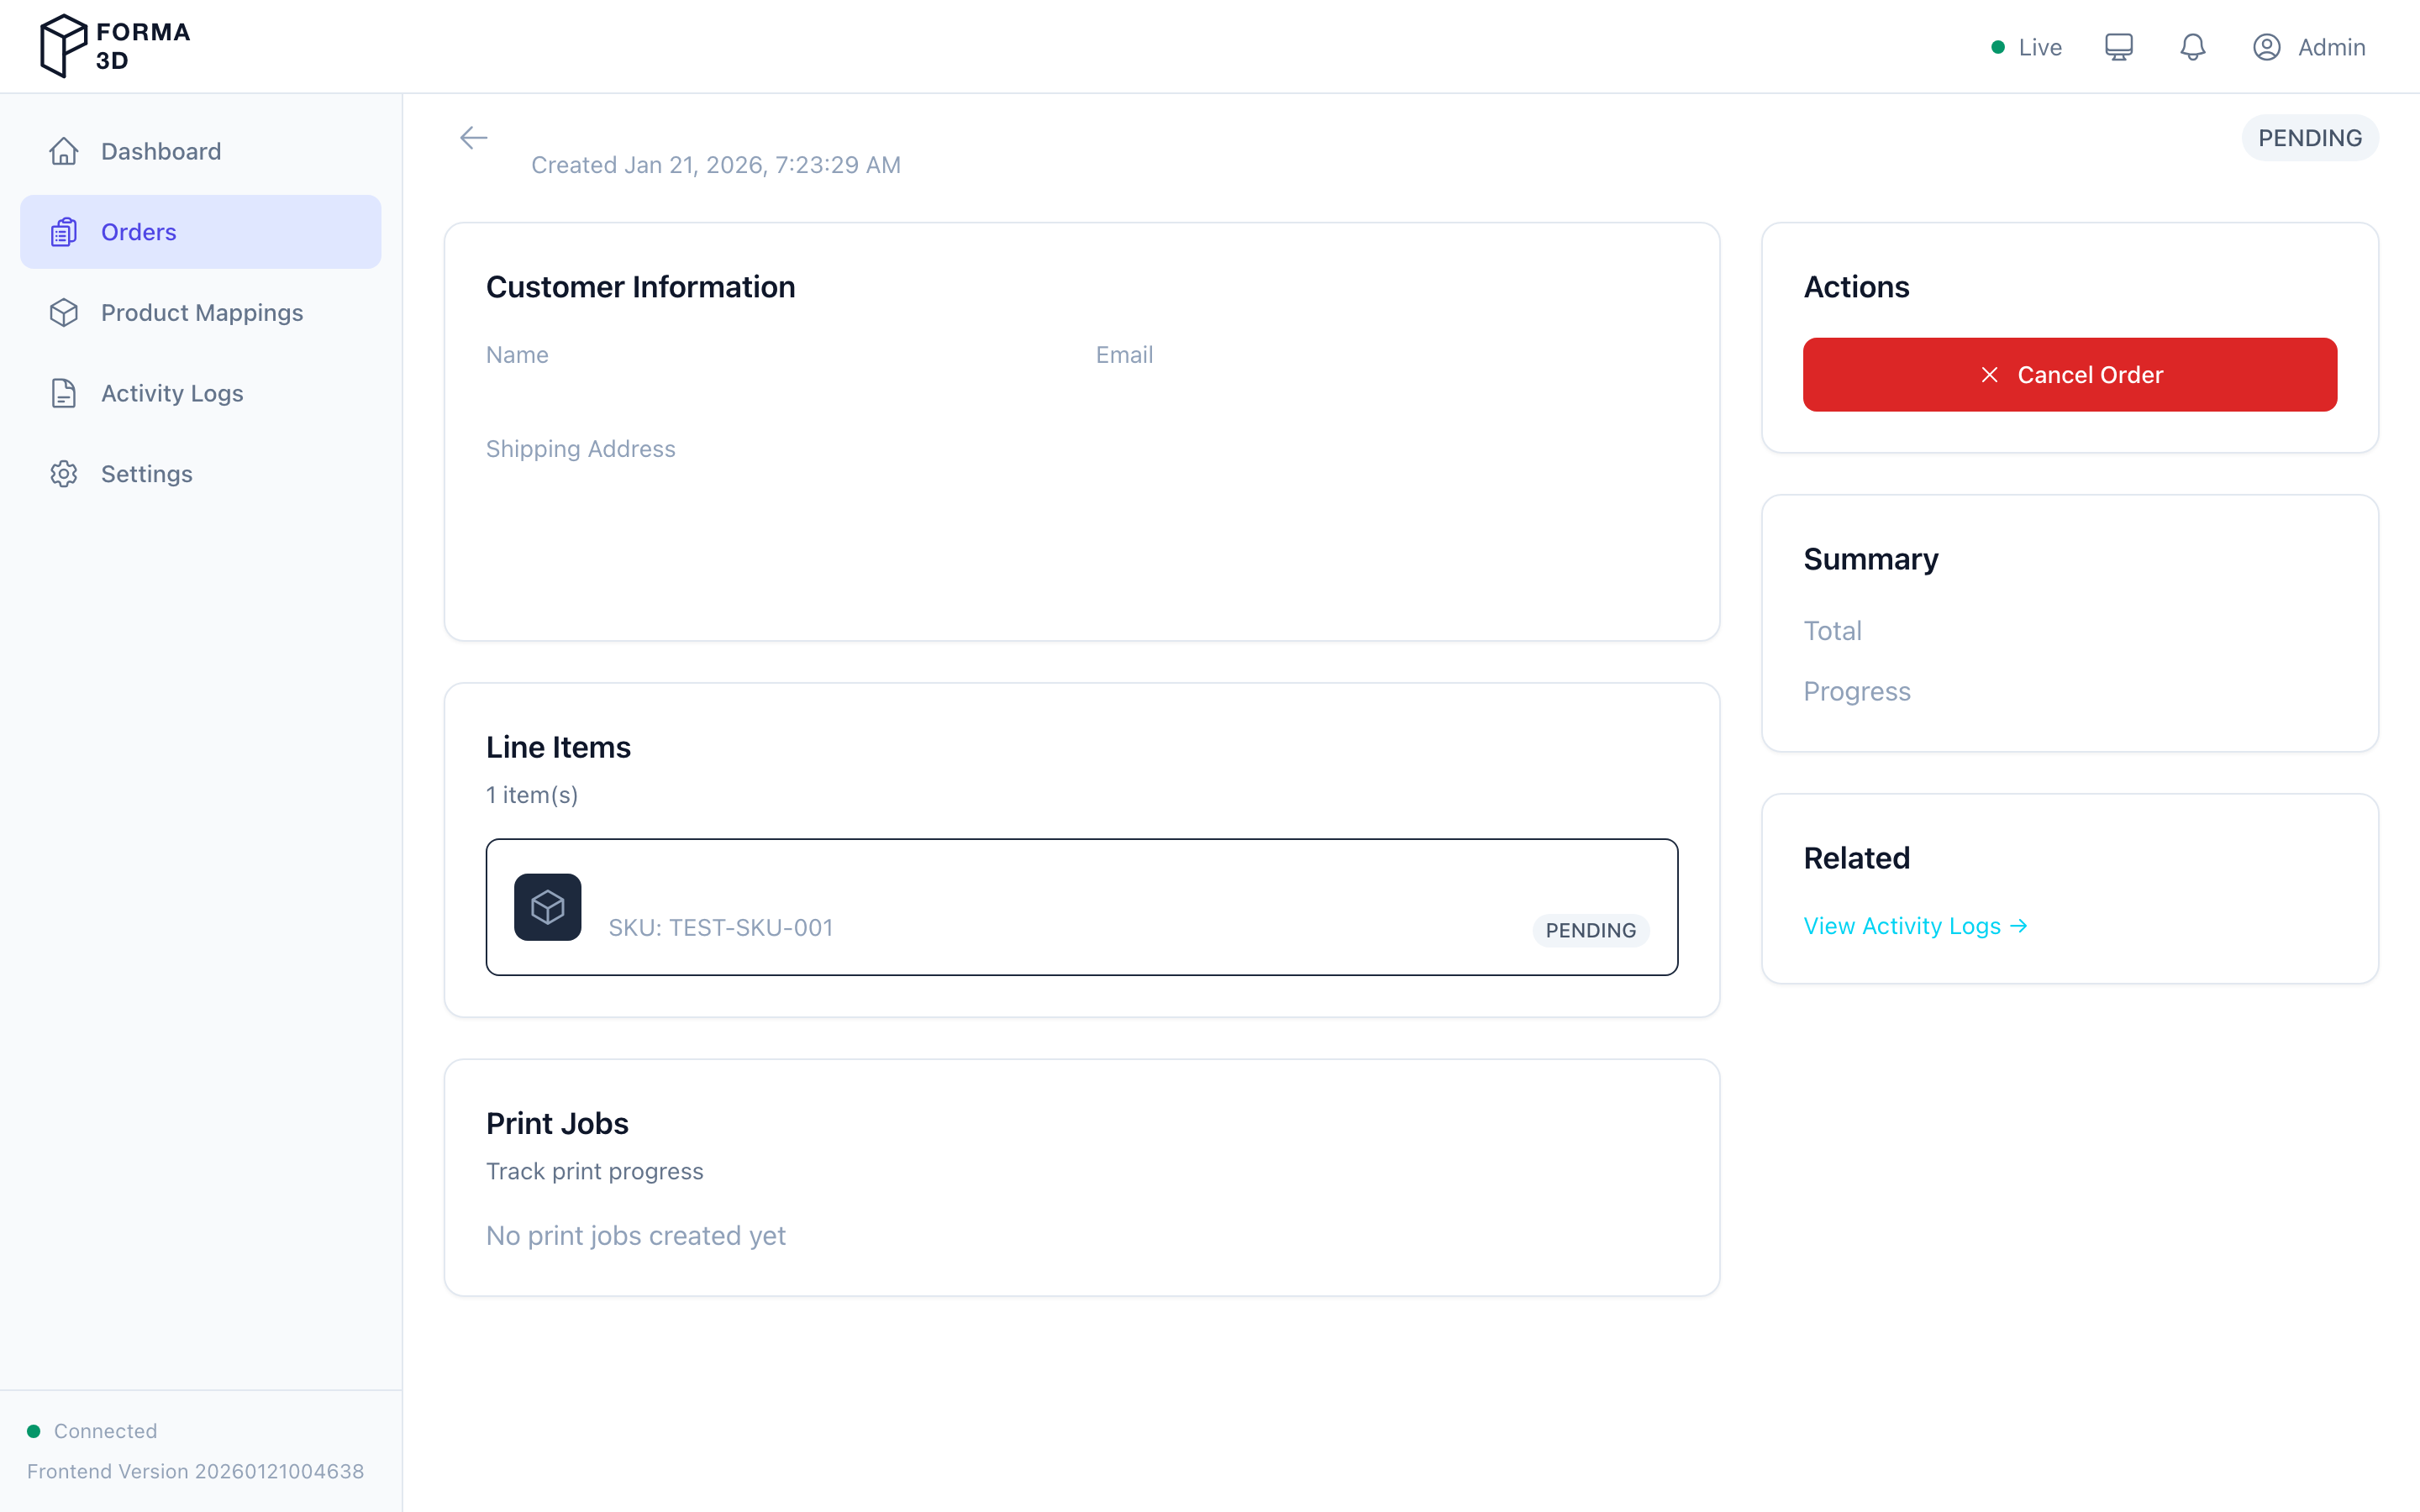
The Order Detail page shows comprehensive information about a single order:
- Order Header — Shopify order number, status badge, creation date, customer name
- Shipping Address — delivery address and SendCloud service point (if applicable)
- Line Items — each line item with:
- Product name and quantity
- Assembly parts and their print job status
- Per-part progress indicators
- Print Jobs — for each print job associated with the order:
- Current status (Queued, Assigned, Printing, Completed, Failed, Cancelled)
- Retry — resubmit a failed print job (admin/operator)
- Cancel — cancel a queued or in-progress print job (admin/operator)
- Force Status — manually set a job to Completed/Failed/Cancelled with a reason (admin only)
Order Actions
| Action | Admin | Operator | Viewer |
|---|---|---|---|
| View details | ✓ | ✓ | ✓ |
| Cancel order | ✓ | ✓ | |
| Reactivate cancelled | ✓ | ✓ | |
| Retry failed print job | ✓ | ✓ | |
| Cancel print job | ✓ | ✓ | |
| Force print job status | ✓ | ||
| Fulfill order | ✓ | ✓ | |
| Force fulfill | ✓ | ✓ |
Use the "Back to orders" link to return to the orders list.
Product Mappings
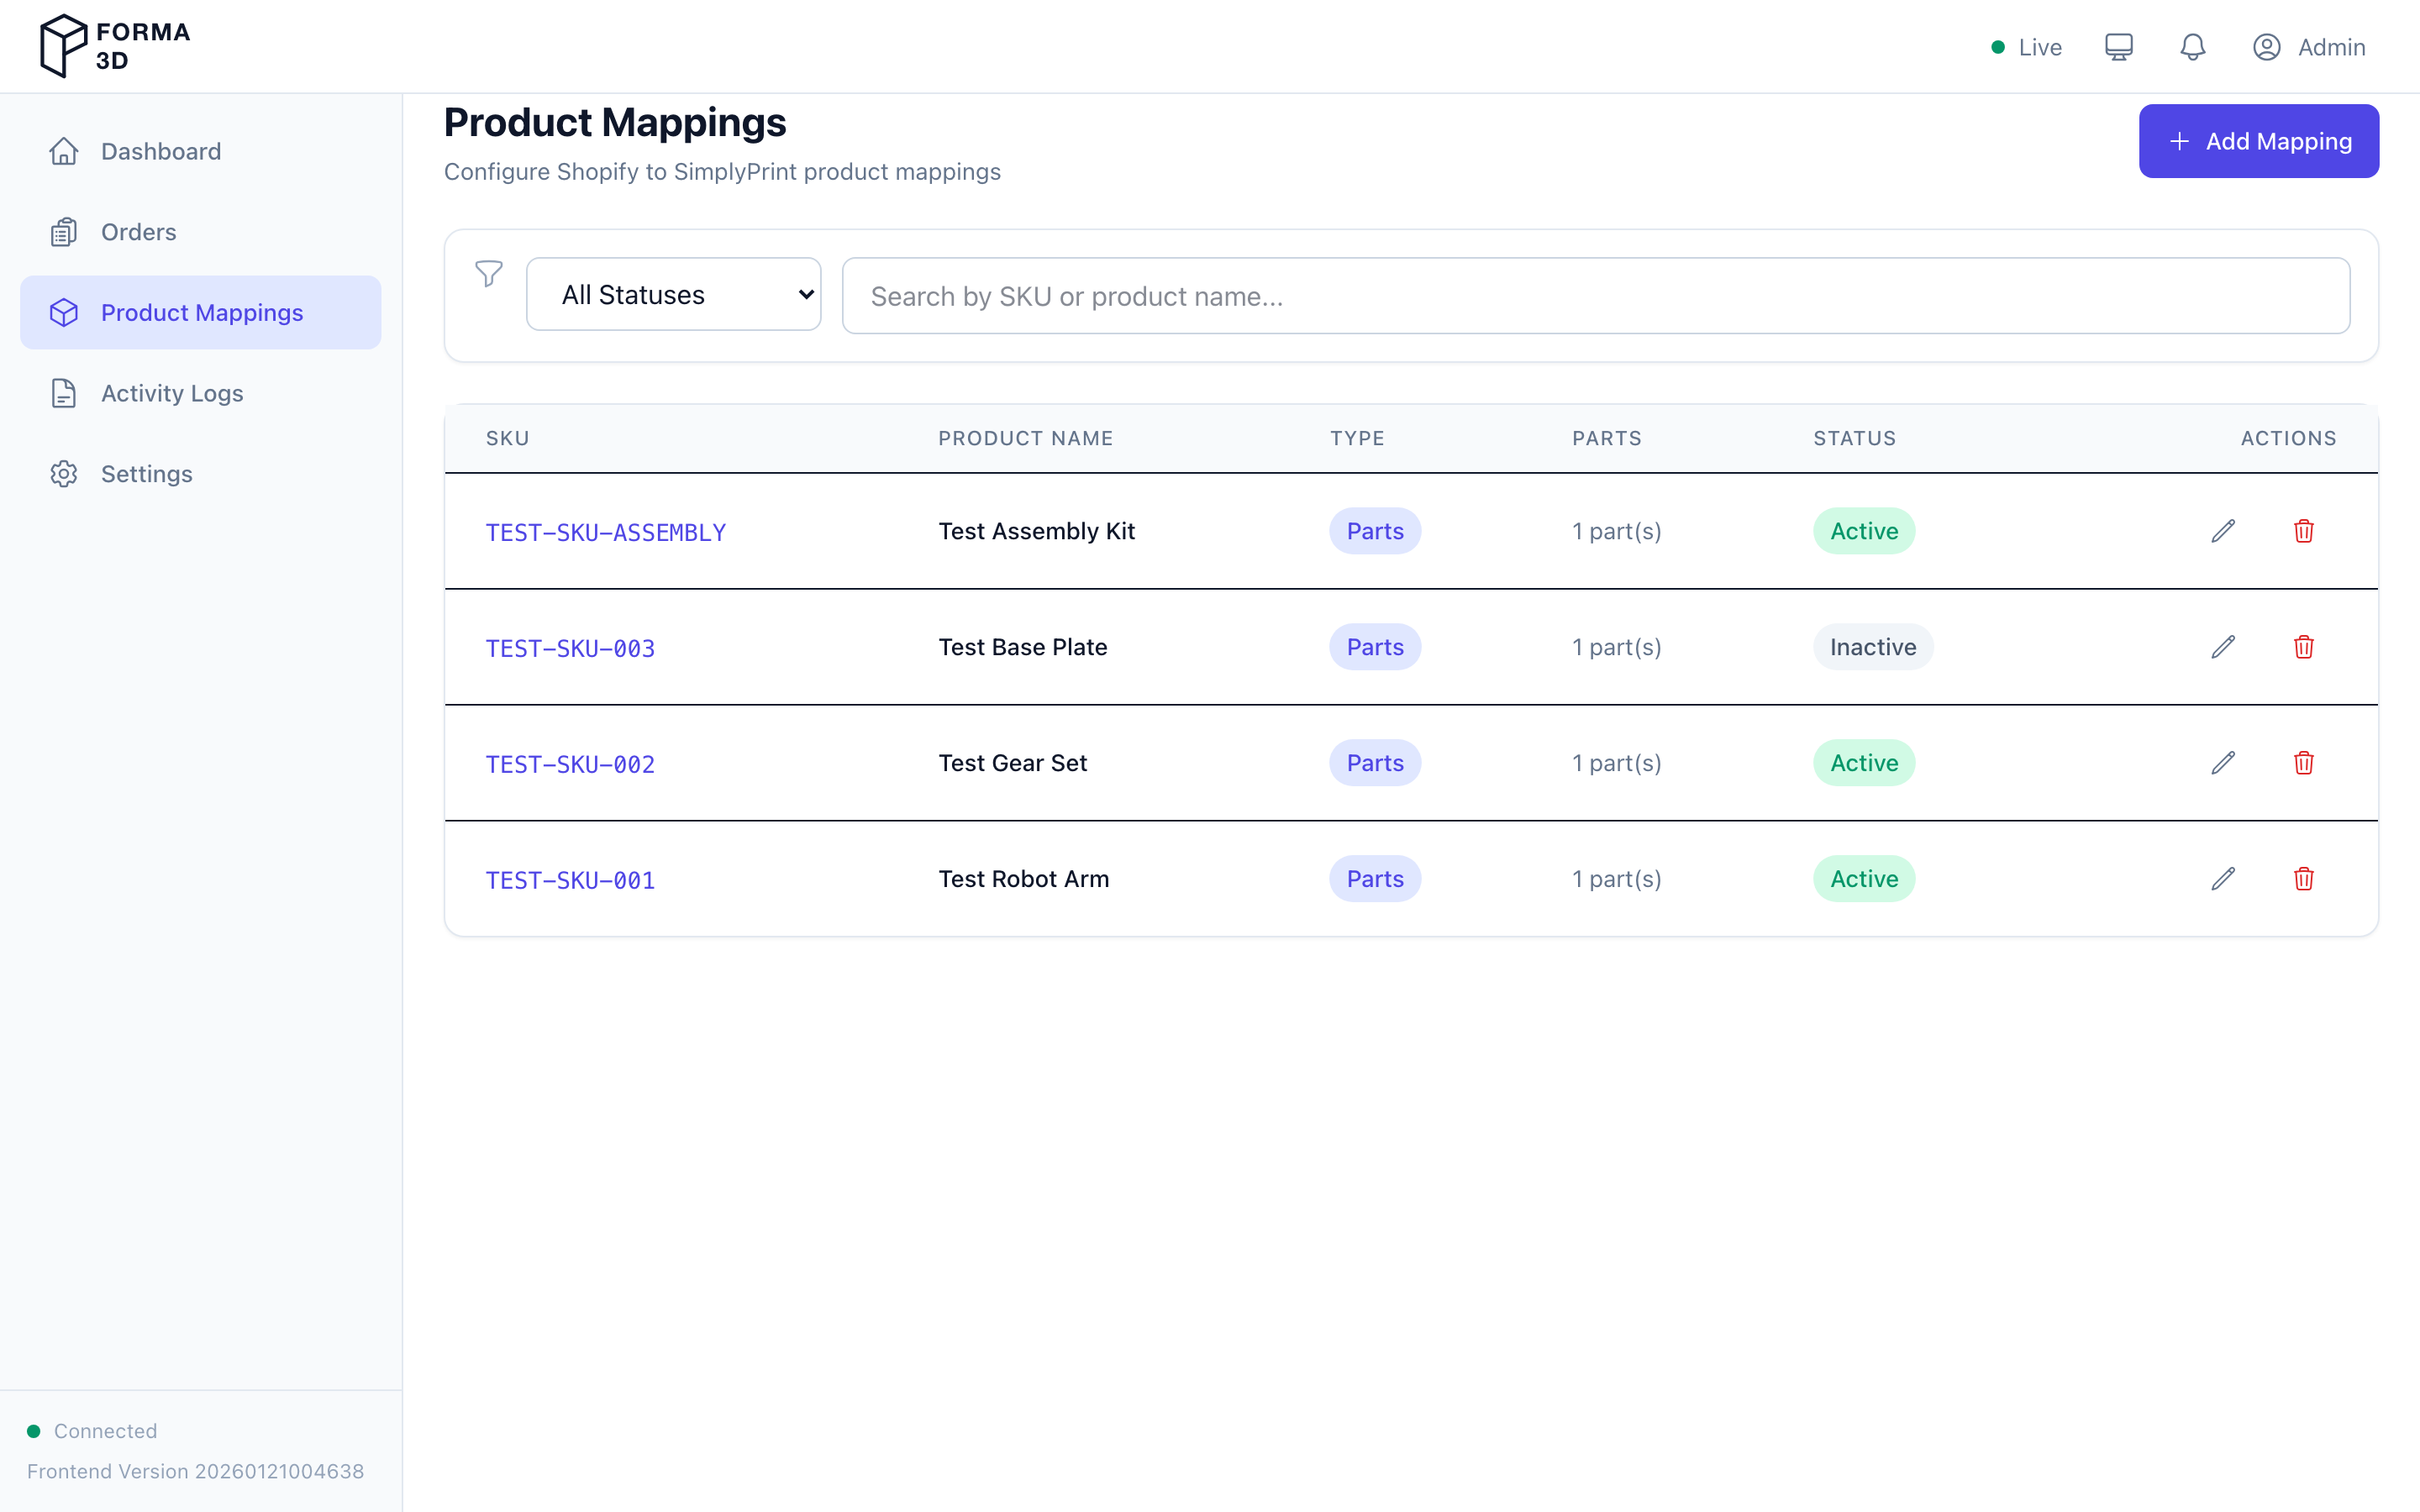
Use Product Mappings to configure how Shopify products map to SimplyPrint files.
Access: All roles can view mappings. Creating, editing, and deleting requires admin or operator role.
Features
- Search: filter by SKU or product name
- Edit: use the edit action to update a mapping (admin/operator only)
- Delete: remove a mapping (requires confirmation) (admin/operator only)
- Part count: each mapping shows the number of assembly parts
The list uses a table layout on desktop and card layout on mobile.
Actions by Role
| Action | Admin | Operator | Viewer |
|---|---|---|---|
| View mappings | ✓ | ✓ | ✓ |
| Create mapping | ✓ | ✓ | |
| Edit mapping | ✓ | ✓ | |
| Delete mapping | ✓ | ✓ |
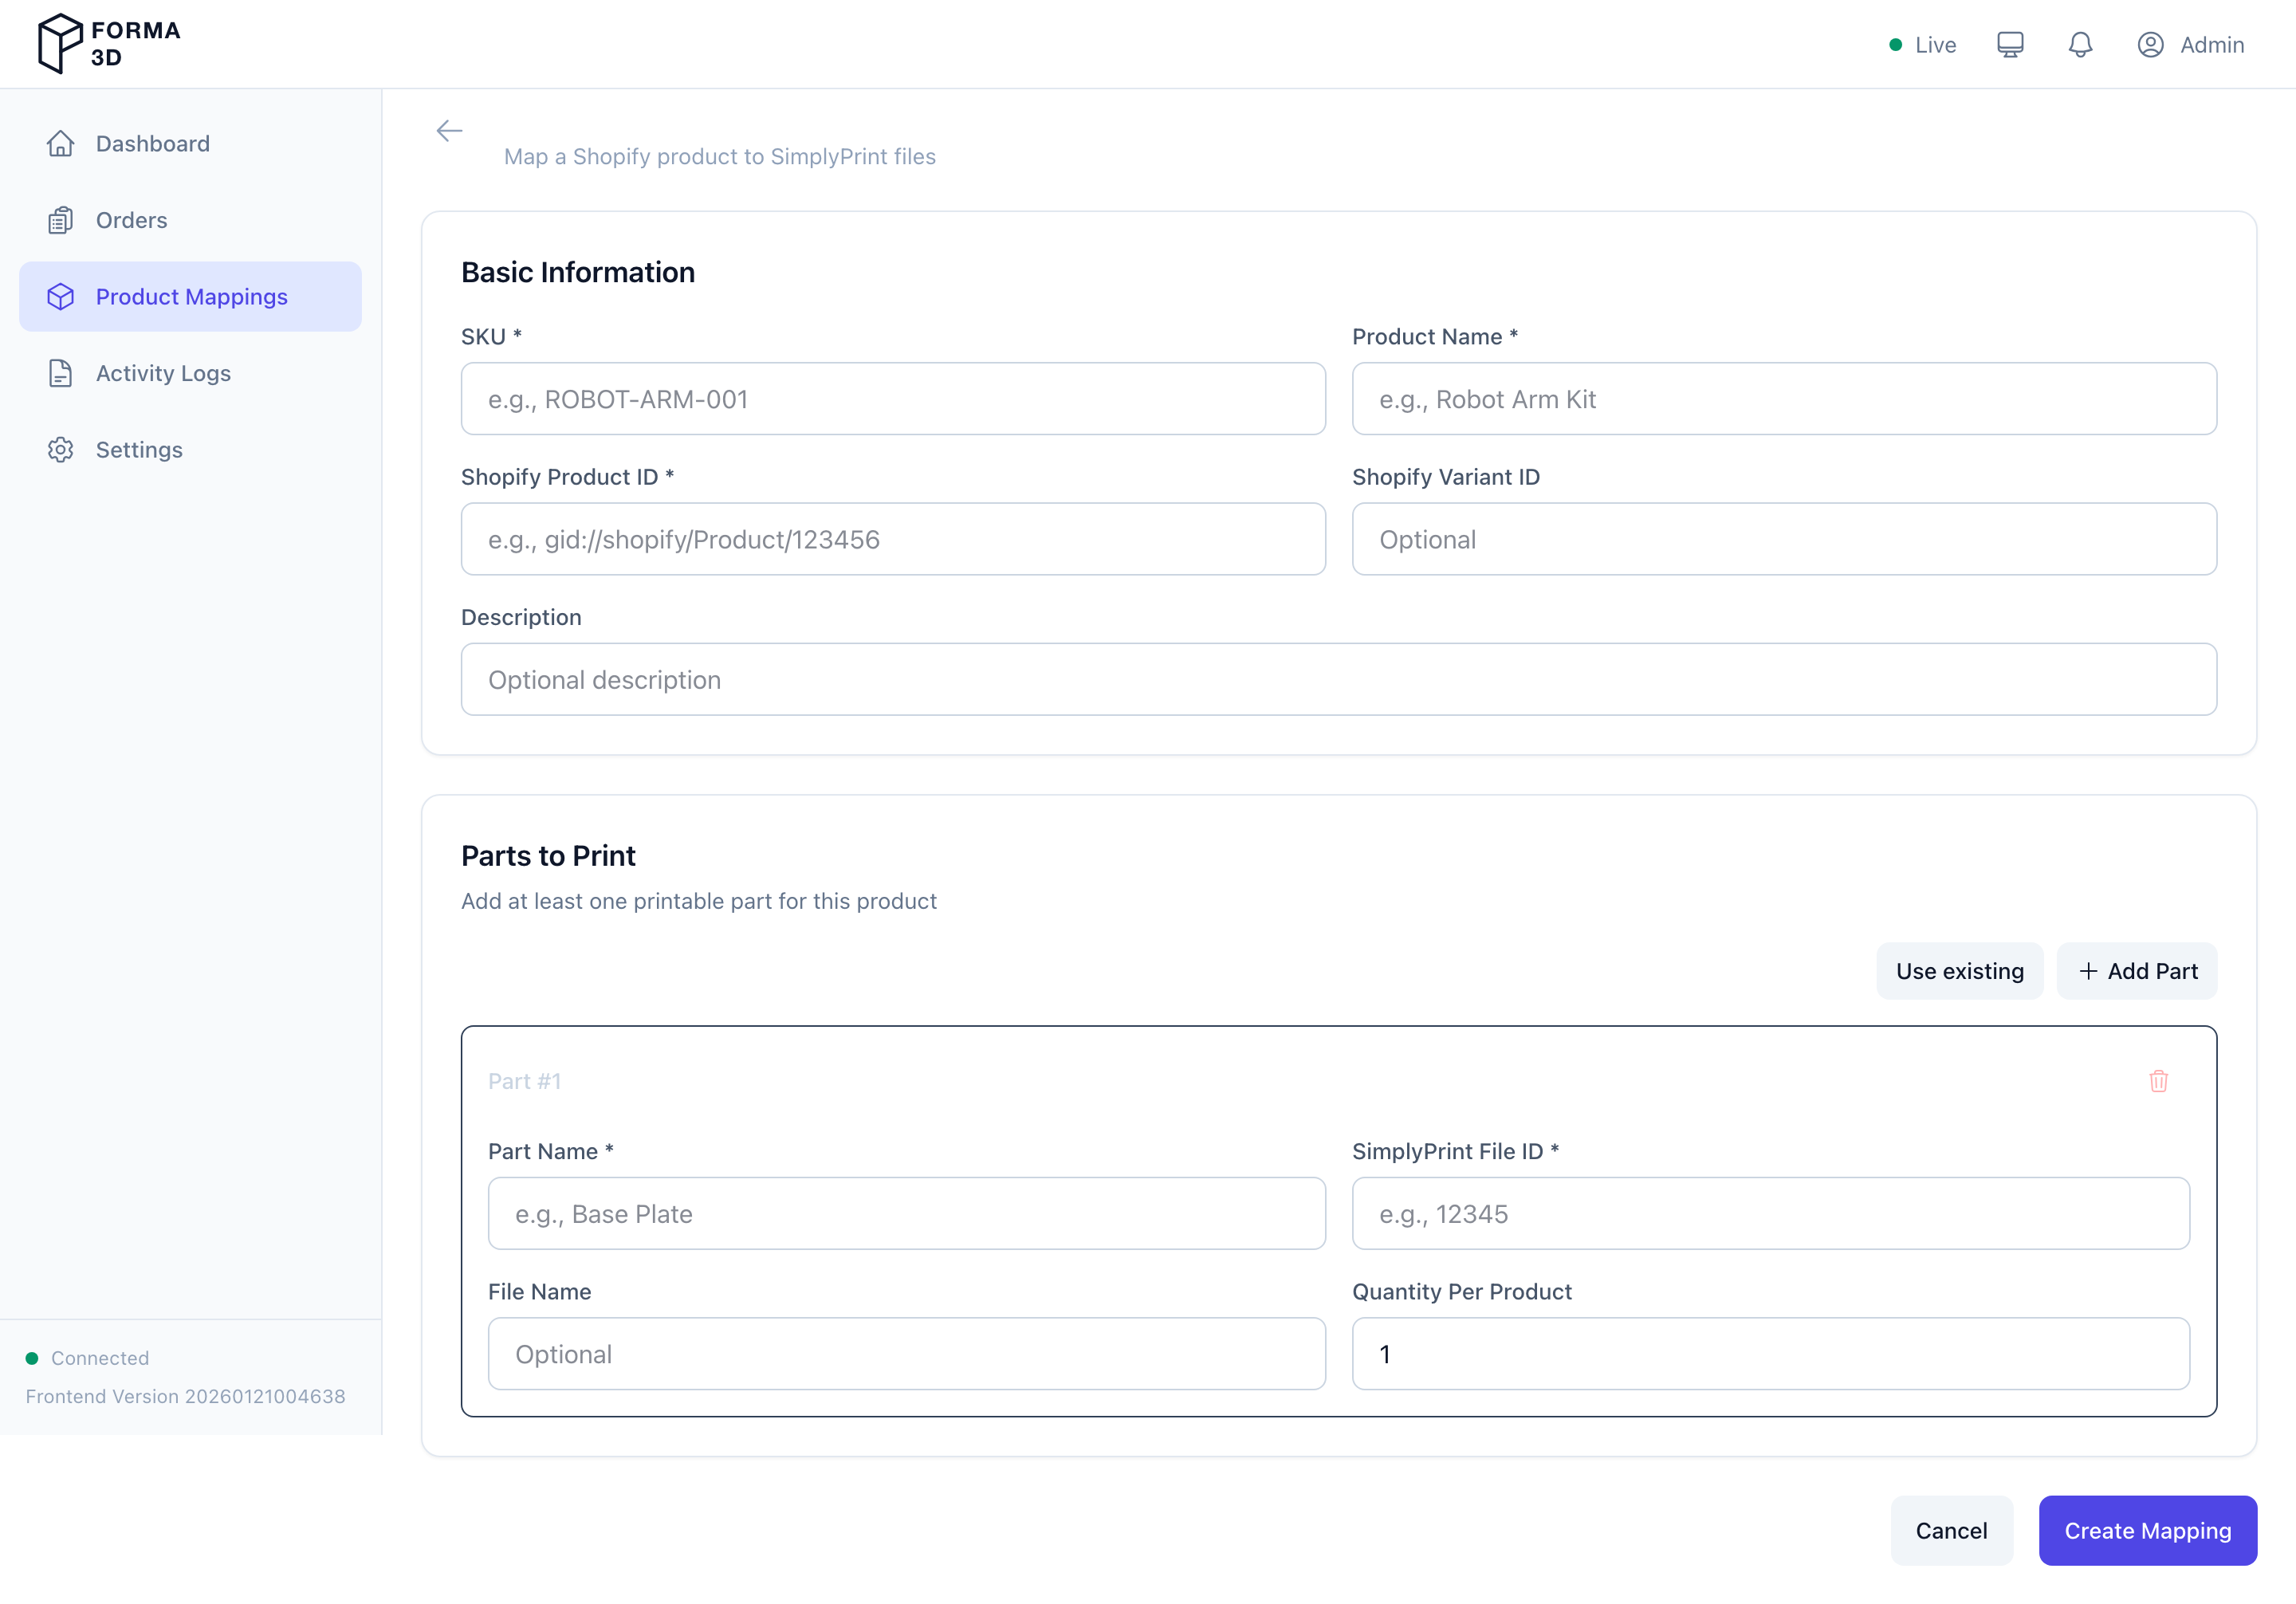
New Product Mapping

Use Add Mapping to create a new mapping.
Shopify Product Picker
Click Select Shopify Product to open a modal that lets you browse and search products from your connected Shopify store. Select a product and variant to automatically populate the Product Name and Shopify Product ID.
Assembly Parts
Add one or more parts with: - Part name - SimplyPrint File — click Select File to browse files from your SimplyPrint account - Quantity per product - Print priority
Copy a Part from an Existing Mapping (Part Library)
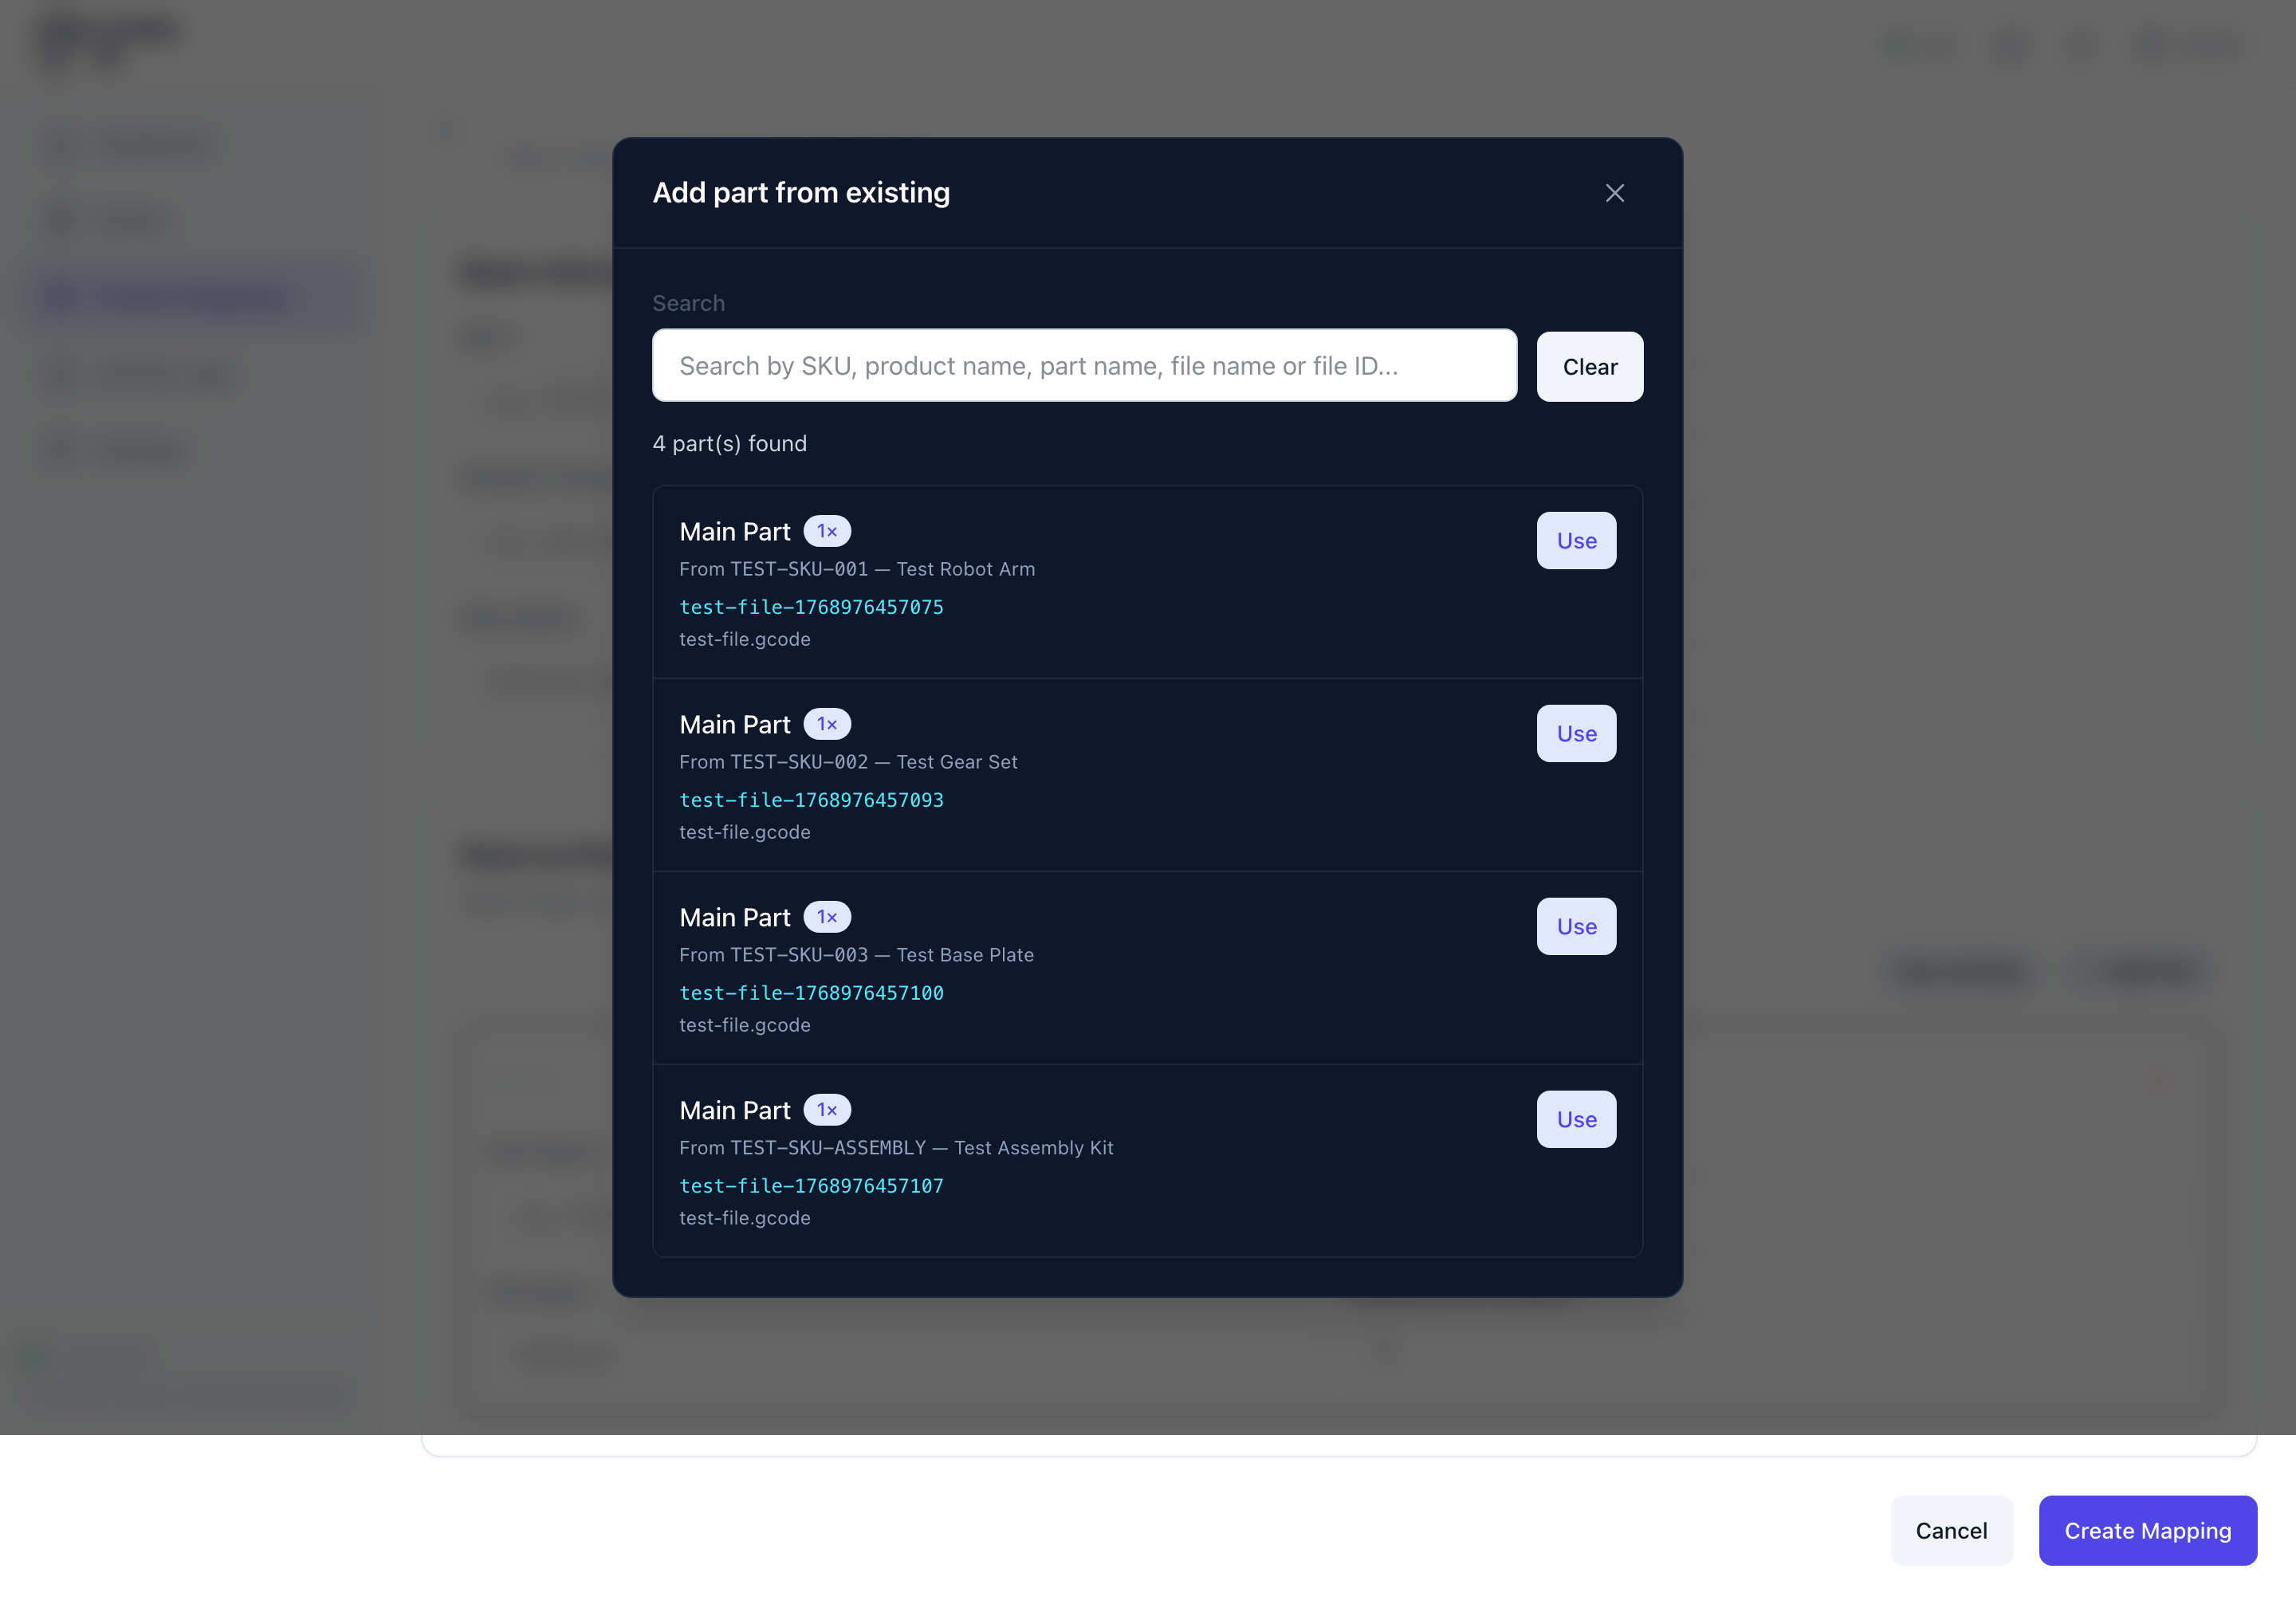
Click Use existing to open Add part from existing:
- Search by SKU, product name, part name, file name, or file ID
- Select a result to copy its SimplyPrint file details into a new part row
- Use pagination to browse large libraries
Stock Management
When the stockManagement feature flag is enabled, additional fields appear per mapping:
- Enable stock tracking toggle
- Minimum stock threshold
- Maximum stock cap
- Replenishment priority
- Batch size for replenishment runs
Click Create Mapping to save, or Cancel to discard.
Edit Product Mapping
Use the Edit action from the mappings list to update an existing mapping. The form is the same as "New Product Mapping", pre-filled with existing values.
Inventory
The Inventory section is available when the stockManagement feature flag is enabled. It has four tabs accessible via the tab bar at the top.
Access: All roles can view stock levels and transactions. Adjusting stock and configuring thresholds requires admin or operator role.
Stock Levels
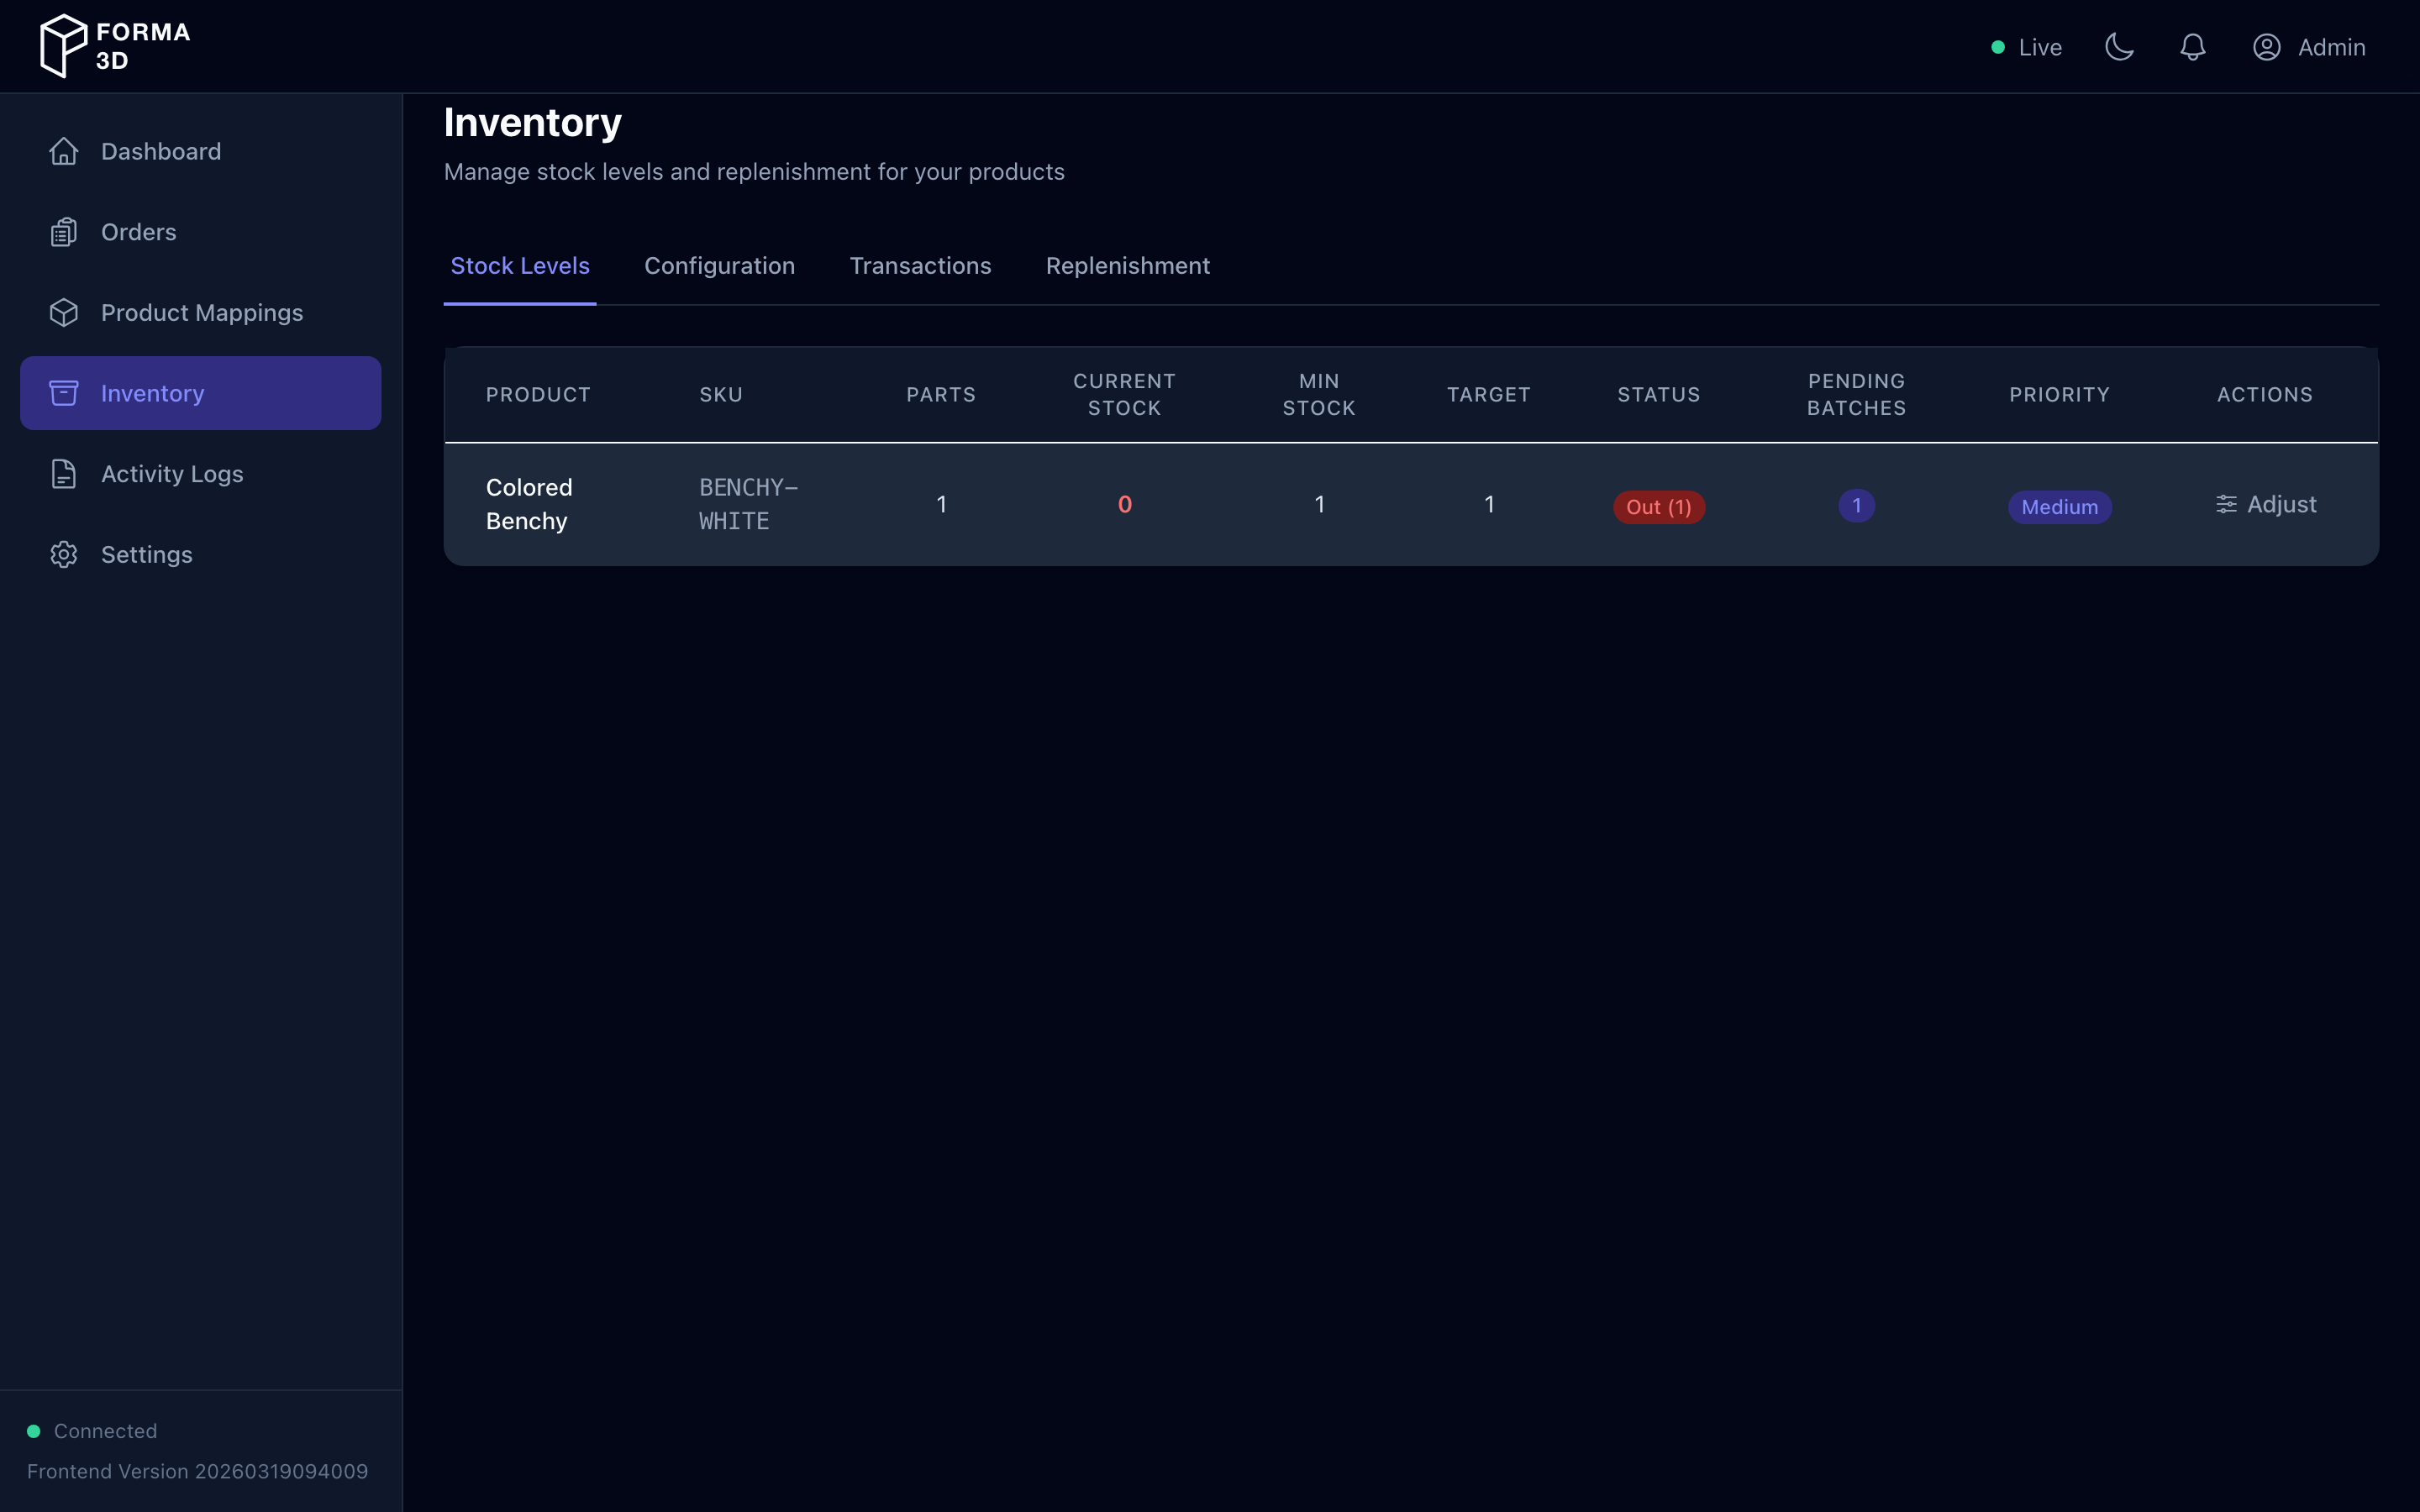
The Stock Levels tab shows a table (or cards on mobile) of all products with stock management enabled:
| Column | Description |
|---|---|
| Product | Product mapping name |
| SKU | Shopify SKU (if set) |
| Parts | Number of assembly parts |
| Current Stock | Current stock count (color-coded: green/yellow/red) |
| Min Stock | Minimum stock threshold |
| Target | Replenishment target quantity |
| Status | At Target / Below Target / Below Min / Out |
| Pending Batches | Number of active replenishment batches |
| Priority | Replenishment priority (Critical / High / Normal / Low) |
| Actions | Adjust — open the stock adjustment modal |
Stock Adjustment Modal
Click Adjust on any product to manually adjust its stock count. Enter a positive or negative quantity and an optional note describing the reason for the adjustment.
Configuration
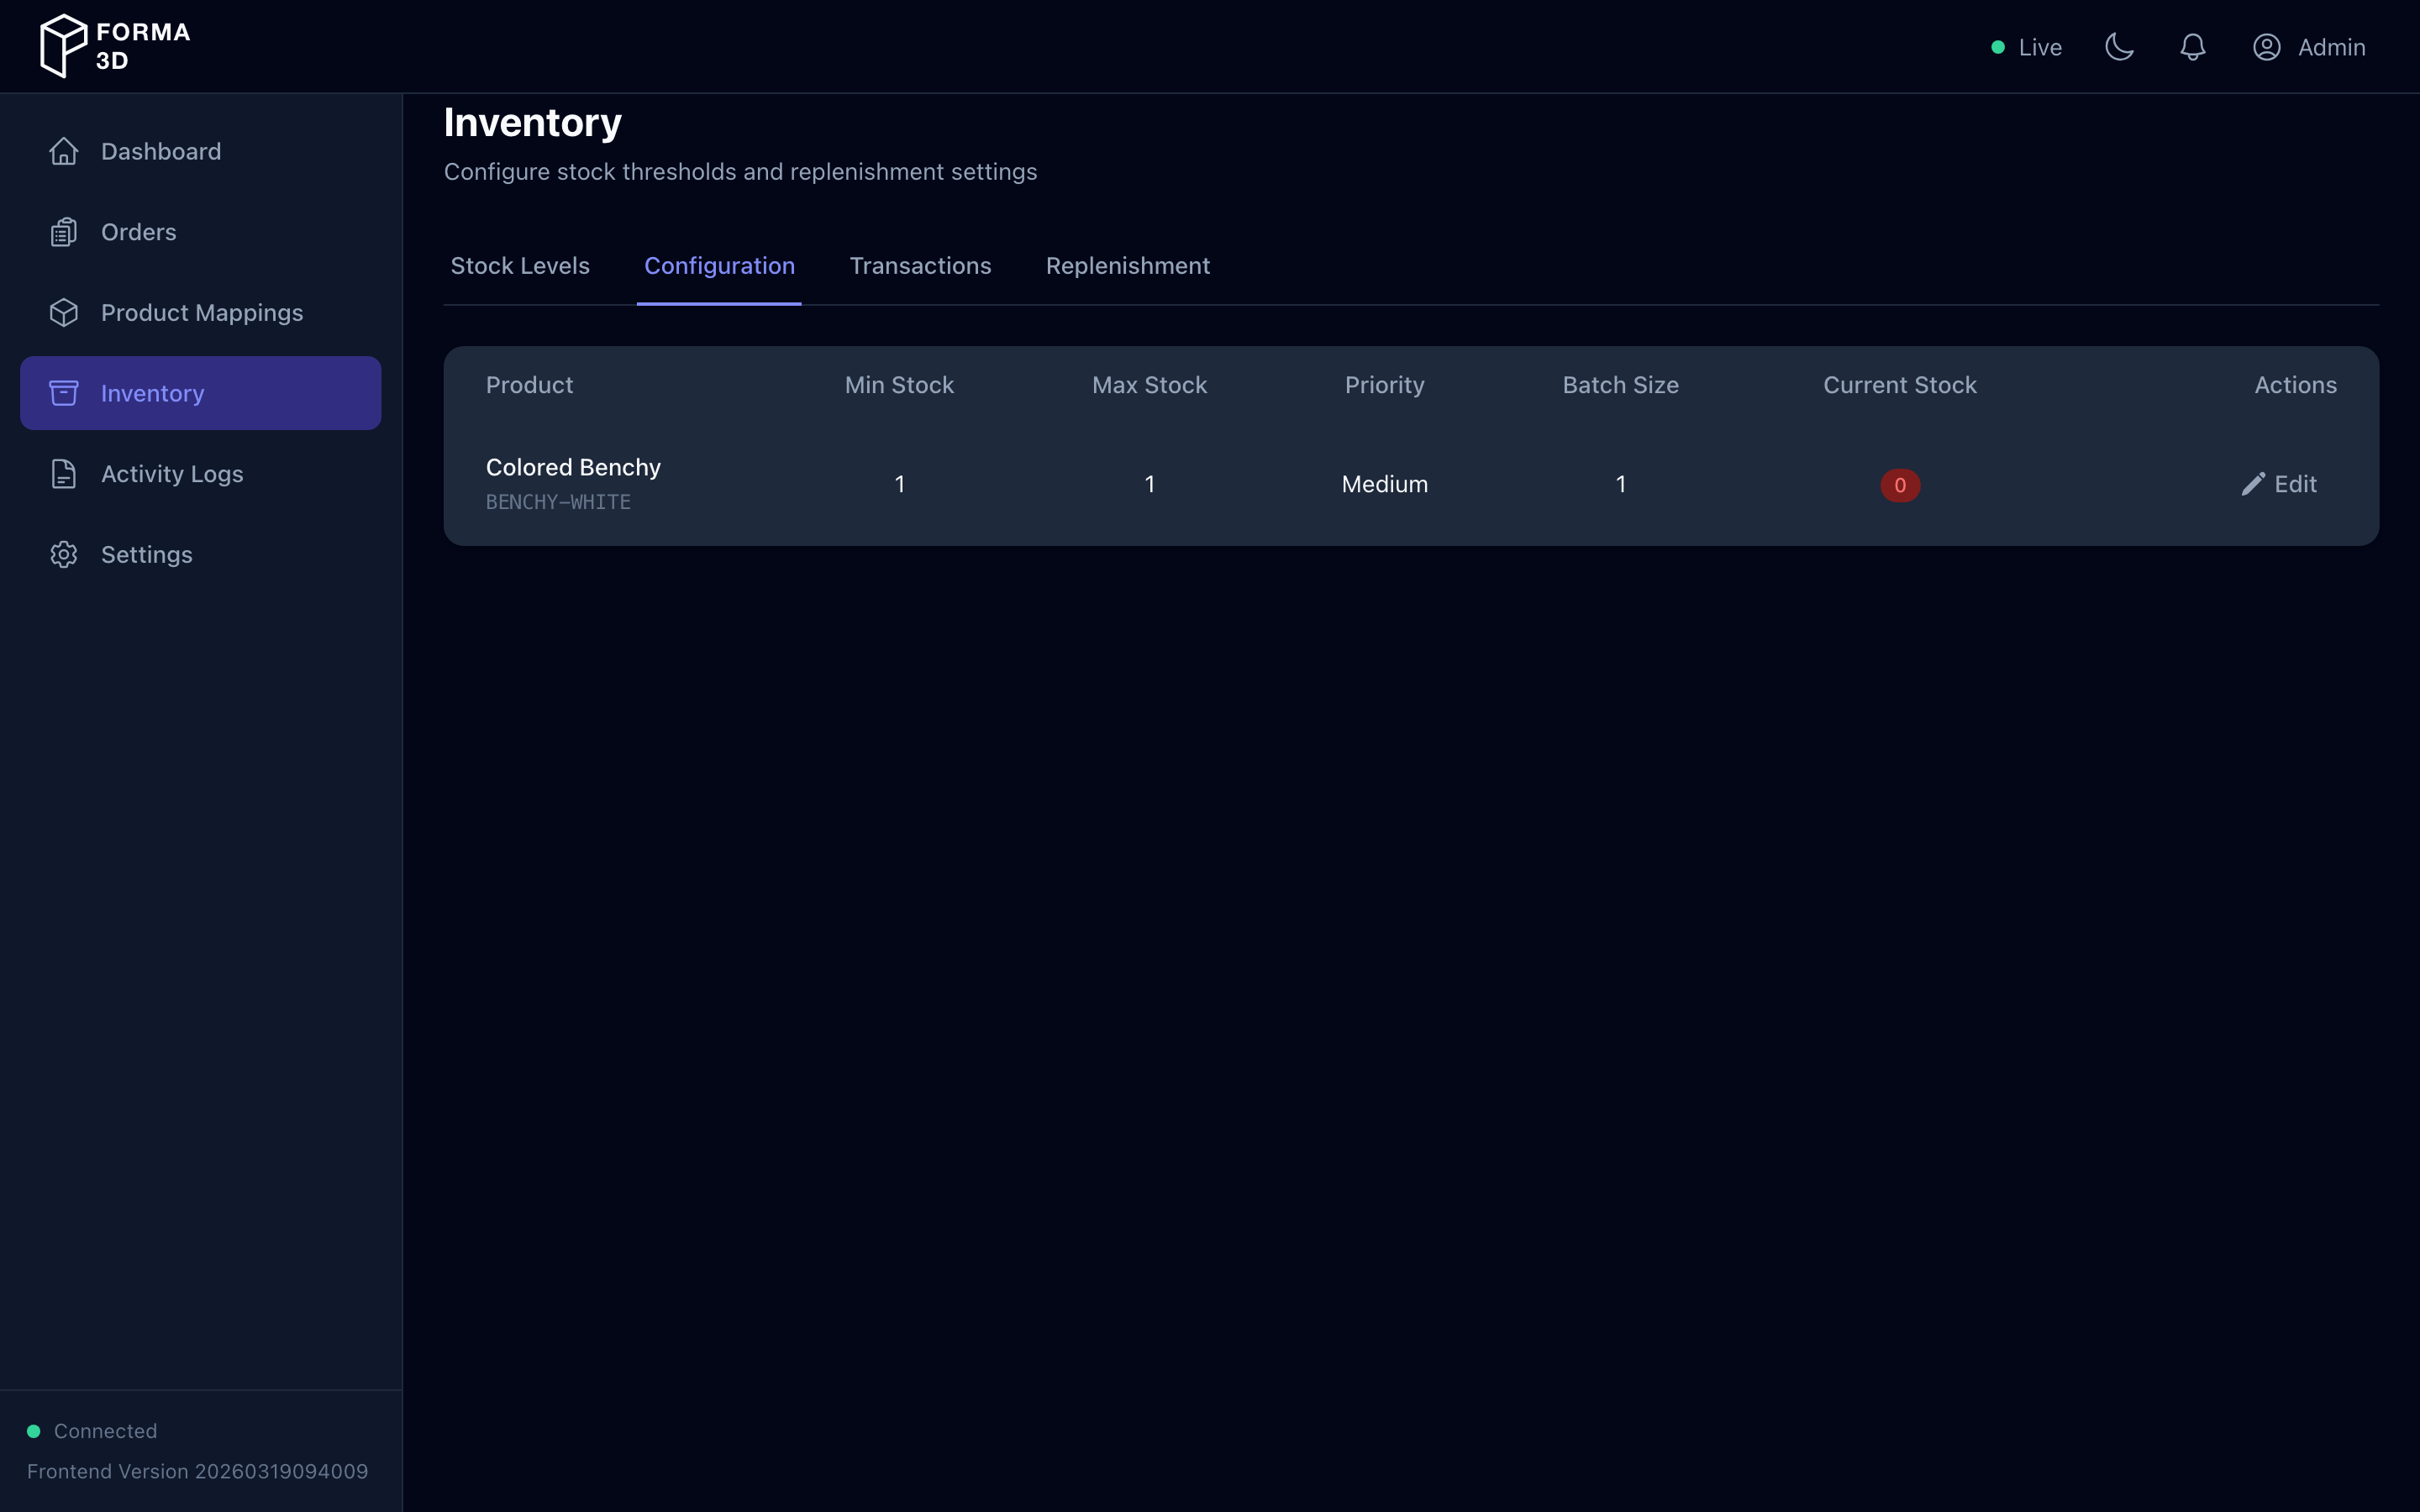
The Configuration tab lets you edit stock thresholds and replenishment settings per product:
| Setting | Description |
|---|---|
| Min Stock | Minimum stock level before replenishment triggers |
| Max Stock | Maximum stock cap (optional — leave blank for no limit) |
| Priority | Replenishment priority: Critical, High, Normal, or Low |
| Batch Size | Number of units to print per replenishment batch |
Click Edit on a row, modify the values, then Save. Click Cancel to discard changes. Max stock must be greater than or equal to min stock.
Transactions

The Transactions tab shows inventory change history for a selected product:
- Select a product from the dropdown
- View transactions with:
- Date — when the change occurred
- Type — Produced, Consumed, Adjustment In, Adjustment Out, Scrapped
- Quantity — units added (+) or removed (-)
- Direction — IN or OUT
- Reference — linked entity (print job, batch, etc.)
- Notes — description of the change
- User — who made the change (or "System")
Use pagination to browse through large histories.
Replenishment
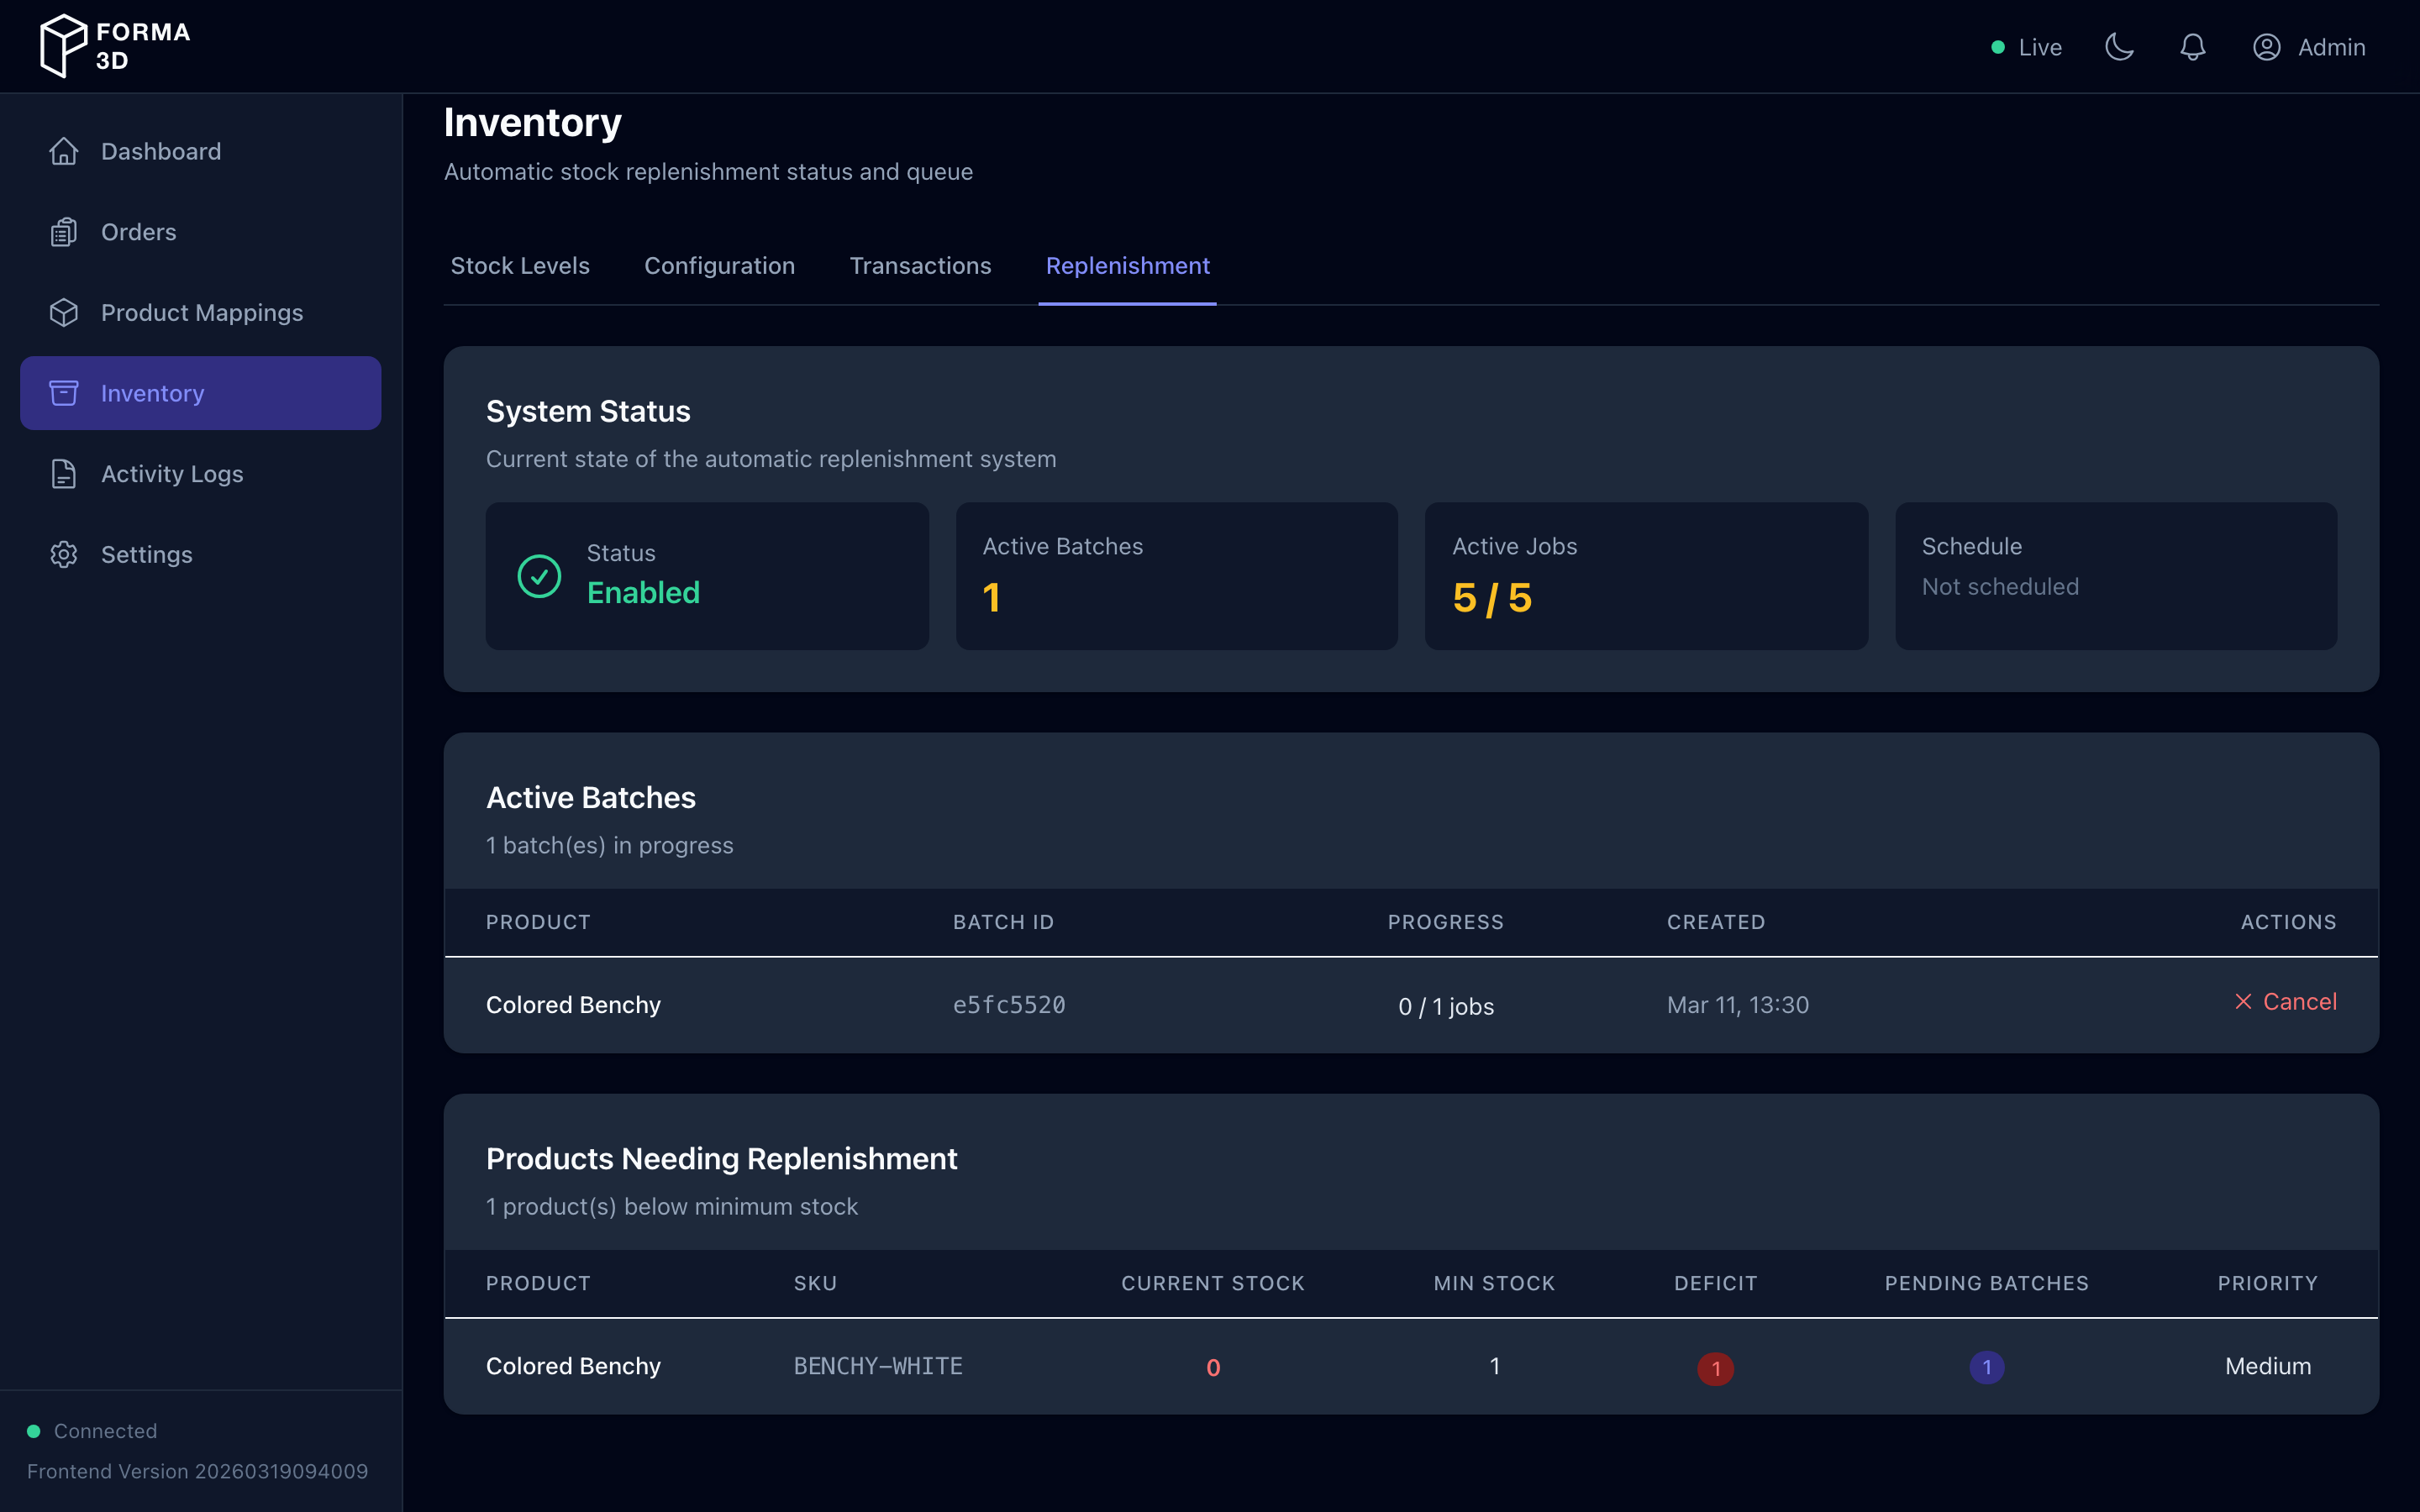
The Replenishment tab shows the automatic stock replenishment system status:
- System Status — enabled/disabled, active batches, active jobs vs. max concurrent, schedule (last/next run)
- Active Batches — in-progress replenishment batches with product name, progress (completed/total jobs), and a Cancel Batch action
- Products Needing Replenishment — products below their minimum stock level, showing current stock, deficit, pending batches, and priority
Inventory Actions by Role
| Action | Admin | Operator | Viewer |
|---|---|---|---|
| View stock levels | ✓ | ✓ | ✓ |
| Adjust stock | ✓ | ✓ | |
| Edit stock configuration | ✓ | ✓ | |
| View transactions | ✓ | ✓ | ✓ |
| View replenishment | ✓ | ✓ | ✓ |
| Cancel stock batch | ✓ | ✓ |
Activity Logs
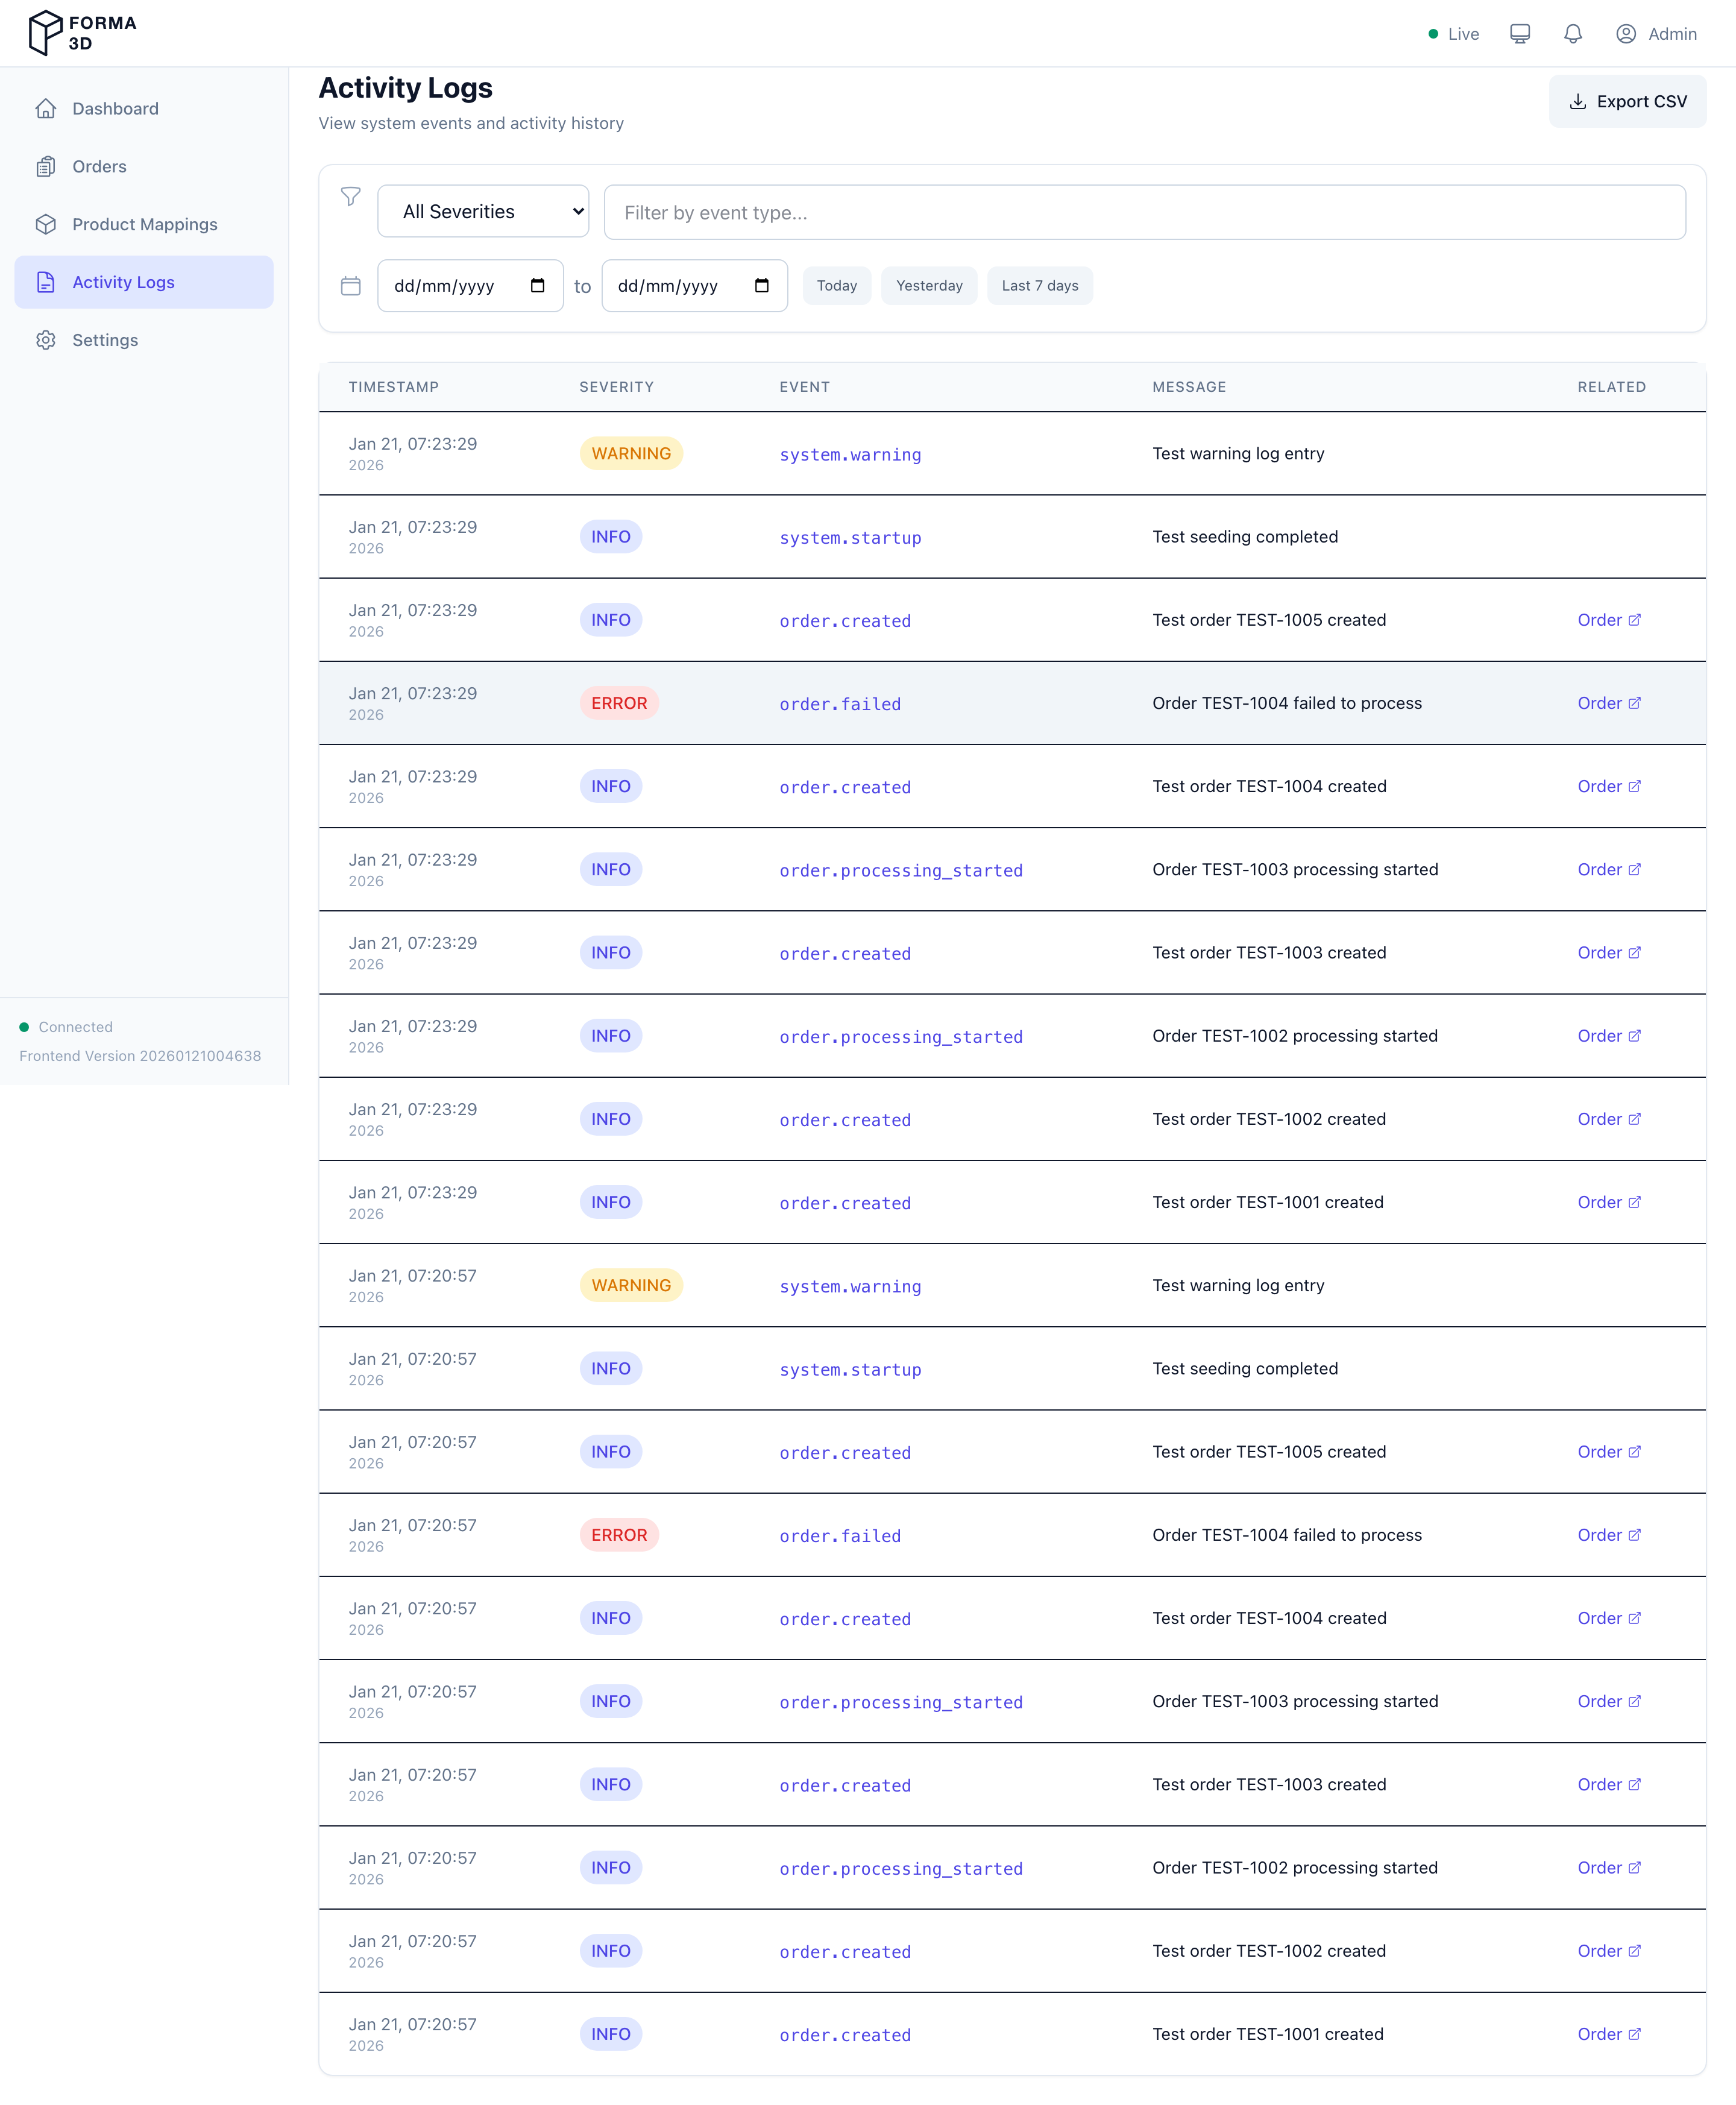
Use Activity Logs to review system events and activity history.
Access: All roles can view activity logs. Clearing logs requires admin or operator role.
Features
- Severity filter: Info / Warning / Error
- Event type filter: free-text filter for event categories
- Order ID filter: filter logs by a specific order
- Date range: filter by start/end date, with quick presets (Today / Yesterday / Last 7 days / Last 30 days)
- Pagination: navigate through log pages
- Export CSV: download the currently loaded log rows (disabled if there are no rows)
- Clear Logs: delete all logs (requires confirmation) (admin/operator only)
Log Detail Modal
Click any log row to open a detail modal showing:
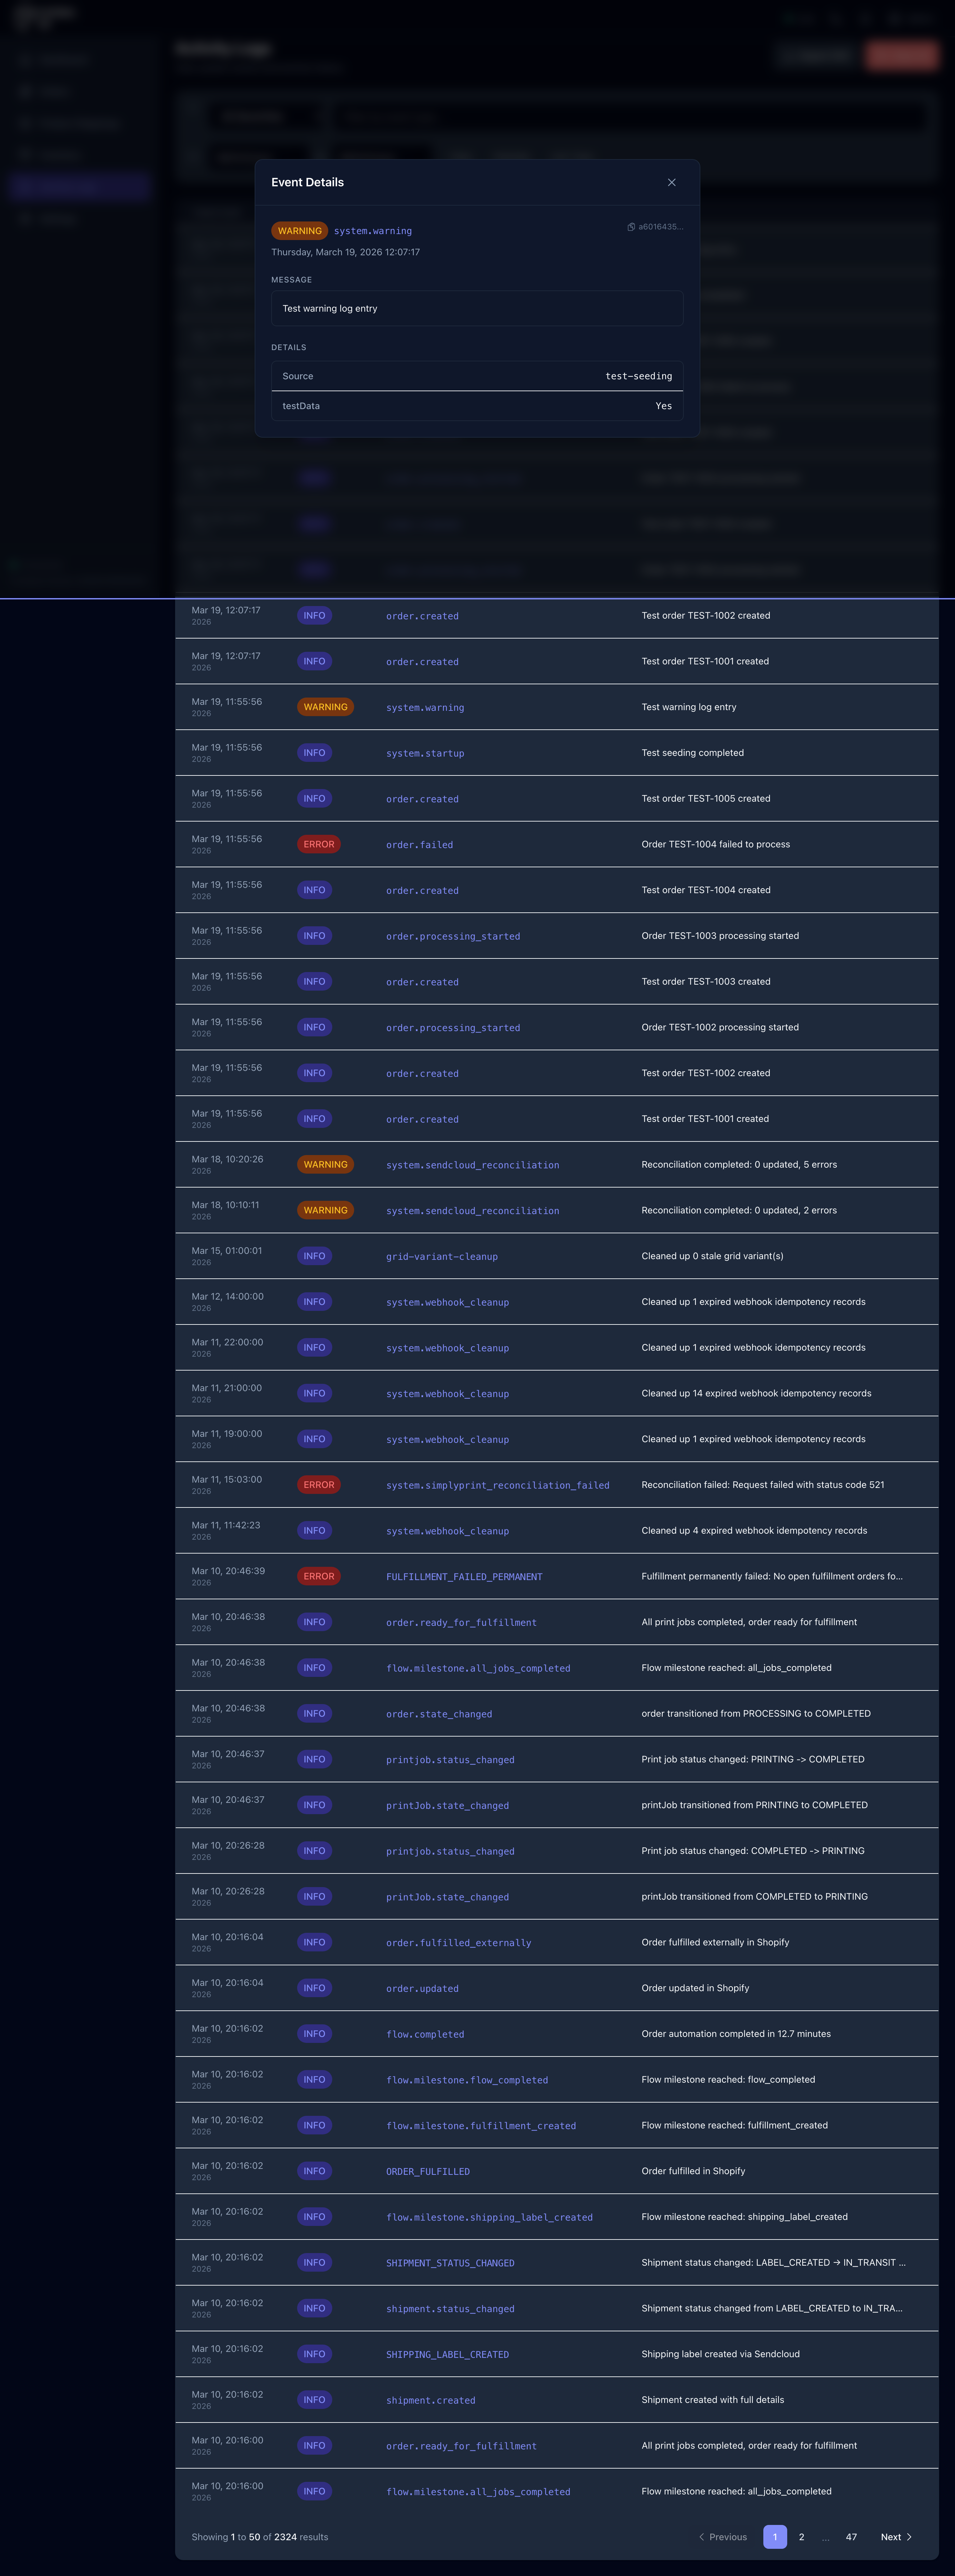
- Full event metadata (event type, severity, timestamp)
- Structured data payload
- Links to the related Order or Print Job (if applicable)
User Management (Admin Only)
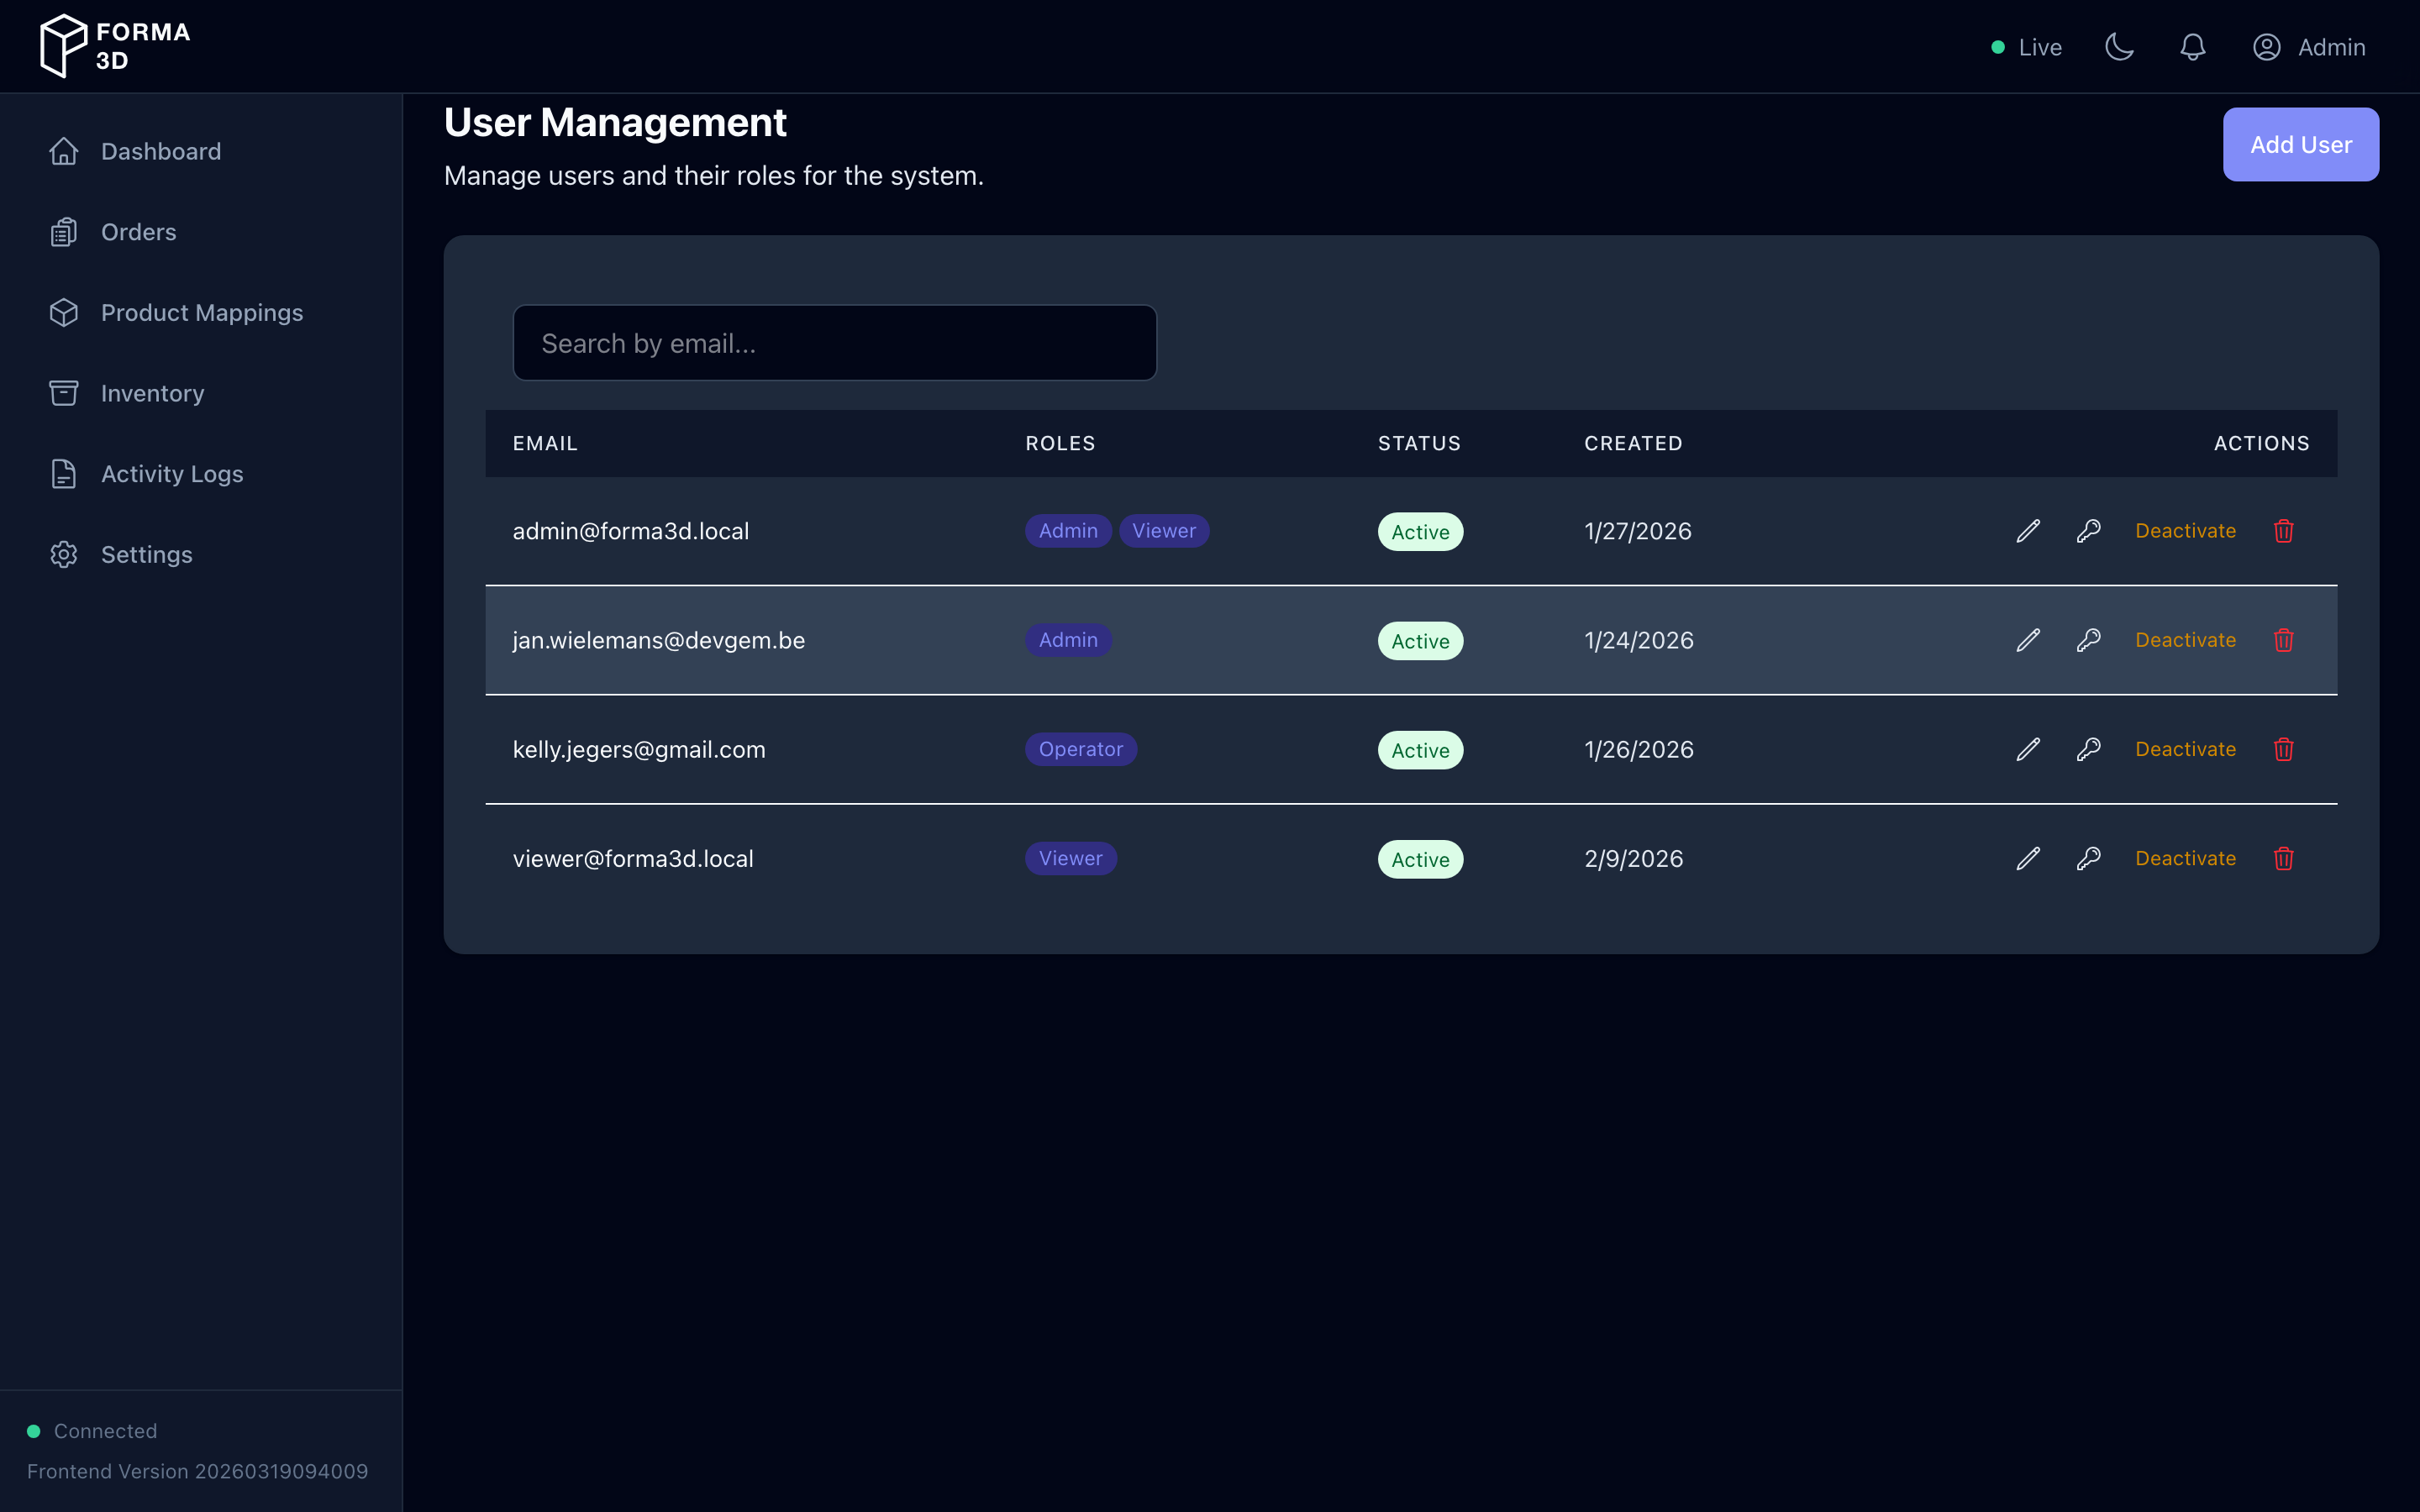
Administrators can access the User Management page to manage all user accounts in the system.
User List Features
- Search: Filter users by email address
- View roles: See which roles are assigned to each user (displayed as colored badges)
- Status indicator: Quickly see if a user is Active or Inactive
- Created date: View when each user was added to the system
- Pagination: Navigate through large user lists
User Actions (requires users.write permission)
| Action | Description |
|---|---|
| Add User | Create a new user with email, password, and role assignment |
| Edit (pencil icon) | Update user email or change role assignments |
| Change Password (key icon) | Reset a user's password |
| Activate/Deactivate | Enable or disable user accounts (inactive users cannot log in) |
| Delete (trash icon) | Permanently remove a user (requires confirmation) |
Creating a New User

- Click Add User button
- Enter the user's email address
- Set an initial password (user can change it later)
- Select one or more roles:
- admin: Full system access including user management
- operator: Day-to-day operations (orders, mappings, print jobs)
- viewer: Read-only access to view data
- Click Create User
Role Assignment Tips
- Assign viewer role to stakeholders who need to monitor progress but shouldn't modify data
- Assign operator role to team members handling daily operations
- Assign admin role sparingly to users who need to manage other users or system settings
Note: This page is only visible to users with the
adminrole. Non-admin users will be redirected to the dashboard if they try to access/admin/users.
Audit Logs (Admin Only)
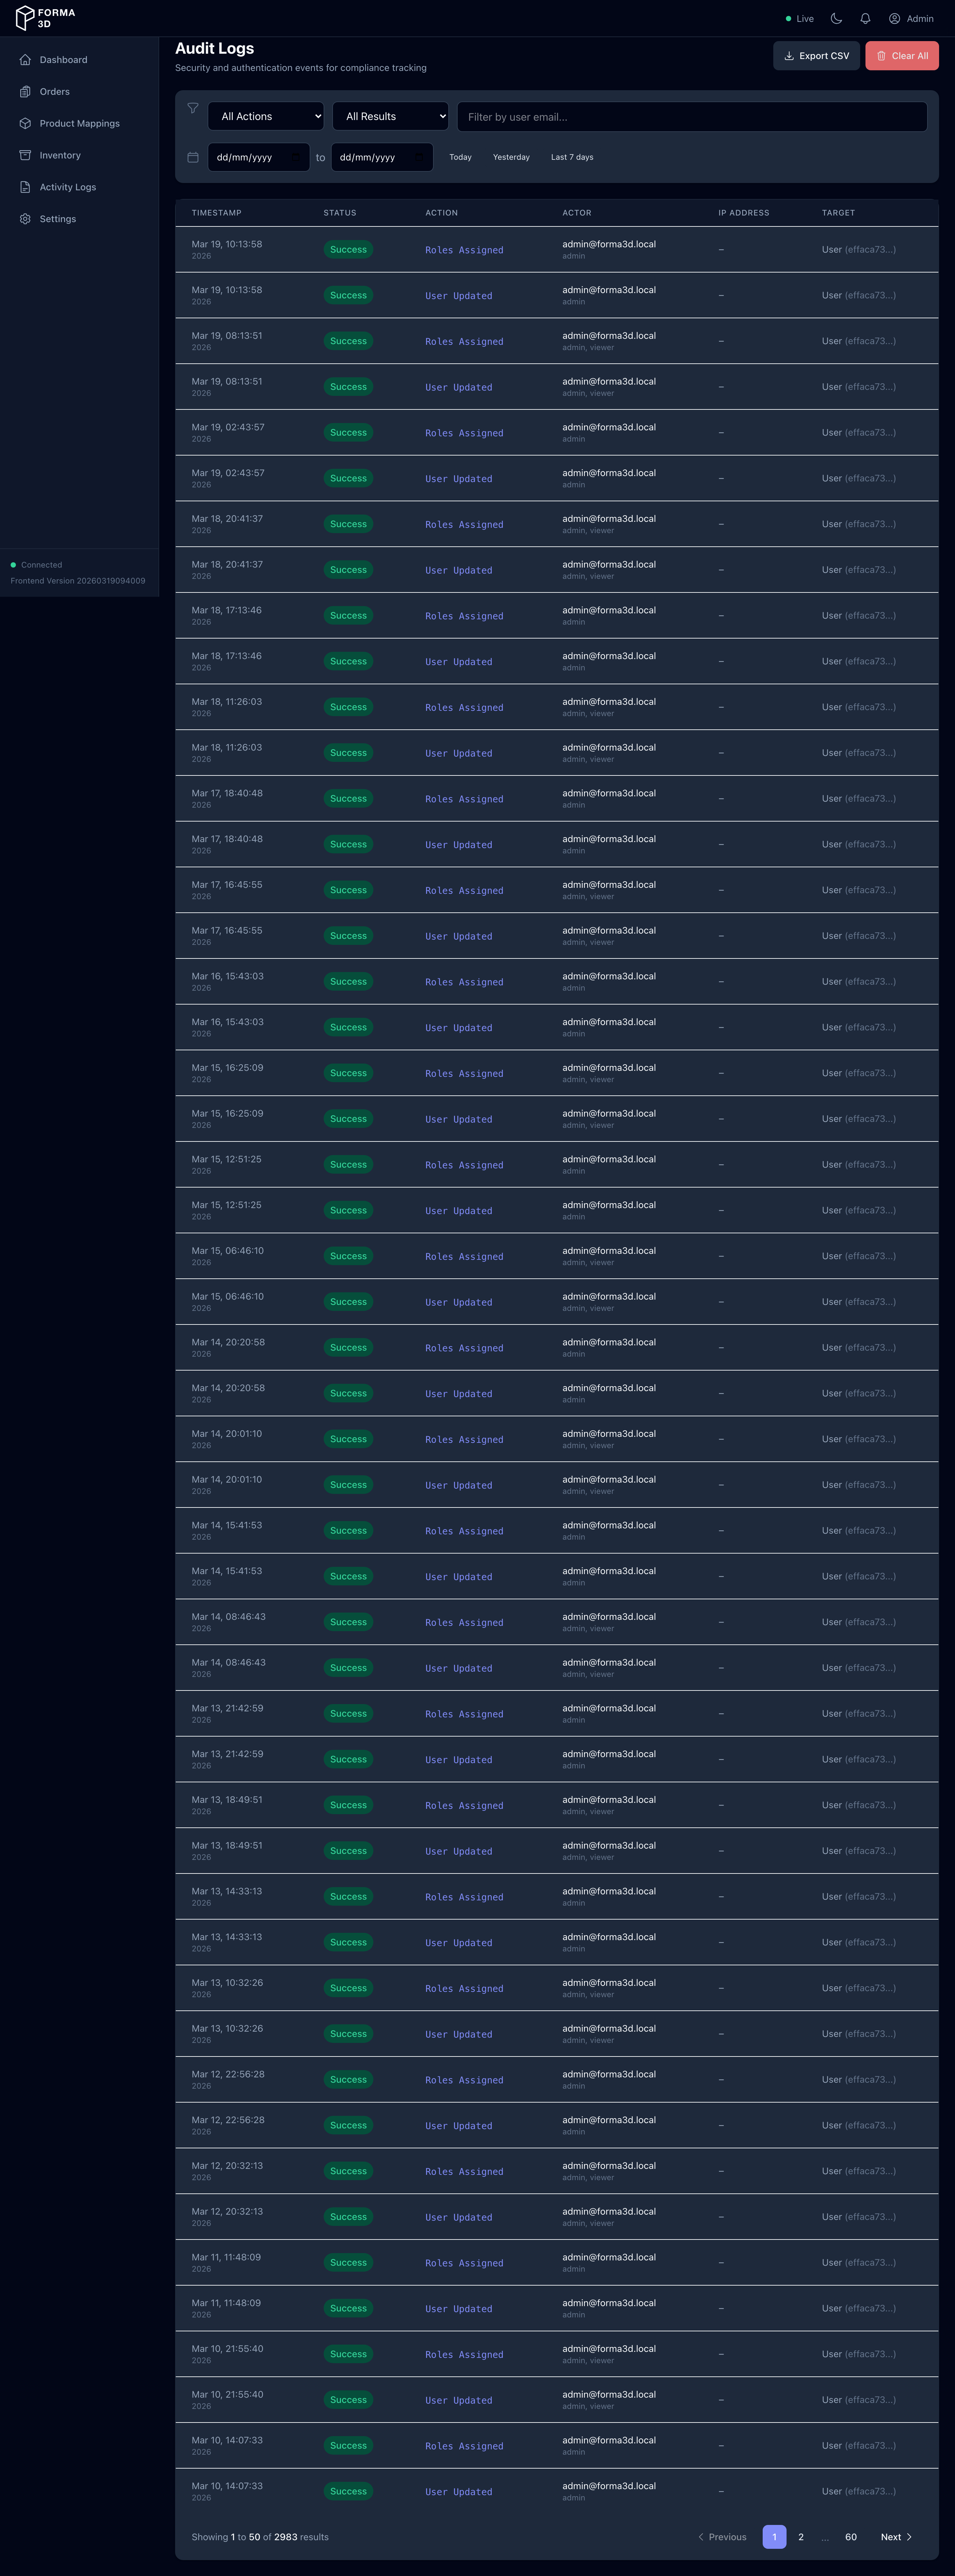
Administrators can access the Audit Logs page to review security and authentication events for compliance tracking.
Access: Admin only (audit.read permission required).
What Gets Logged
The audit log tracks security-relevant events including:
| Event Category | Examples |
|---|---|
| Login Events | Successful logins, failed login attempts |
| Logout Events | User sign-outs |
| User Management | User creation, updates, deactivation, password changes |
| Permission Events | Role assignments, permission changes |
Each log entry includes:
- Timestamp - When the event occurred
- Status - Success or Failure
- Action - The type of event (e.g., "auth login success")
- Actor - The user who performed the action (email and roles)
- IP Address - The client's IP address
- Target - The affected resource (if applicable)
Filtering Options
| Filter | Description |
|---|---|
| Action | Filter by event type: Login Events, Logout Events, User Management, Permission Events |
| Result | Filter by Success or Failure |
| User Email | Search for events by a specific user |
| Date Range | Filter by date with quick presets (Today, Yesterday, Last 7 days) |
Export & Clear
- Export CSV: download the currently filtered log entries for external analysis or compliance reporting.
- Clear Logs: delete all audit log entries for the current tenant (requires confirmation,
audit.writepermission).
Note: This page is only visible to users with the
adminrole. The audit log is separate from Activity Logs and focuses specifically on security and authentication events.
Settings
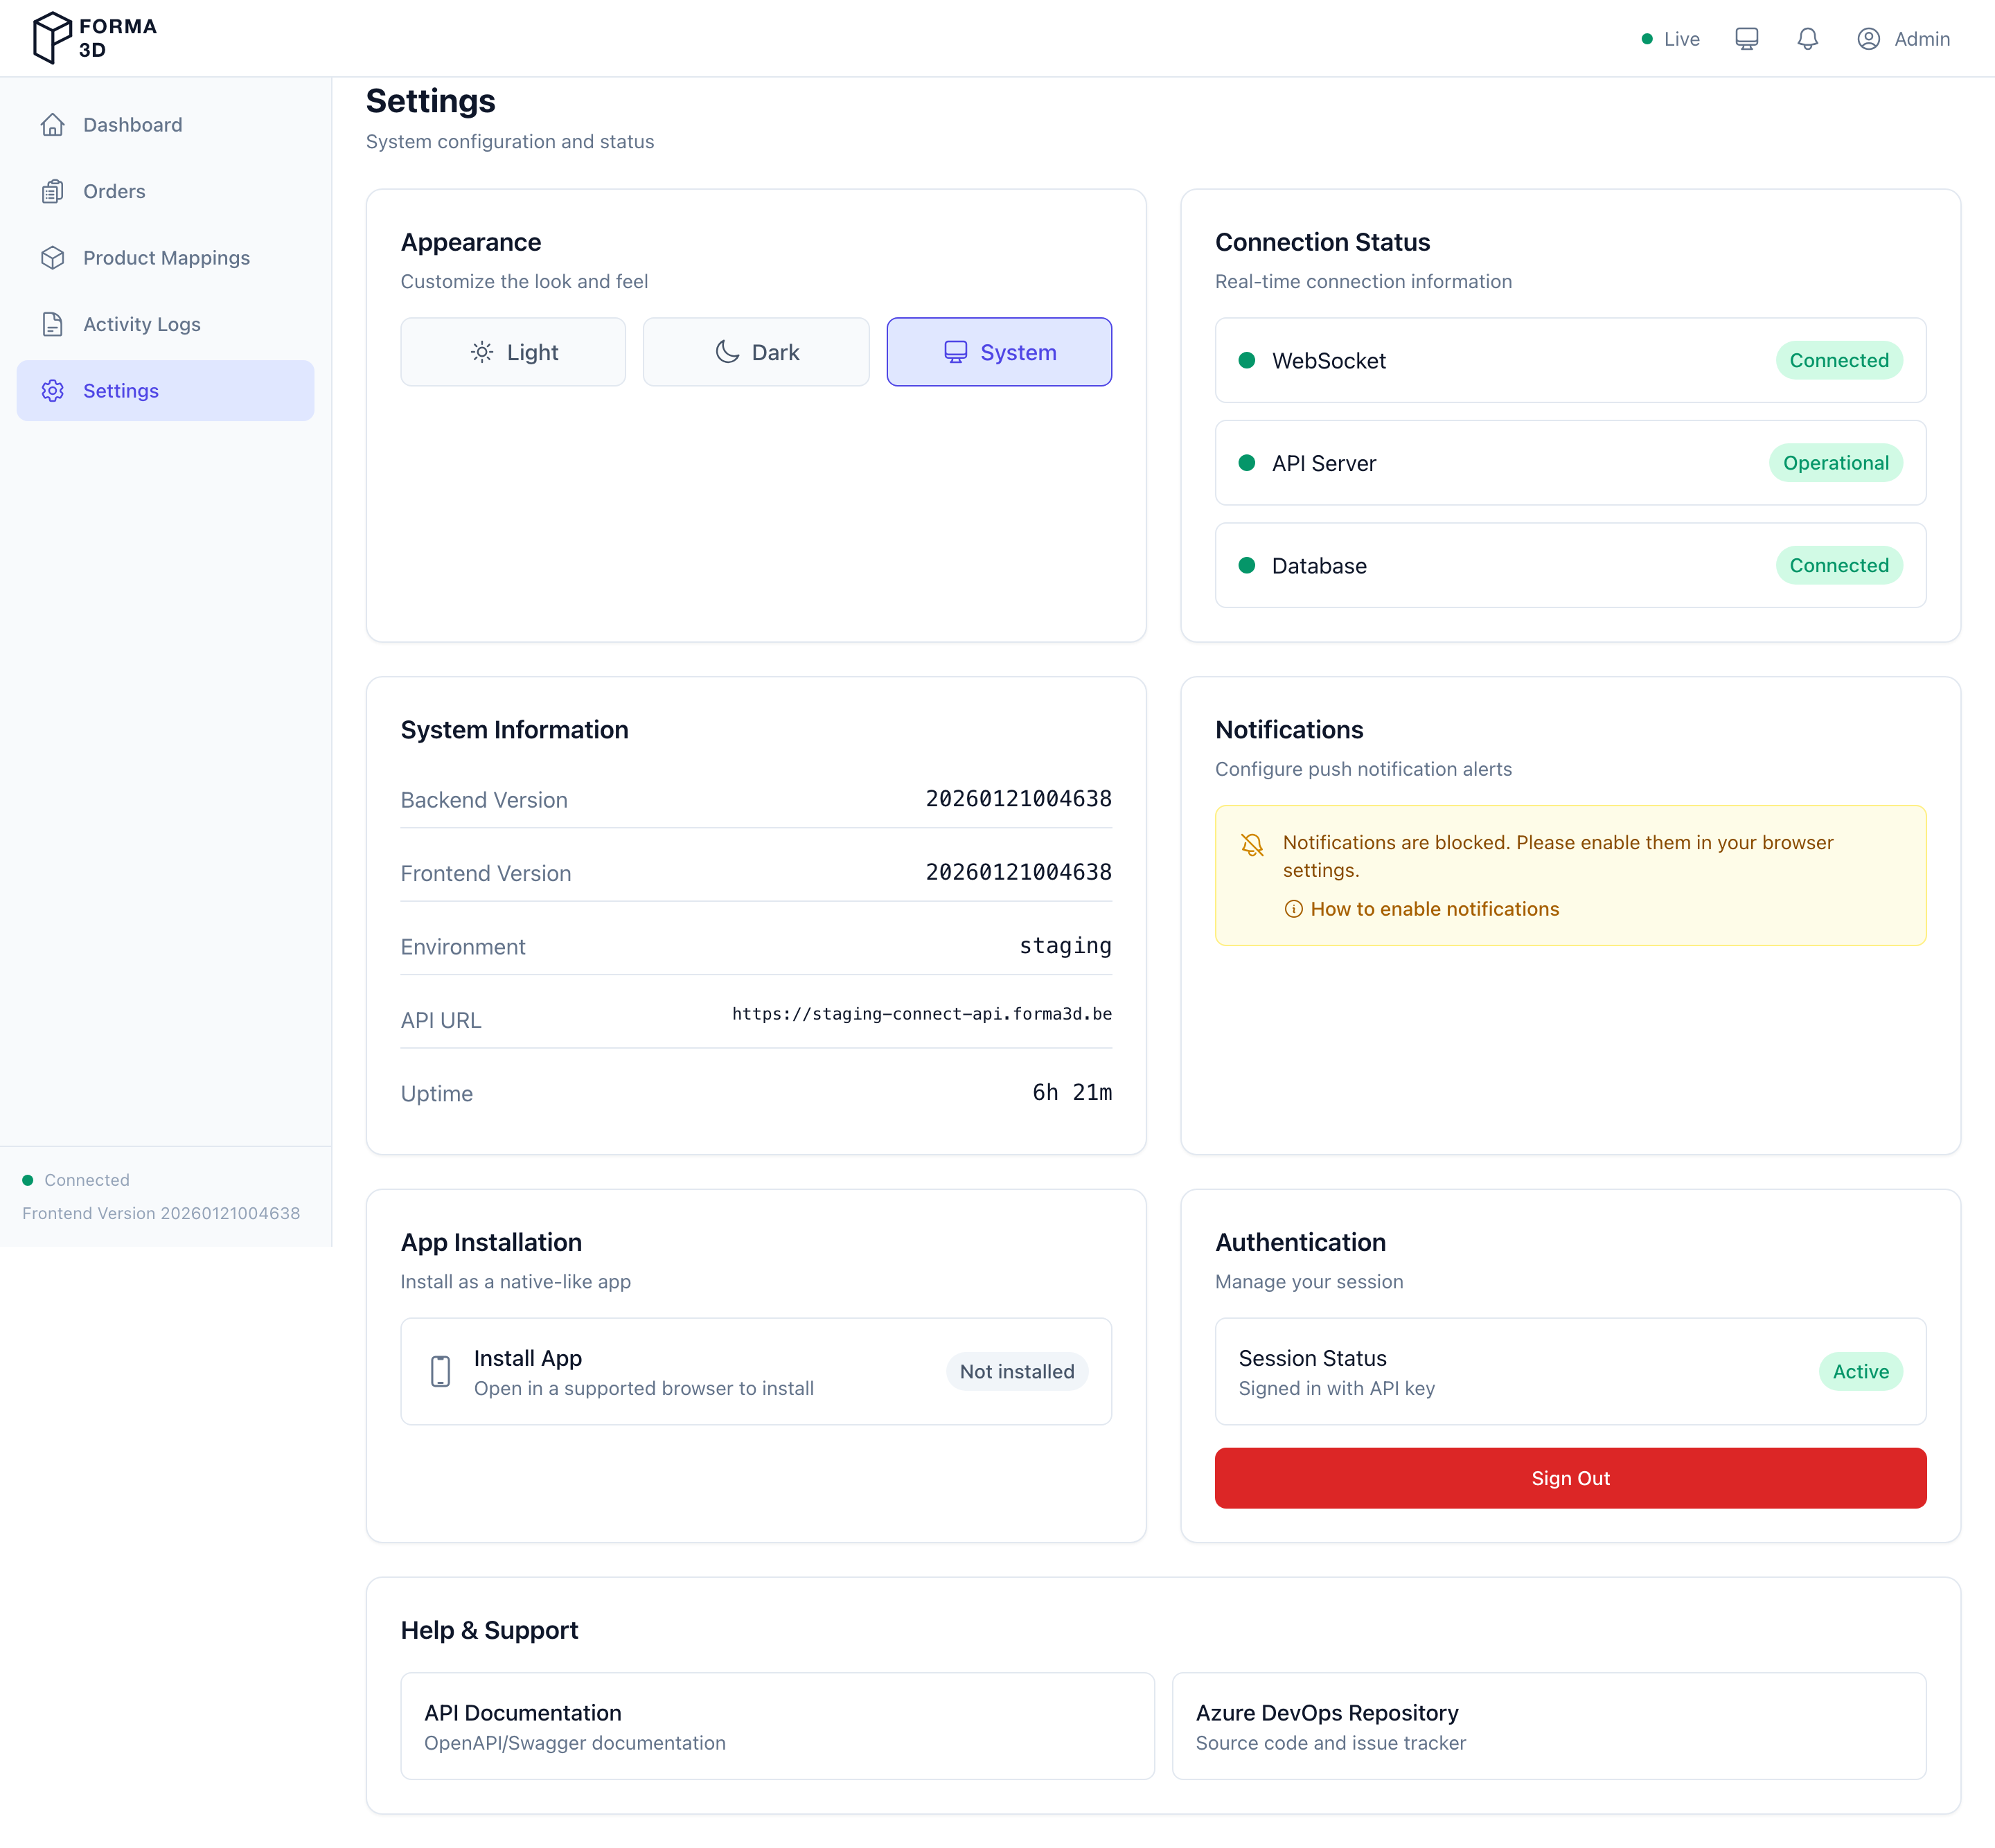
Use Settings for system configuration and status.
Access: All roles can view settings and change personal preferences (theme, notifications). Admin-only settings are restricted.
Available Settings
| Setting | Admin | Operator | Viewer | Description |
|---|---|---|---|---|
| Appearance | ✓ | ✓ | ✓ | Light / Dark / System theme |
| Notifications | ✓ | ✓ | ✓ | Push notification preferences |
| Connection Status | ✓ | ✓ | ✓ | WebSocket, API, database status |
| System Information | ✓ | ✓ | ✓ | Versions, environment, API URL, uptime |
| Service Versions | ✓ | ✓ | ✓ | Version table for all microservices |
| App Installation | ✓ | ✓ | ✓ | Install PWA (browser support required) |
| Integrations | ✓ | ✓ | ✓ | Connect external services (Shopify, etc.) |
| Authentication | ✓ | ✓ | ✓ | Session info, current user, Sign Out |
| Help & Support | ✓ | ✓ | ✓ | Links to API docs and repository |
| Stock Management | ✓ | ✓ | Stock settings (when feature enabled) | |
| SimplyPrint Files | ✓ | Manage files uploaded to SimplyPrint | ||
| Feature Flags | ✓ | Toggle features per tenant | ||
| Developer Tools | ✓ | Infrastructure containers (pgAdmin) | ||
| User Management | ✓ | Manage users, roles, passwords | ||
| Audit Logs | ✓ | View security and auth events |
Automatic Update Check
When you visit the Settings page, the app automatically checks if a newer version is available on the server. This is useful when:
- You previously dismissed the "Update now" prompt
- The service worker hasn't yet detected a new version
If the Frontend Version shown in System Information differs from the latest server version, you'll see an "Update now" prompt in the top-right corner. Click Update now to refresh to the latest version, or Later to dismiss (you can always update by revisiting Settings).
Note: The sidebar also displays the current PWA version. If this differs from what the server reports, visiting Settings will trigger the update prompt.
Integrations
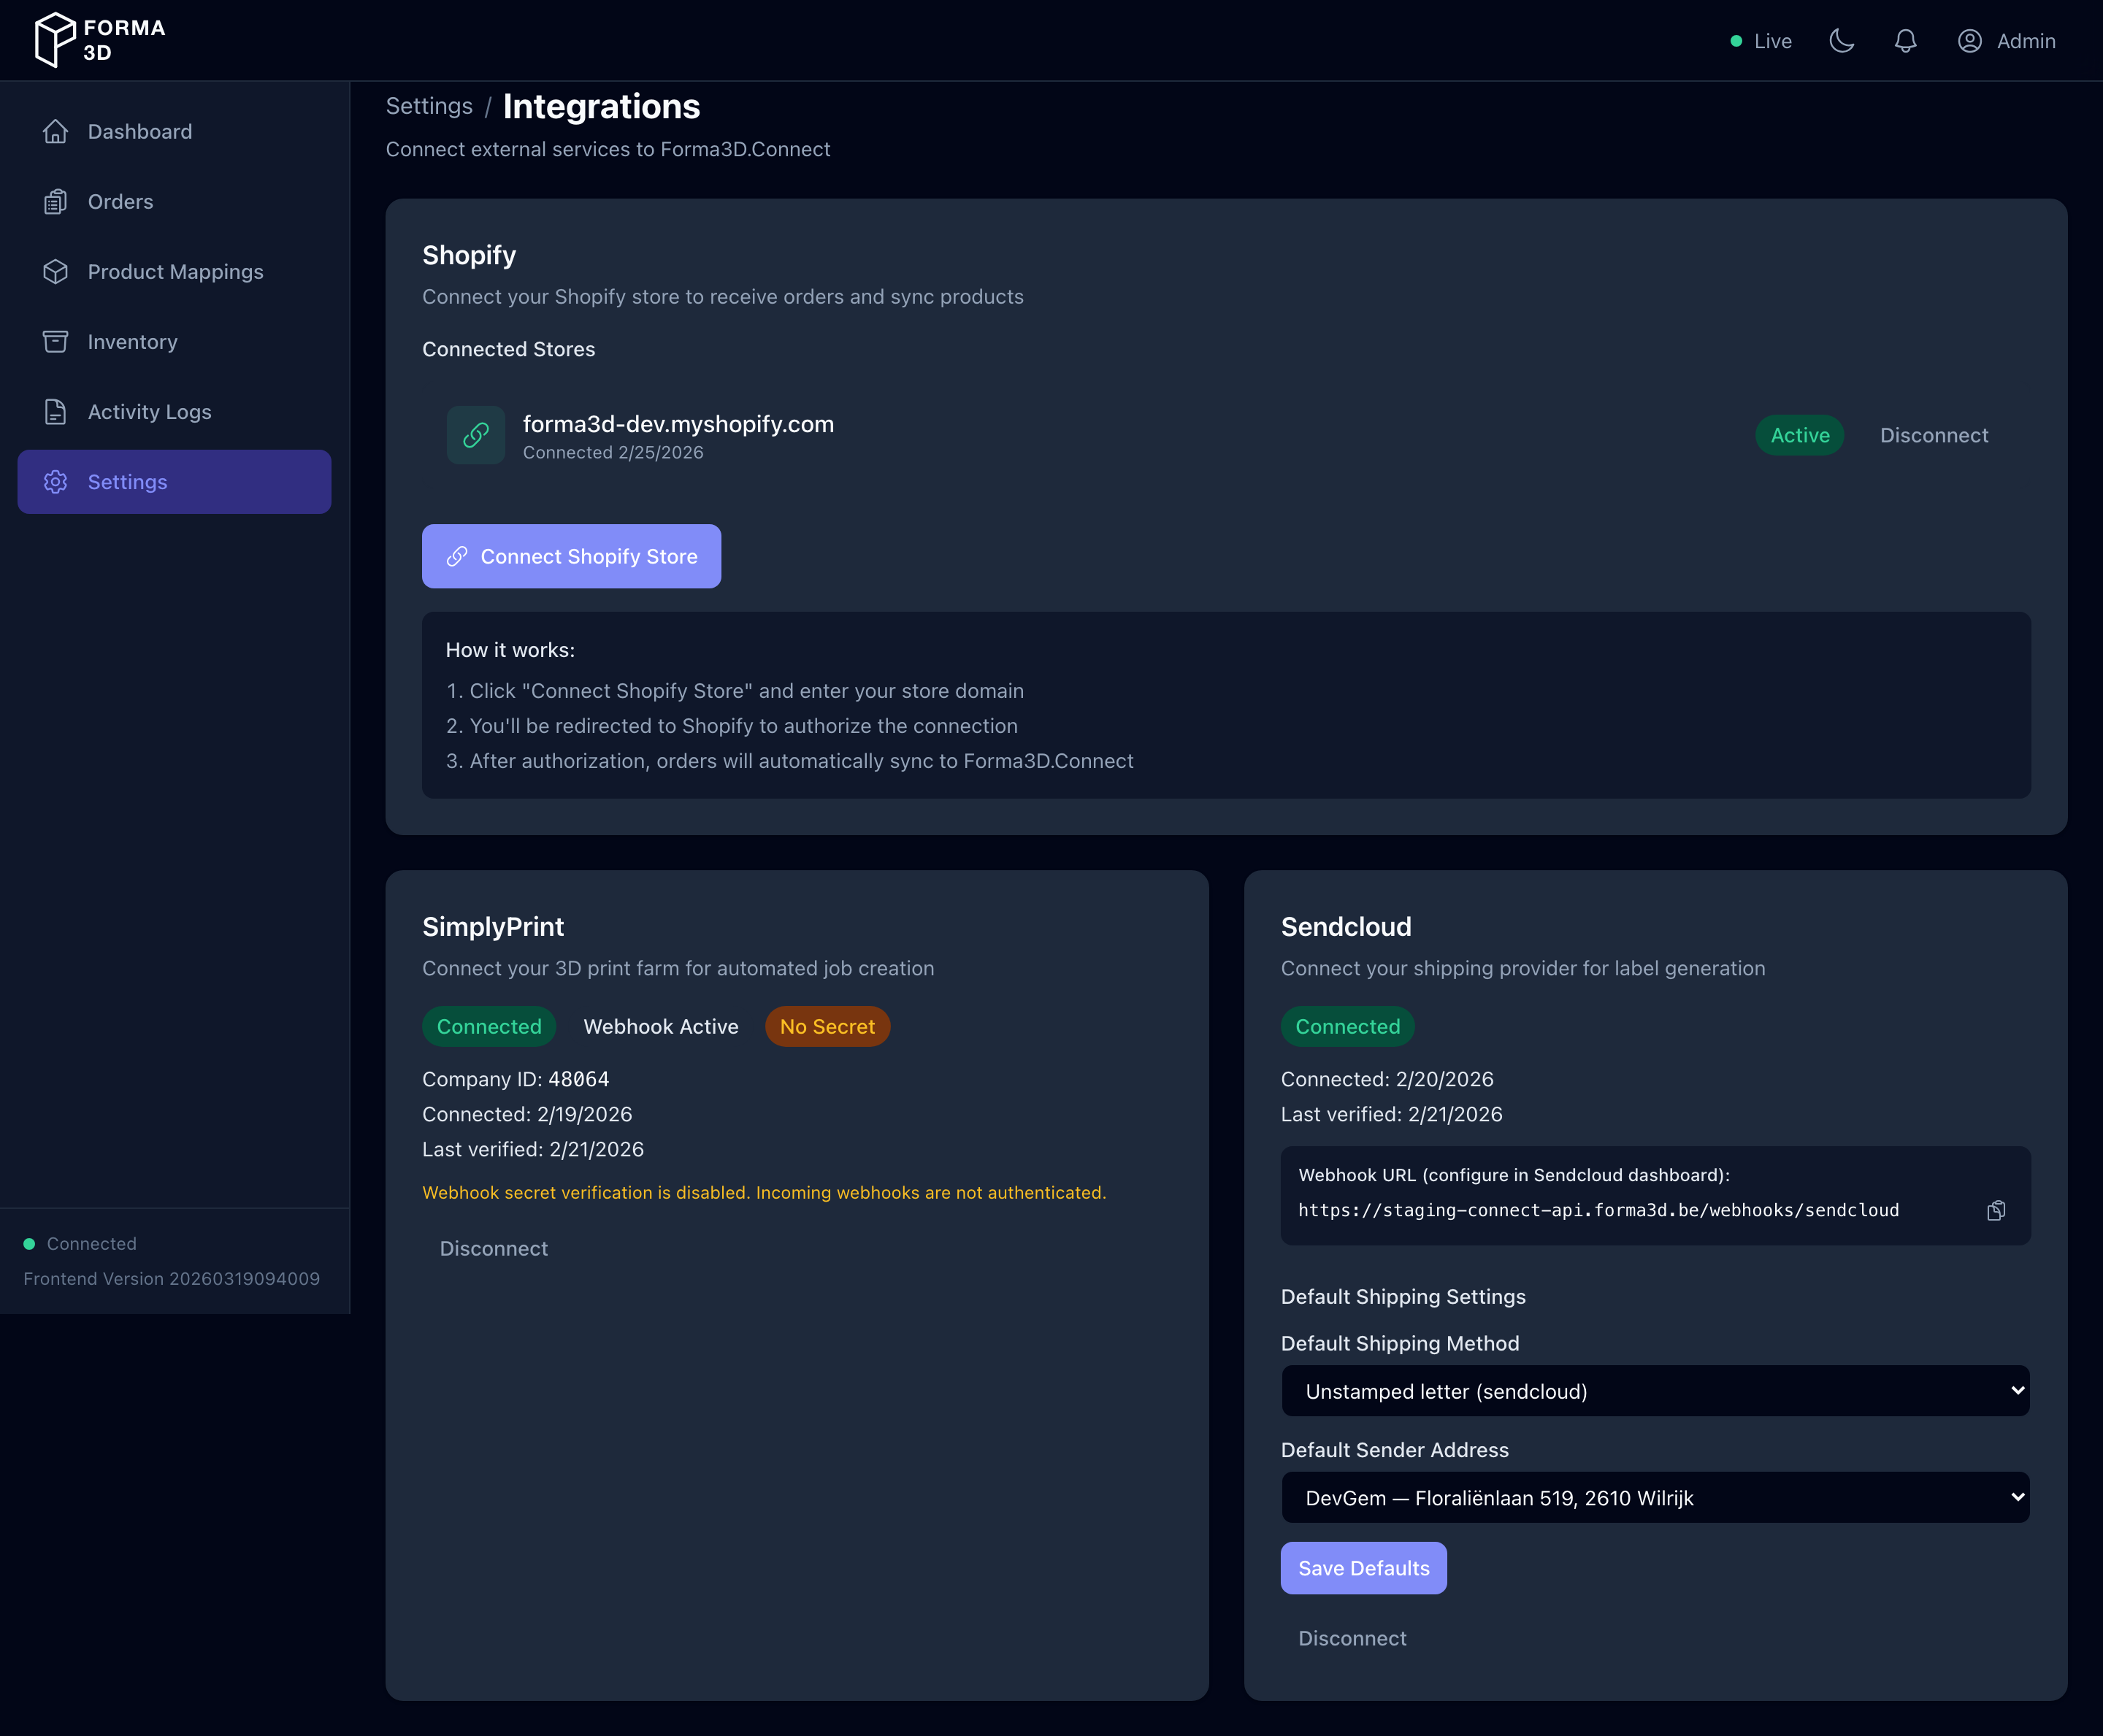
Use the Integrations page to connect external services to Forma3D.Connect. Access this page via Settings → Manage Integrations.
Access: All roles can view integrations. Connecting and disconnecting requires appropriate permissions.
Shopify Integration
The Shopify integration uses OAuth 2.0 to securely connect your Shopify store(s) to Forma3D.Connect. Once connected, orders from your Shopify store will automatically sync.
Connecting a Shopify Store
- Click Connect Shopify Store
- Enter your Shopify store domain (e.g.,
mystore.myshopify.com) - You'll be redirected to Shopify to authorize the connection
- After authorization, you'll return to the Integrations page with a success message
- Your connected store will appear in the Connected Stores list
Connected Stores
For each connected store, you can see:
- Store domain - The Shopify store URL
- Status badge - Active (green) or Inactive (yellow)
- Connection date - When the store was connected
- Disconnect button - Remove the connection (requires confirmation)
SendCloud Integration
The SendCloud section shows your shipping integration status. SendCloud provides:
- Shipping label generation
- Parcel creation and tracking
- Service point (pickup location) support
Connection details (API key, secret) are configured through the Integrations page or via environment variables during deployment.
SimplyPrint Integration
The SimplyPrint section shows your 3D print farm integration status. SimplyPrint provides:
- Print job queuing and status tracking
- File management
- Printer fleet status
Connection is configured through the Integrations page or via environment variables during deployment.
Troubleshooting
| Issue | Solution |
|---|---|
| OAuth authorization fails | Ensure your Shopify app is properly configured in the Shopify Dev Dashboard with correct redirect URLs and scopes |
| Store shows as "Inactive" | The access token may have expired; try disconnecting and reconnecting |
| Orders not syncing | Check that webhooks are properly registered in Shopify admin |
| Fulfillment fails with 403 | The OAuth token is missing required scopes. Deploy a new app version with the correct scopes via shopify app deploy, update the SHOPIFY_SCOPES env var, restart the API, and reconnect the store |
Developer Tools (Admin Only)
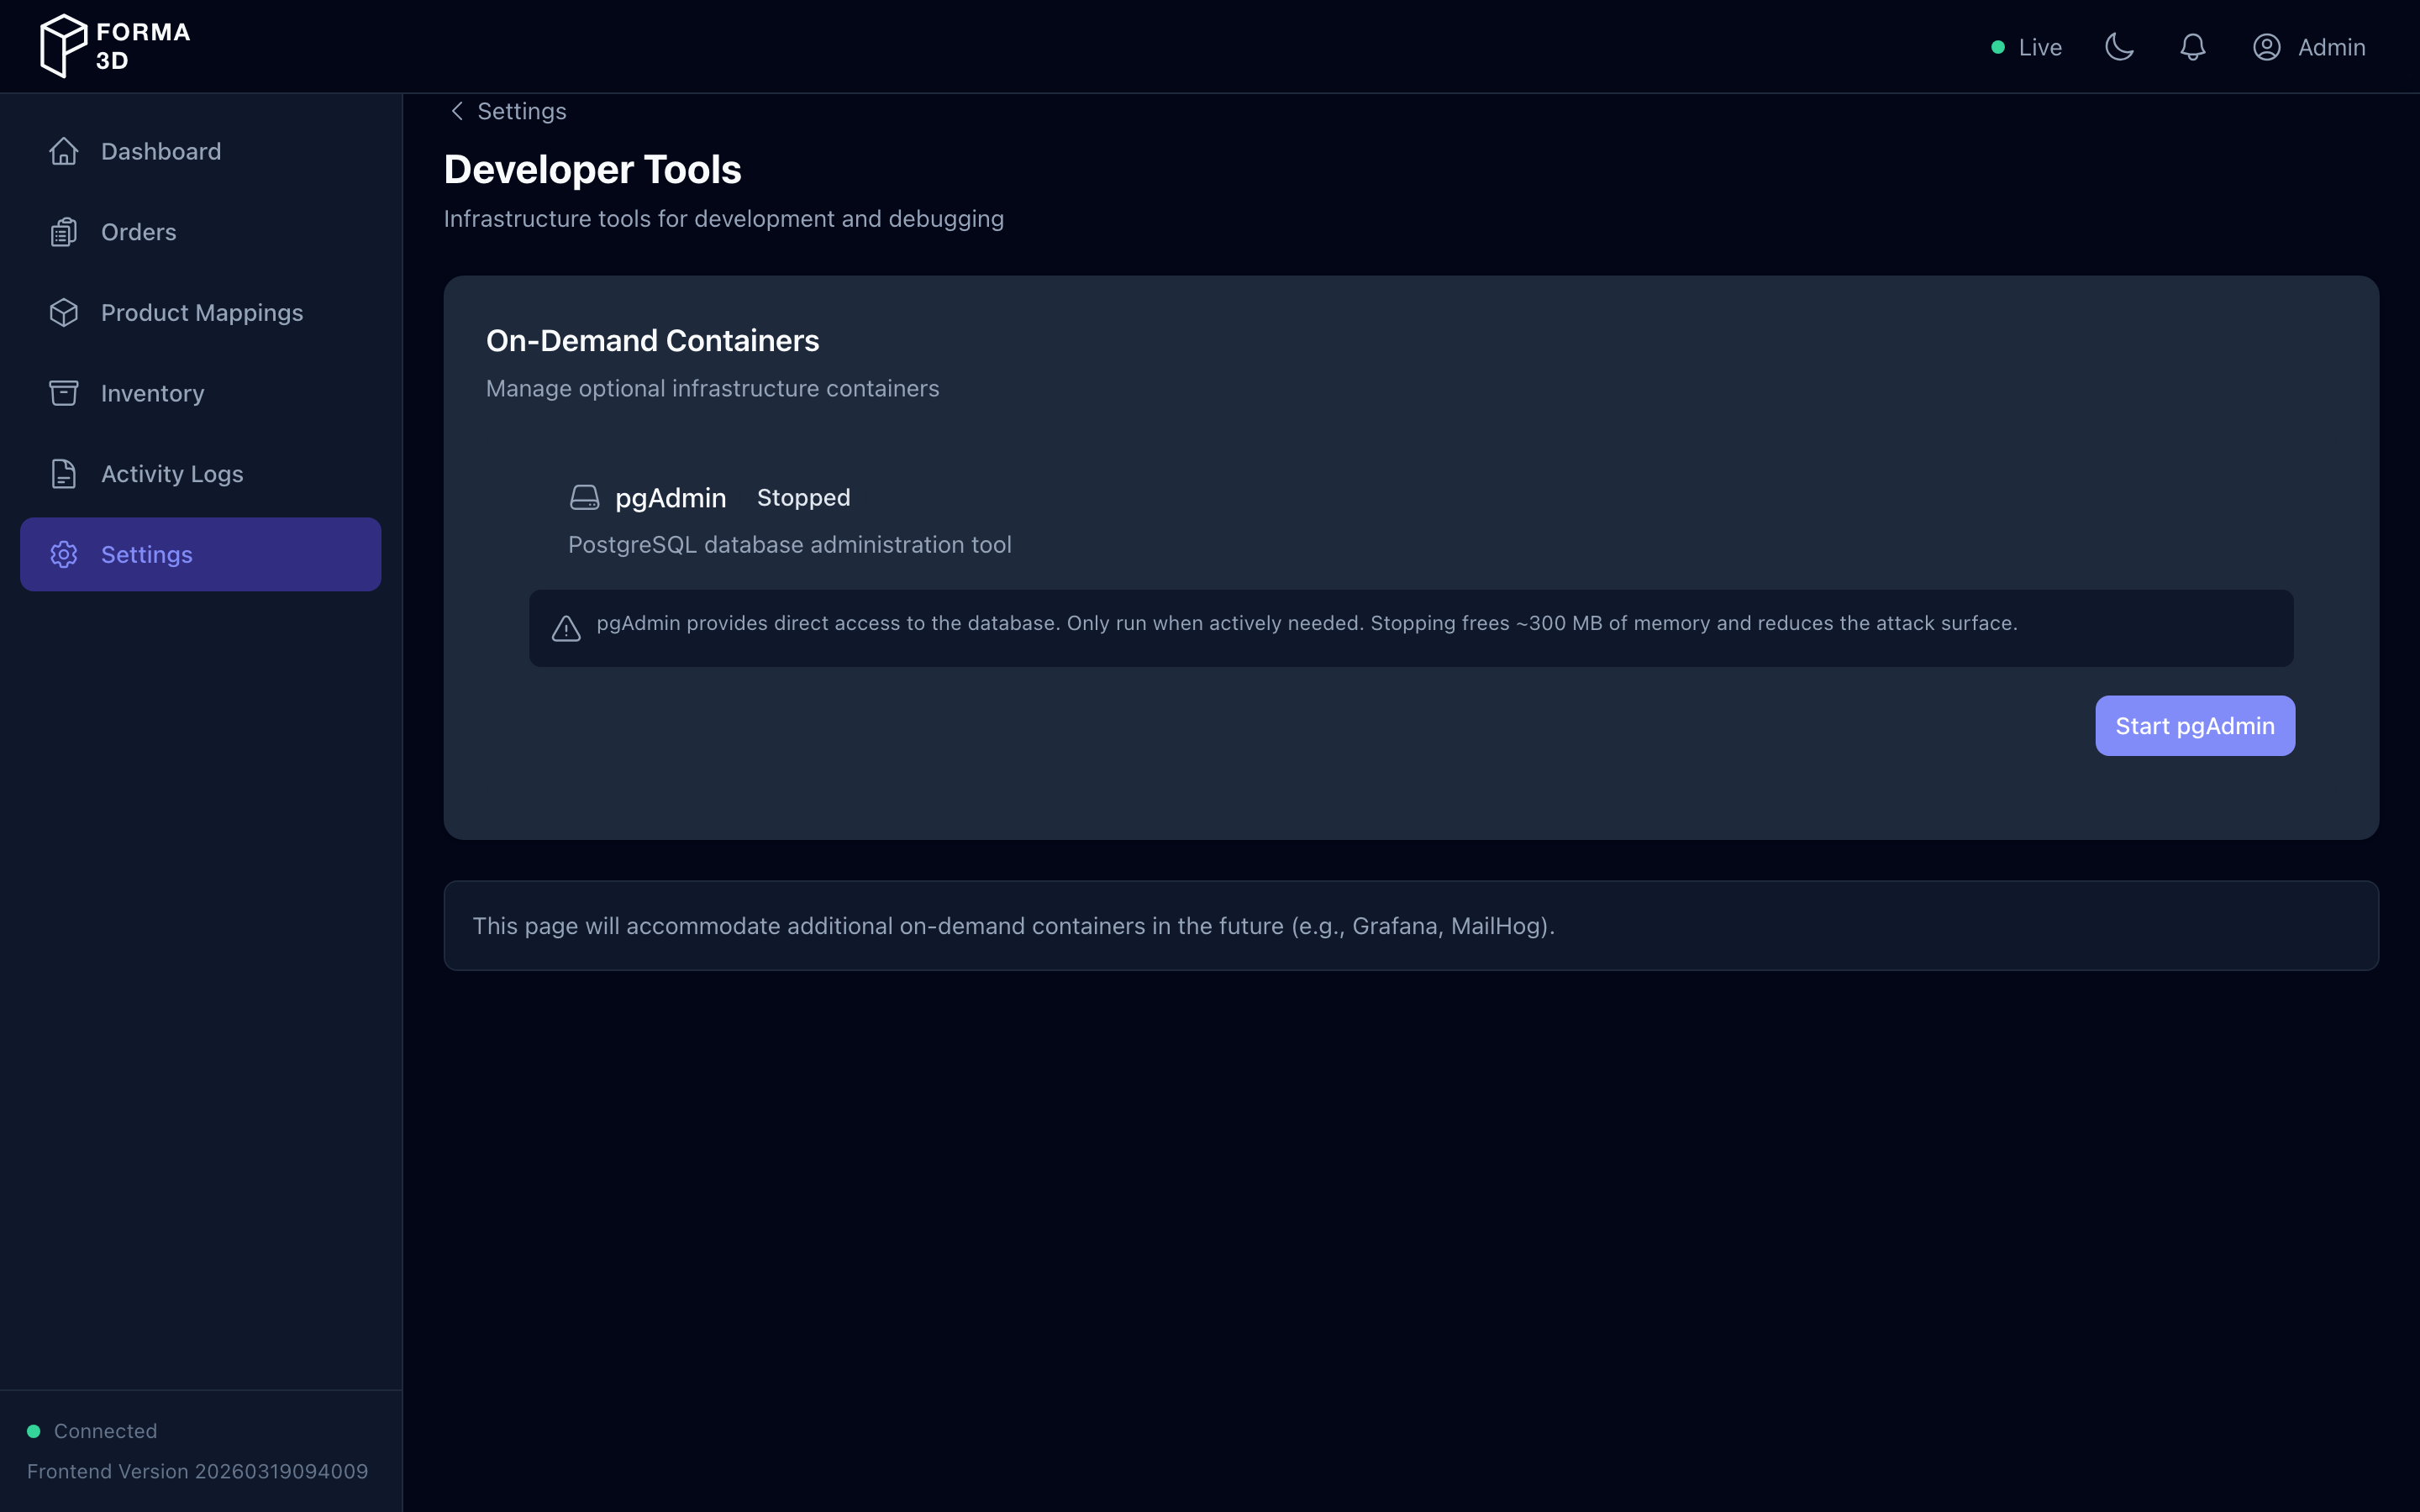
The Developer Tools page lets administrators manage on-demand infrastructure containers. Access via Settings → Developer Tools.
Access: Admin only (admin.operations permission required).
pgAdmin Container
pgAdmin provides a web-based interface for PostgreSQL database administration. Because it uses significant resources (~300 MB RAM), it runs as an on-demand container that you start and stop as needed.
Status Information
When running, the page displays:
- Health — Healthy, Unhealthy, Starting, or Stopped
- Memory Usage — current RAM consumption
- Uptime — how long the container has been running
- URL — direct link to the pgAdmin web interface
Actions
| Action | Description |
|---|---|
| Start pgAdmin | Launch the pgAdmin container (takes 15–30 seconds to become ready) |
| Stop pgAdmin | Stop and remove the container (requires confirmation) |
Note: pgAdmin provides direct database access. Only run it when actively needed. Stopping frees memory and reduces the attack surface.
SimplyPrint Files (Admin Only)
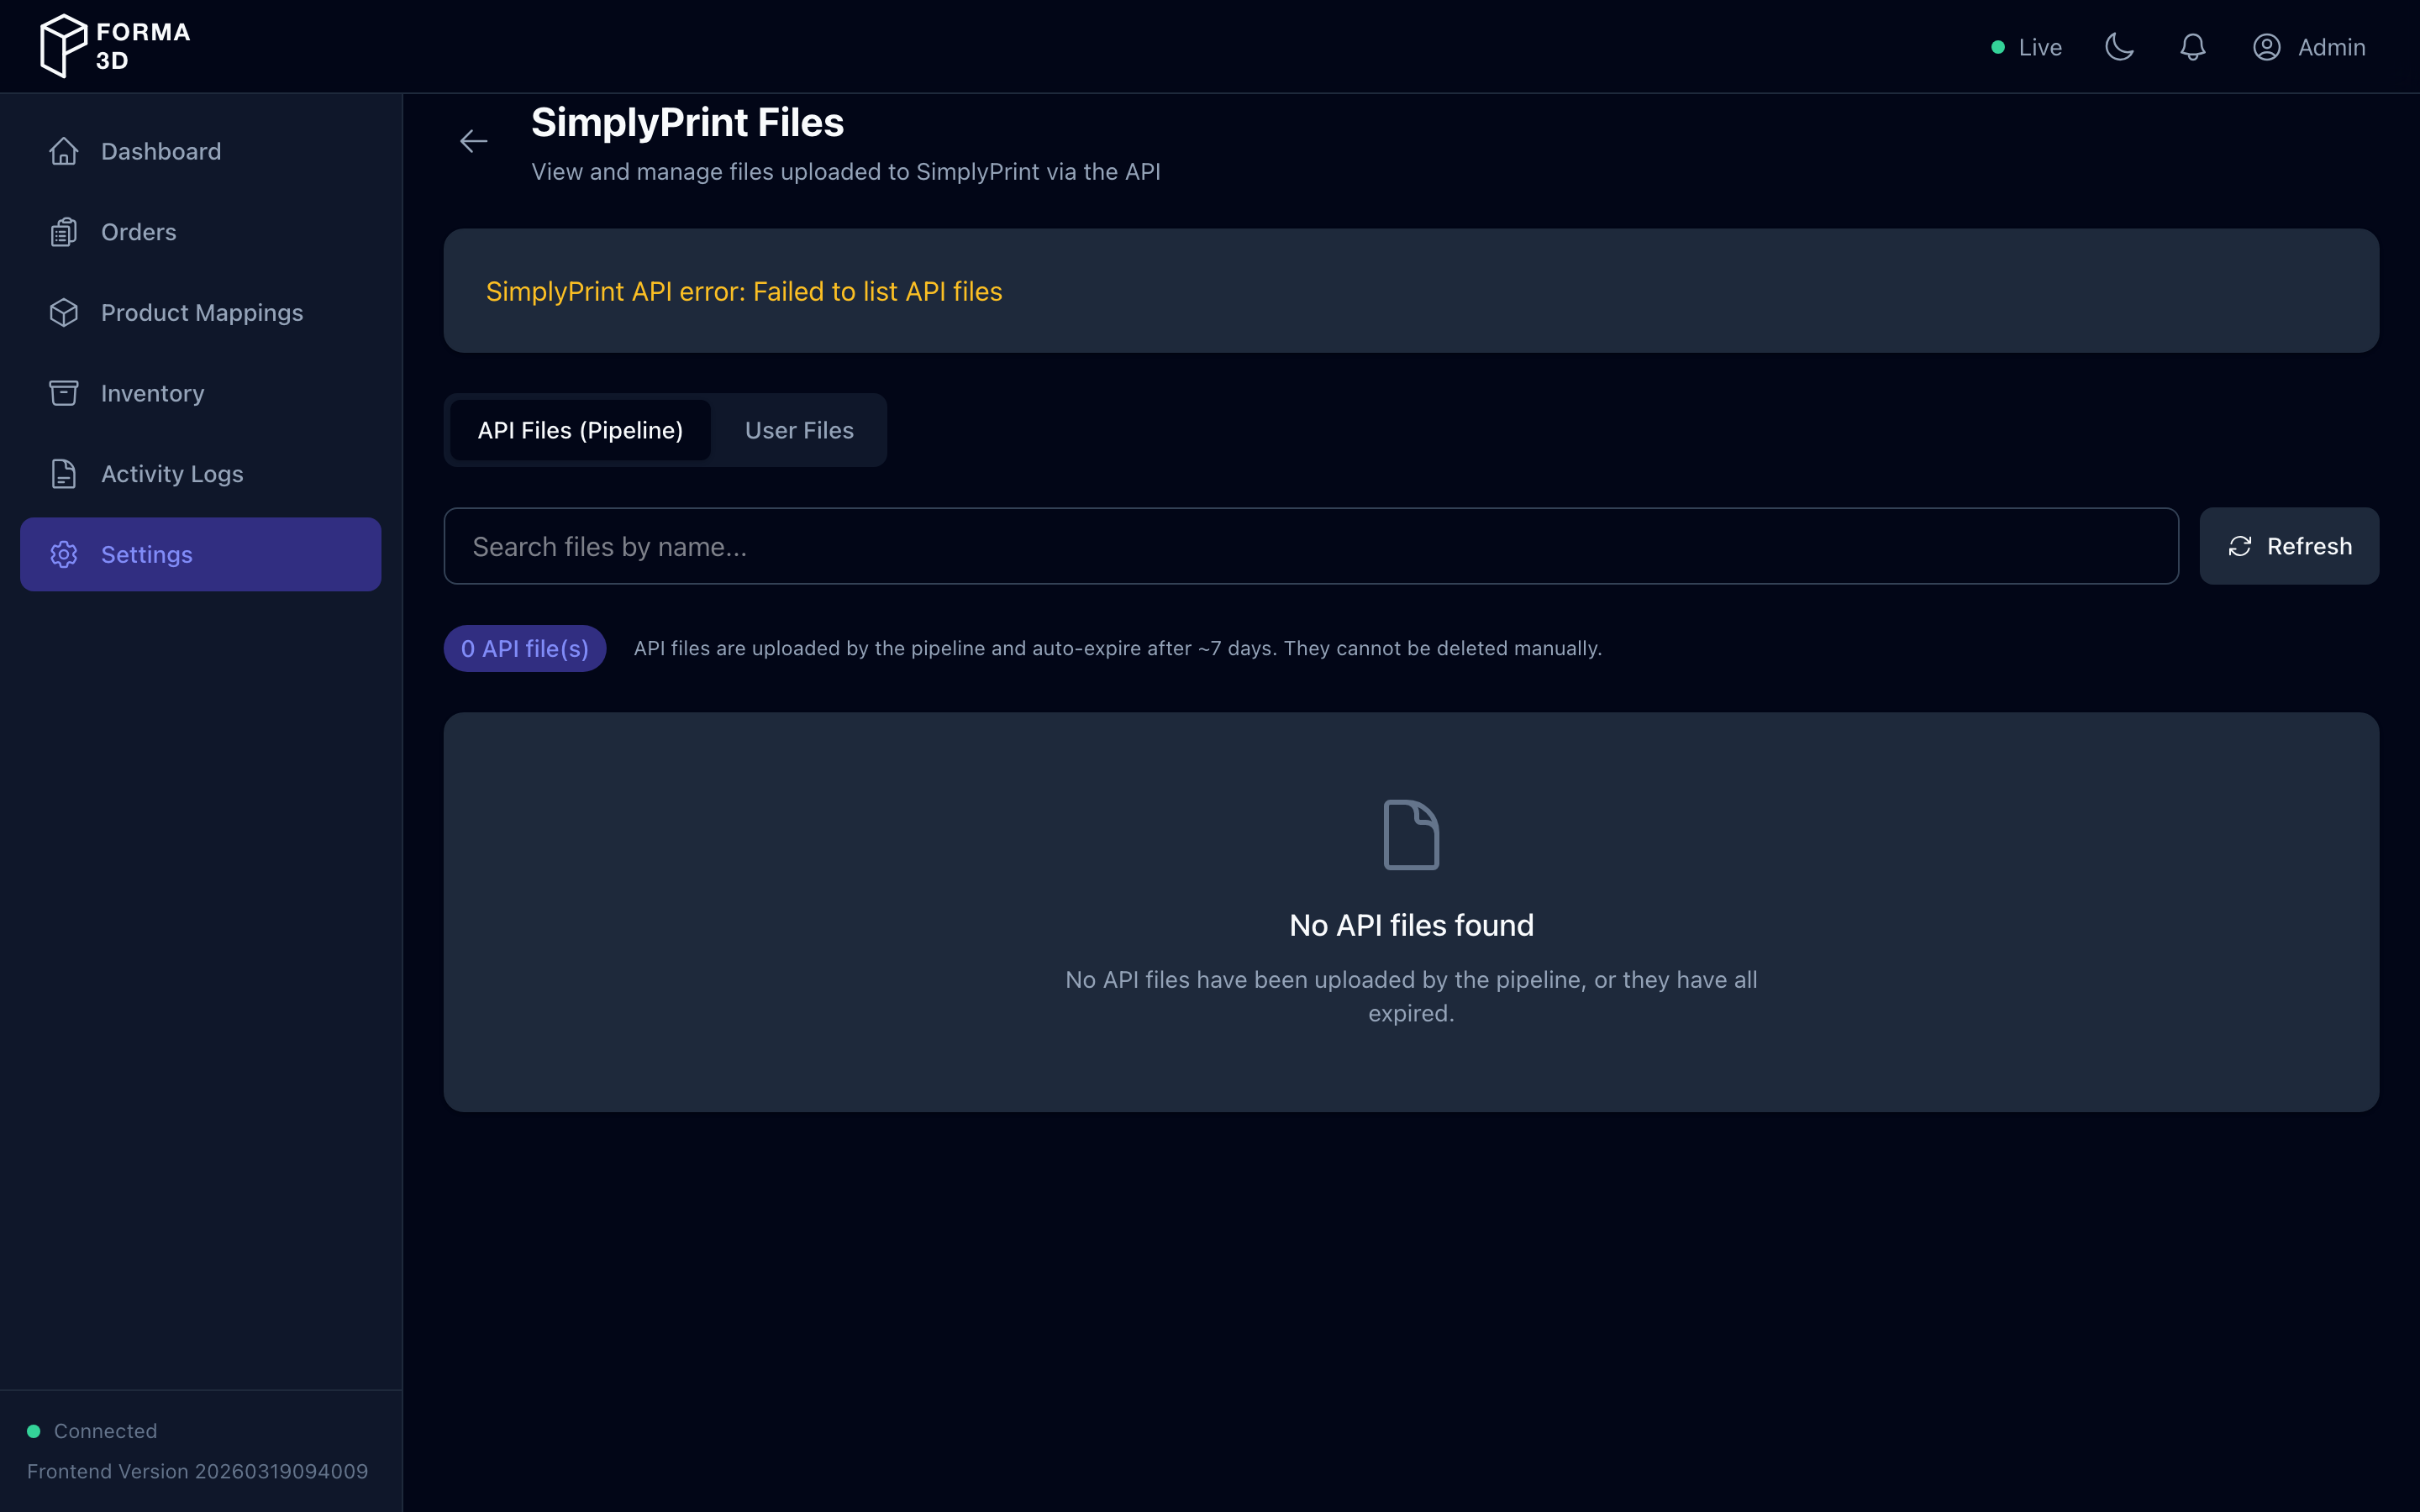
The SimplyPrint Files page lets administrators view and manage files uploaded to SimplyPrint via the API. Access via Settings → SimplyPrint Files.
Access: Admin only (admin.operations permission required).
Tabs
| Tab | Description |
|---|---|
| API Files | Files uploaded by the print pipeline; auto-expire after ~7 days |
| User Files | Permanent files in your SimplyPrint account |
Features
- Search — filter files by name
- Refresh — reload the file list from the SimplyPrint API
- Save to files (API Files tab) — promote a pipeline file to permanent storage before it expires
- Delete (User Files tab) — permanently remove a file from SimplyPrint (requires confirmation)
Each file shows its name, file ID, size, and upload date. API files also show their expiration date and whether they have expired.
Feature Flags (Admin Only)
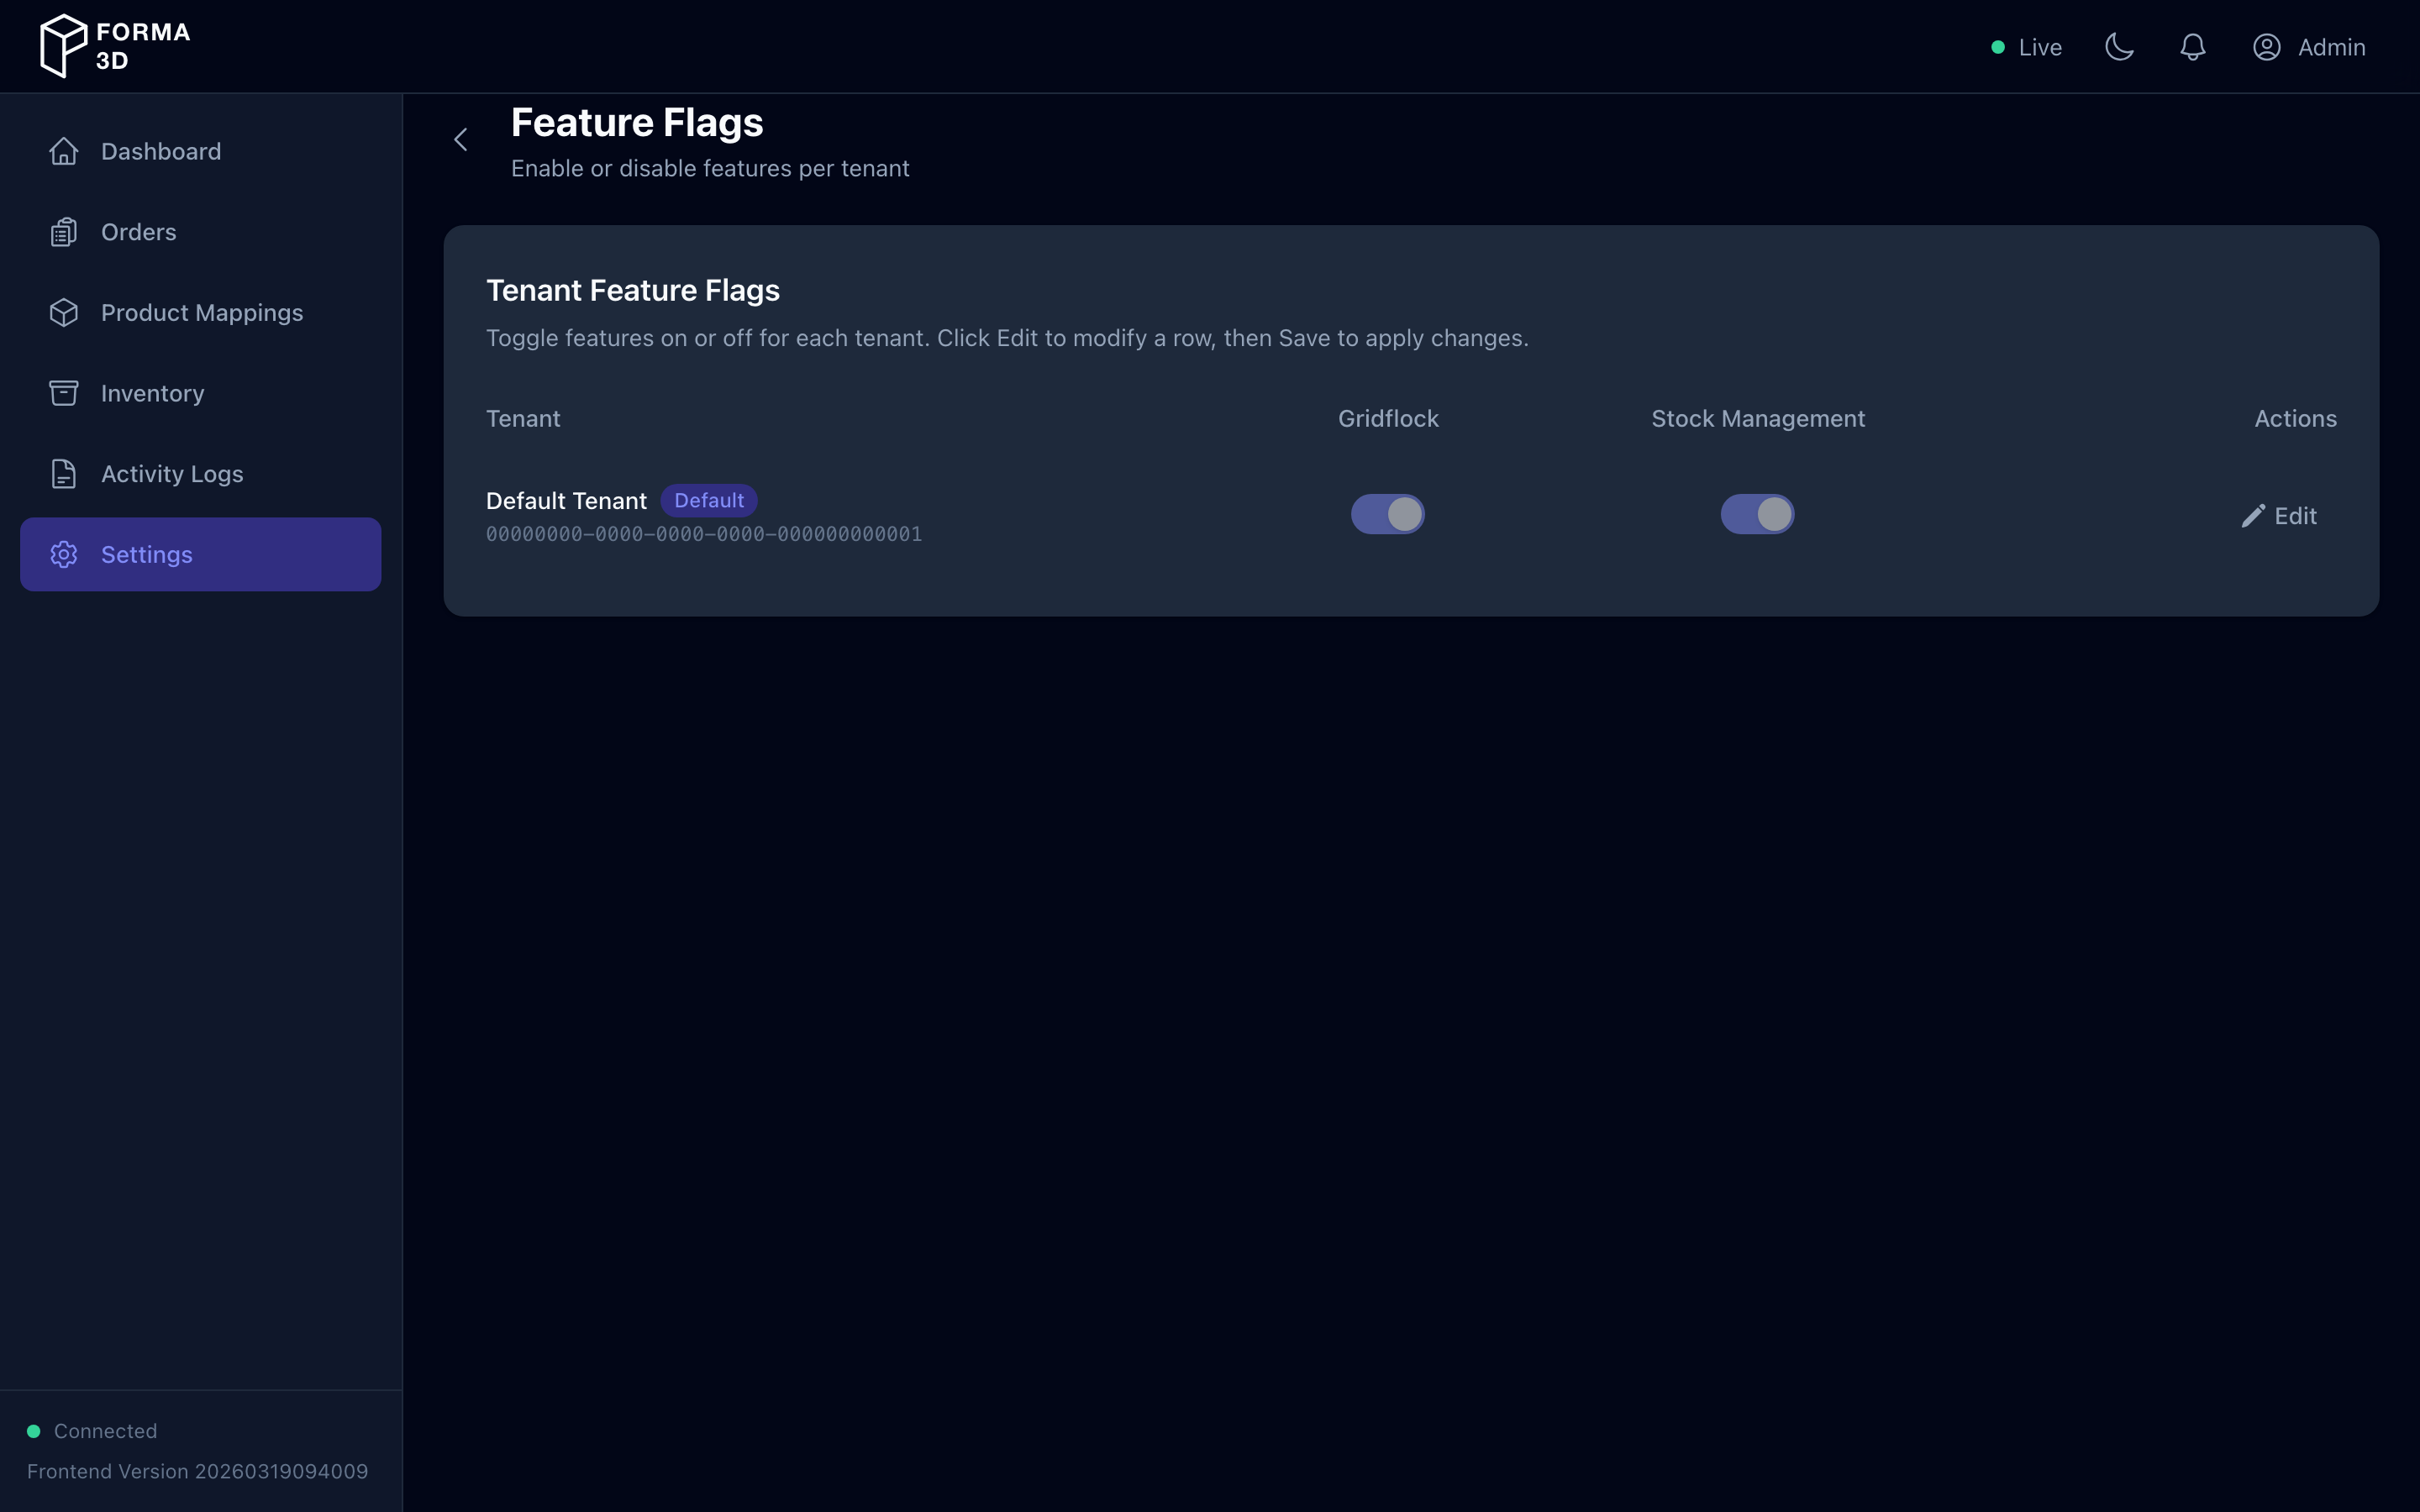
The Feature Flags page lets administrators enable or disable features per tenant. Access via Settings → Feature Flags.
Access: Admin only (admin.operations permission required, default tenant only).
Features
- Tenant list — shows all tenants with their feature flag states
- Toggle flags — each feature has a toggle switch per tenant
- Edit/Save/Cancel — click Edit on a tenant row to modify flags, then Save to apply or Cancel to discard
Available feature flags include:
| Flag | Description |
|---|---|
stockManagement |
Enable inventory tracking and replenishment |
gridflock |
Enable GridFlock STL generation features |
Note: Changing feature flags affects what UI elements and API endpoints are available for the tenant.
Page Not Found (404)
If you open an unknown URL, the app shows a 404 page with a button back to the dashboard.
Maintaining this Manual (Generating Screenshots)
Screenshots are stored in docs/assets/user-manual/.
To regenerate them against staging (headless Chromium), you need admin credentials:
STAGING_EMAIL="admin@forma3d.local" \
STAGING_PASSWORD="Admin123!" \
pnpm ts-node --compiler-options '{"module":"CommonJS"}' scripts/capture-user-manual-screenshots.ts
Optional environment variables:
STAGING_WEB_URL: Override the web app URL (default:https://staging-connect.forma3d.be)STAGING_API_URL: Override the API URL (default:https://staging-connect-api.forma3d.be)
The script signs in, switches to dark mode via Settings, signs out, then captures the login page in dark mode and signs in again for the rest:
- Login page (captured in dark mode after sign-out)
- Dashboard (waits for chart animations to finish)
- Orders list
- Order detail
- Product mappings list
- New product mapping form
- Part library modal
- Edit product mapping form
- Activity logs
- Activity log — Event Details modal (click first log row)
- User management (admin-only)
- Add User modal (admin-only)
- Audit logs (admin-only)
- Settings
- Integrations (Shopify, SendCloud, SimplyPrint)
- Inventory — Stock Levels
- Inventory — Configuration
- Inventory — Transactions
- Inventory — Replenishment
- Developer Tools (Settings → Manage Developer Tools, admin-only)
- SimplyPrint Files (Settings → Manage SimplyPrint Files, admin-only)
- Feature Flags (Settings → Manage Feature Flags, admin-only)
- 404 Not Found page